Say Goodbye to Soggy Lunch Sadness: Hello, Pasta Salad Jars!
Hey friends, Jackson here! Let’s be real for a second. How many times have you packed a lunch with the best intentions, only to open it at noon to find a sad, soggy, unified mush? Your crisp veggies have surrendered to the dressing, your pasta has absorbed all the liquid, and that cheese you were so excited about? Nowhere to be found, probably dissolved into the abyss. I’ve been there, standing in my own kitchen, staring at a container of what-was-supposed-to-be-amazing, feeling that lunchtime letdown.
But what if I told you there’s a better way? A method so brilliantly simple, it feels like a culinary cheat code. Enter the Pasta Salad Jar: your new secret weapon for lunches that are not just convenient, but actually exciting to eat. This isn’t just a recipe; it’s a system. A portable, make-ahead, totally customizable masterpiece that keeps every element fresh, crisp, and perfectly dressed exactly when you want it to be.
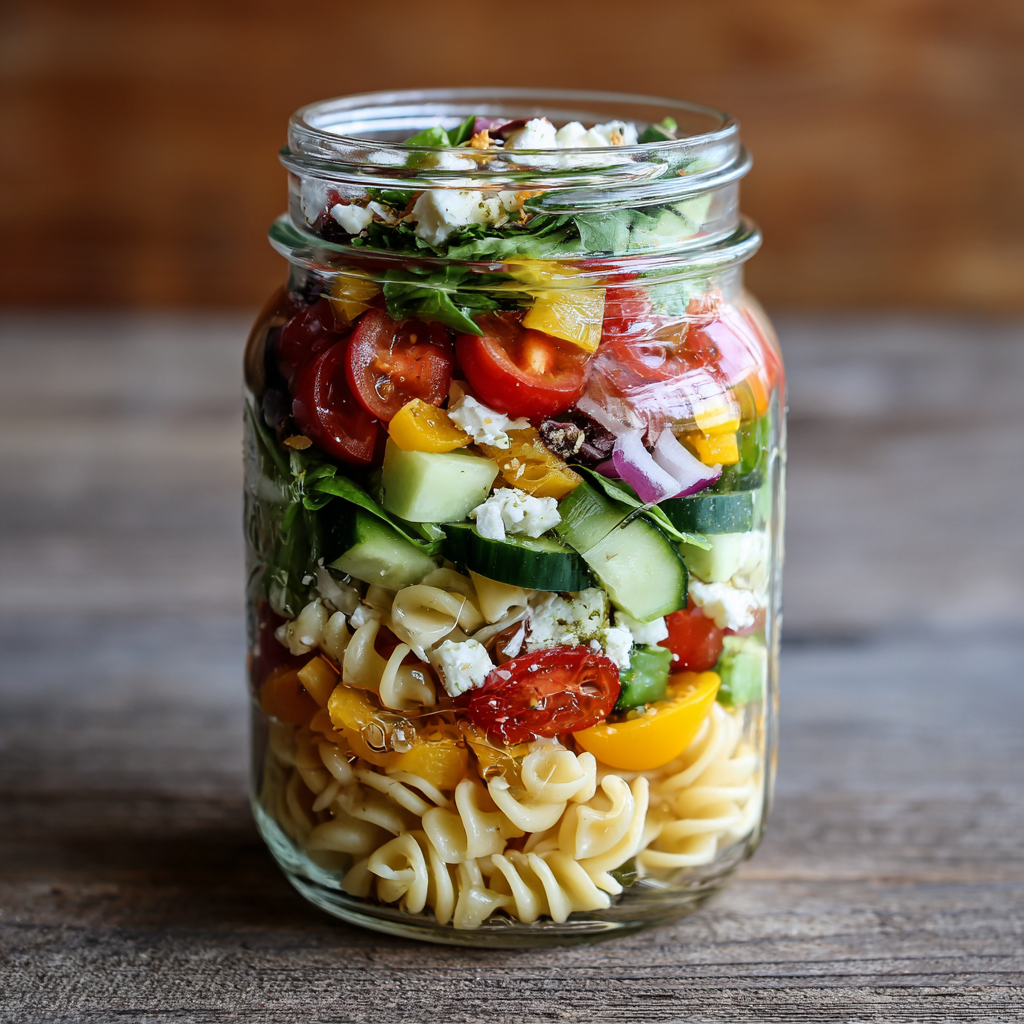
Imagine layers of colorful confetti vegetables, hearty pasta, and creamy cheese, all sitting pretty in a jar, completely protected from the dressing waiting patiently at the bottom. When hunger strikes, you simply shake, pour, and devour. It’s a lunchbox revolution, a picnic superstar, and a meal-prep game-changer all rolled into one. It’s the answer to the “what’s for lunch?” dread, and today, I’m walking you through exactly how to build your own. Get ready to fall in love with lunch again. Let’s build some flavor-packed jars!
The “Aha!” Moment: From Backyard BBQ Mess to Jarred Genius
This whole jar salad obsession started, like many of my best ideas do, from a minor kitchen disaster. Picture this: It’s a sweltering summer Sunday, and I’m hosting a backyard get-together. I’d made a huge, beautiful bowl of Italian pasta salad—rotini, peppers, olives, the works. I dressed it early so the flavors could “marry,” as the old cooking wisdom goes. Big mistake. By the time my friends arrived, my vibrant, crisp veggie medley had turned into a limp, weeping pile. The pasta was bloated, the basil was black, and the feta had mostly dissolved into the now-pooling dressing at the bottom of the bowl. It tasted fine, but it looked… defeated.
I was so frustrated. I wanted that perfect bite: al dente pasta, a pop of tomato, a crunch of pepper, all coated in just the right amount of tangy dressing. As I was cleaning up, glaring at the sad leftovers, I looked at the empty mason jars I’d used for drinks. The lightbulb went off. What if I built the salad in reverse? Dressing on the bottom, sturdy pasta as a barrier, delicate veggies safe on top. Seal it tight, and the flavors can’t mingle until I say so. I tried it the next day for my own lunch, and friends, it was a revelation. Every component was in its prime. The shake-up moment was pure magic. It was the same flavors I loved, but the experience was completely transformed. That’s the heart of Food Meld right there—taking a classic, facing a problem head-on, and finding a fun, simple, and downright delicious solution.
Your Blueprint for Flavor: What Goes In the Jar
Here’s the beautiful part: this is less of a strict recipe and more of a flavorful framework. Think of these ingredients as your construction materials. Use what you love, swap what you don’t, and make it yours! This list is for one generous pint-sized (16 oz) mason jar.
- 2 tbsp Italian or Balsamic Dressing: This is your foundation. A good, zesty vinaigrette is key. Chef’s Insight: I make a big batch of my own (3 parts oil, 1 part vinegar, garlic, herbs, mustard, salt, pepper), but a quality store-bought one works perfectly! The oil creates a seal that helps protect the layers above.
- ¾ cup Cooked Pasta (penne, rotini, or farfalle): Your sturdy barrier layer. Cook it al dente—it will soften slightly in the jar. Pro Tip: After draining, toss it with a tiny drizzle of oil to prevent sticking and add an extra flavor shield.
- ½ cup Cherry Tomatoes, halved: Little bursts of juicy sweetness. If you’re prepping more than a day ahead, leave them whole to prevent excess moisture.
- ¼ cup Diced Cucumber: For that essential crunch. I prefer English or Persian cucumbers for fewer seeds. If using a standard cuke, you can scoop out the watery center seeds.
- ¼ cup Bell Pepper, chopped: Color and crunch! Use any color—I love a mix of red and yellow for sweetness and visual pop.
- 2 tbsp Olives or Red Onion (optional): The flavor boosters. Sliced kalamata olives add a briny punch, while finely diced red onion gives a sharp bite. Substitution: Try peppadews or artichoke hearts!
- 2 tbsp Crumbled Feta or Shredded Mozzarella: The creamy, salty prize on top. Feta holds up beautifully, but mozzarella pearls are a fun, mild alternative. For a vegan twist, a sprinkle of nutritional yeast or vegan “feta” works wonders.
- Salt & Pepper to taste: Season as you layer! A little pinch on the pasta and veggies goes a long way.
Building Your Edible Masterpiece: Step-by-Step
Okay, let’s get building. This is the fun, almost therapeutic part. Clear some counter space, line up your jars and ingredients, and let’s create some lunch magic.
- Start with the Dressing. Pour your chosen dressing straight into the bottom of a clean, dry mason jar. This is non-negotiable—it’s the first law of Jar Salad. Chef’s Hack: If I’m using a particularly thick dressing (like a creamy Caesar or ranch), I’ll sometimes add a thin layer of hearty beans (chickpeas, cannellini) right on top of it. They act as an extra buffer and soak up flavor beautifully.
- Add the Pasta Layer. Carefully spoon your cooled, cooked pasta directly over the dressing. Gently press it down with the back of the spoon to create a solid, even barrier. This layer is your salad’s superhero, protecting everything above from the dressing’s moisture until mix-time.
- Pile on the Veggies. Now for the color! Add your tomatoes, cucumbers, peppers, and any other crunchy veggies. I like to pack them in fairly tightly—this helps minimize air space, which keeps everything fresher longer. It also just looks so darn pretty when you see all those distinct, bright layers through the glass.
- Top it Off with Cheese & Extras. Crown your creation with the cheese, any fresh herbs (basil, parsley), or delicate toppings like nuts or seeds. Important Note: If you’re adding something that gets soggy easily (like toasted pine nuts or croutons), pack those in a tiny separate baggie and add them just before shaking.
- Seal, Label, and Refrigerate. Screw the lid on tight! These guys are good in the fridge for 3-4 days. I’m a big fan of slapping a piece of masking tape on the lid and writing the date or contents—especially if you make a few different flavor varieties.
- The Grand Shake-Up! When you’re ready to eat, here’s the ritual: Remove the lid, take a moment to admire your handiwork, then put the lid back on tightly. Hold the jar firmly with one hand on the lid and one on the bottom, and shake it like you’re mixing a cocktail! Shake it up, down, and all around for a good 15-20 seconds to ensure every single piece gets coated in that dressing. You can eat it right out of the jar or pour it into a bowl. Enjoy the perfectly dressed, non-soggy fruits of your labor!
How to Serve & Savor Your Creation
The beauty of this dish is in its simplicity and portability, but that doesn’t mean we can’t think about presentation! When I’m taking it on the go, the jar is its own perfect vessel. I just throw a fork in my bag (or use one of those handy travel sets) and I’m good. For a picnic or potluck, I’ll bring the jars as-is—they’re incredible conversation starters.
If I’m serving these at home, especially to guests, I love the drama of the “shake and reveal.” I’ll place the sealed jars on the table, let everyone choose their own, and we all do the synchronized shake together. Then, we either dig in from the jar or pour them out into wide, shallow bowls. Pouring it out lets you see the final, beautifully mixed salad in all its glory. Pair it with a crusty piece of garlic bread, a simple green side salad, or just enjoy it as the star of the show. It’s a complete, satisfying meal in one convenient package.
Mix It Up! 5 Flavor-Packed Twists
Once you master the basic formula, the world (literally) is your oyster. Here are a few of my favorite “meld” variations to spark your creativity:
- Greek Goddess: Use a Greek vinaigrette or lemon-oregano dressing. Layer with pasta, cherry tomatoes, cucumber, red onion, kalamata olives, and a big heap of crumbled feta. Add a sprinkle of dried oregano on top.
- Southwest Fiesta: Start with a creamy cilantro-lime ranch. Next, pasta, black beans, roasted corn, diced avocado (squeeze of lime on it first!), cherry tomatoes, and red bell pepper. Top with shredded cheddar or cotija cheese and a few tortilla chip strips (add those just before eating!).
- Pesto Party: Thin out a few tablespoons of basil pesto with a little extra olive oil or lemon juice for your dressing layer. Follow with pasta, mozzarella pearls, sun-dried tomatoes, steamed broccoli florets, and toasted pine nuts.
- Protein Powerhouse: Turn it into a muscle-building meal. Add a layer of chopped grilled chicken, chickpeas, flaked tuna, or hard-boiled egg between the pasta and the veggies. The dressing will flavor the protein perfectly.
- Vegan Vibes: Use a dairy-free dressing. Skip the cheese or use a vegan alternative. Load up on hearty veggies like chickpeas, roasted sweet potato cubes, blanched green beans, and sunflower seeds for crunch and protein.
Jackson’s Kitchen Notes & Stories
This recipe has evolved so much since that first soggy-bowl summer. I’ve learned that wider-mouth jars are easier to eat from, that a single layer of spinach or arugula between the pasta and hard veggies wilts perfectly by lunchtime, and that my friends will literally put in “orders” for specific jar flavors for our hiking trips. One time, I accidentally used a jar that wasn’t completely dry before adding the dressing. The water droplets diluted the dressing a bit—lesson learned! Always start with dry jars.
The biggest win? Seeing my niece, who’s a super picky eater, get excited to build her own “rainbow jars.” She loves choosing each colorful layer. It turned lunch from a battle into a creative project. That’s what cooking should be about—fun, creativity, and sharing something awesome. Don’t stress about perfection; just play with your food!
Your Questions, Answered!
Q: Can I really make these 4 days ahead? Won’t the veggies get weird?
A: Yes! The magic of the layering is what makes it work. The dressing stays completely separate. Hardier veggies like bell peppers, carrots, and cucumbers stay crisp. For best results with tomatoes, leave them whole if prepping more than 2 days out, and always avoid adding leafy greens more than a day ahead.
Q: My pasta still got a little soft after a few days. What did I do wrong?
A> Two likely culprits: 1) The pasta was cooked past al dente to begin with. It should have a definite bite when you drain it. 2) The jar wasn’t sealed airtight, or the dressing layer was too small and didn’t create a proper seal. Make sure your lids are on super tight!
Q: Can I use mayonnaise-based dressings like ranch or Caesar?
A> Absolutely! They work great. Just be aware they are thicker, so you might need to shake the jar a little more vigorously (or give it a good stir with a fork after the initial shake) to coat everything evenly.
Q: What’s the best way to transport these?
A> I keep them upright in my lunch bag, often with a small ice pack if I’m commuting for a while. The jar itself is pretty sturdy, but you can always wrap it in a kitchen towel for extra cushioning.
Nutritional Breakdown (Approximate, per jar)
Let’s talk fuel! One of these jars is a balanced meal with carbs for energy, healthy fats from the dressing and cheese, protein, and a great serving of vegetables. Remember, these numbers can vary widely based on your specific ingredients and portion sizes (like using whole wheat pasta, low-fat cheese, or extra veggies).
- Calories: ~300-350
- Carbohydrates: 32-40g
- Fat: 14-18g (Mostly from the olive oil in the dressing and cheese—the good kind of fats!)
- Protein: 9-12g (Boost this significantly by adding beans, chicken, or tuna as suggested in the variations)
- Fiber: 3-5g
It’s a satisfying, real-food lunch that will keep you full and focused through the afternoon without the post-lunch slump. You’re in control of the ingredients, so you can make it as light or as hearty as you need!
Let’s Keep This Lunch Revolution Going!
And there you have it, my friends—your complete guide to ditching the soggy lunch blues forever. Pasta Salad Jars are more than just a recipe; they’re a mindset. They’re about preparing for success, embracing flexibility, and making sure that even on your busiest days, you get to enjoy a meal that’s fresh, flavorful, and made exactly how you like it.
I want to see what you create! Did you invent an amazing new flavor combo? Did your kids finally eat their peppers because they were part of a “rainbow layer”? Tag me on social @FoodMeld with #FoodMeldJarSalad. Your creativity inspires me every single day.
Now, go raid your fridge, grab some jars, and start layering. Remember, in this kitchen, there are no mistakes, only delicious discoveries. Let’s cook something awesome together, one perfectly-portable jar at a time.
Stay hungry,
Jackson


