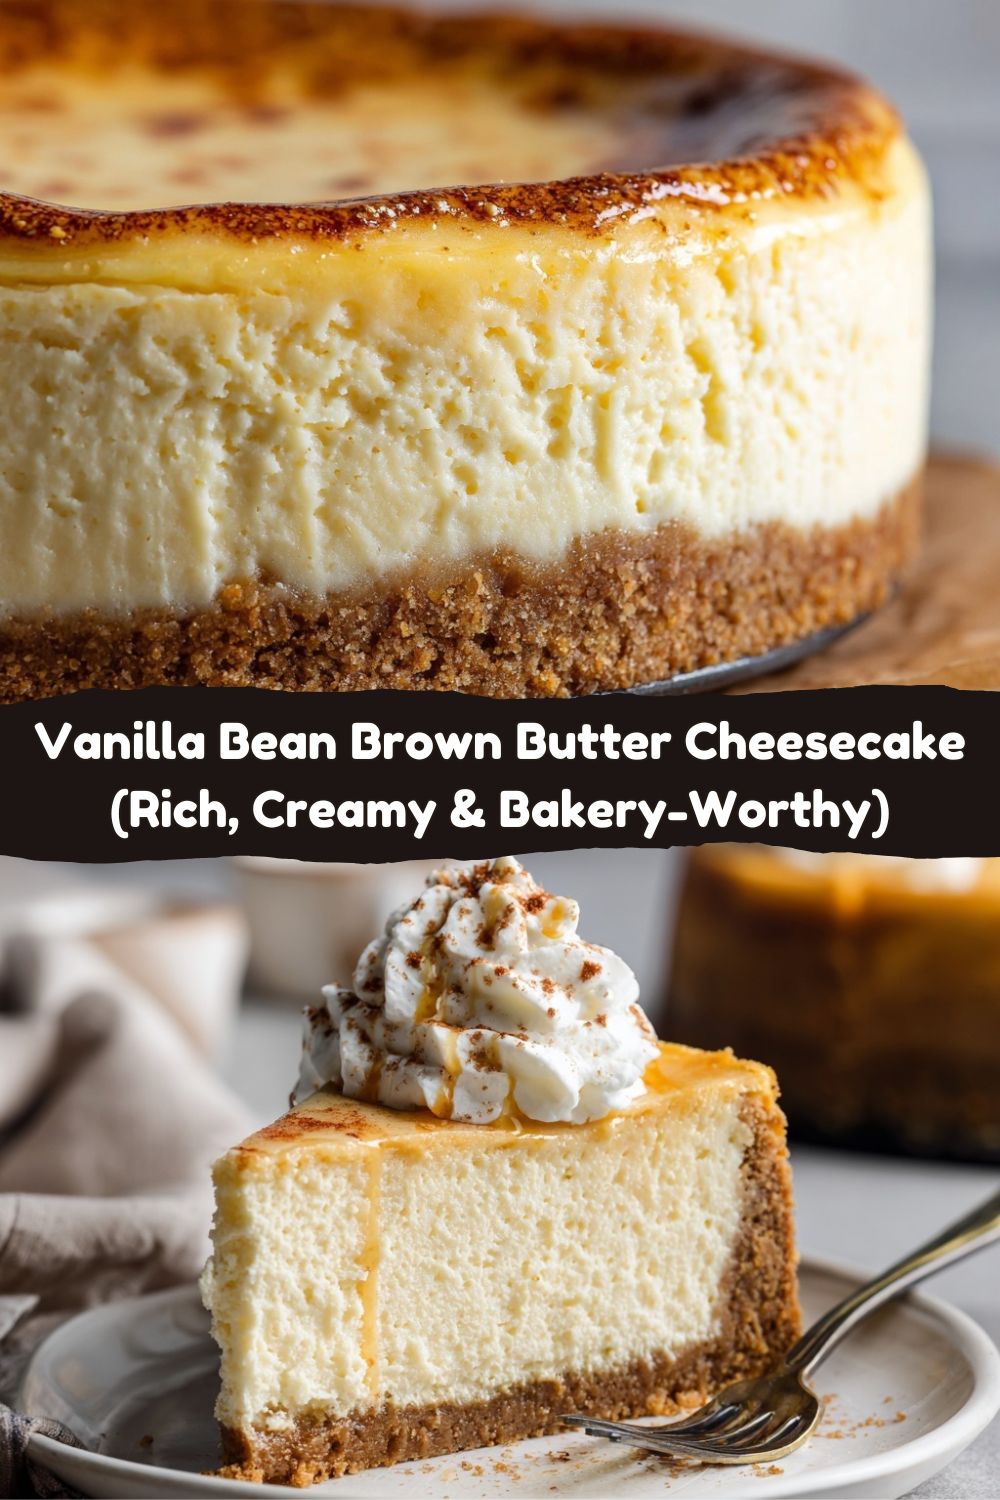
Vanilla Bean Brown Butter Cheesecake: Your New Secret Weapon for “Wow” Moments
Hey friends, Jackson here. Let’s talk about that moment. You know the one. You bring a dessert to the table, and the conversation just… stops. Forks hover. Eyes get wide. Then comes the chorus of “you made this?” and the inevitable, desperate ask for the recipe. That’s the exact moment we’re engineering today with this Vanilla Bean Brown Butter Cheesecake.
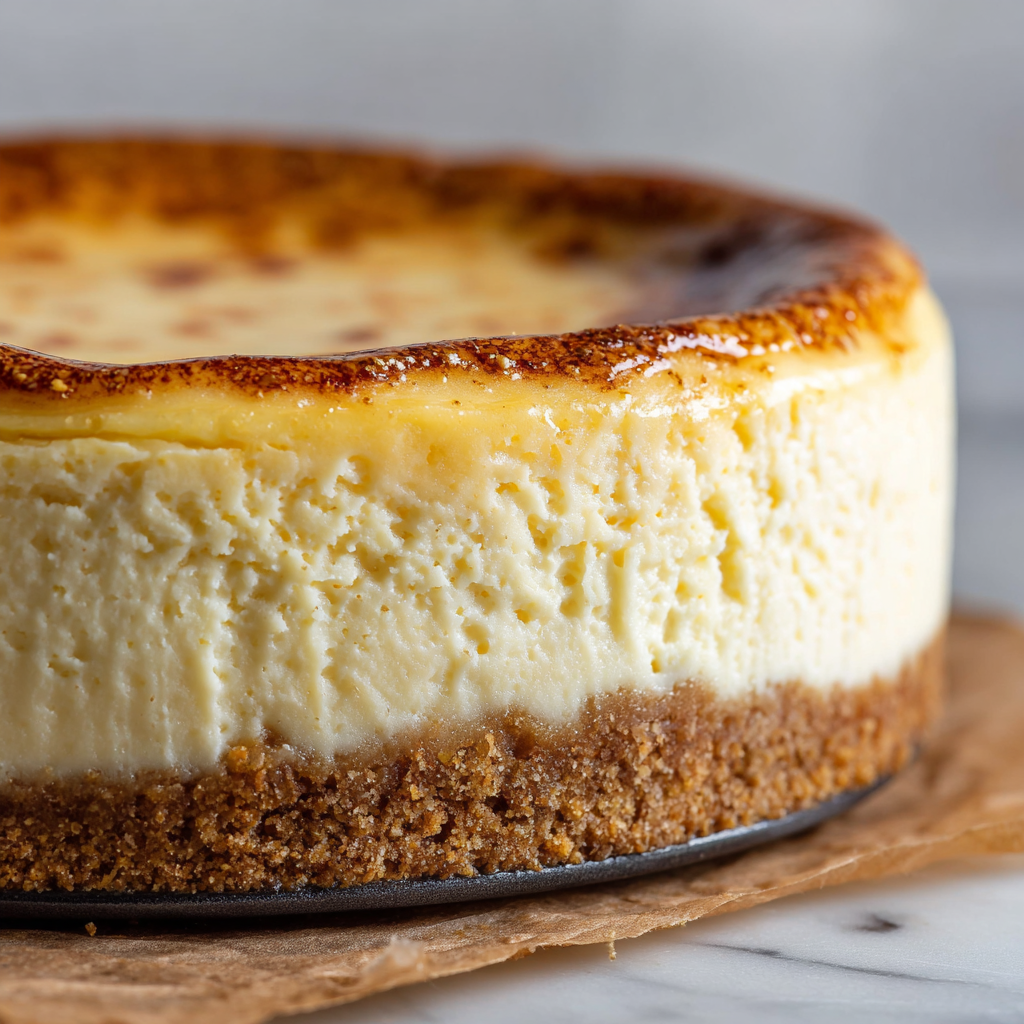
I’m a firm believer that the best recipes aren’t about a hundred obscure ingredients; they’re about taking a few fantastic things and treating them right. This cheesecake is the poster child for that philosophy. We’re taking the classic, beloved creamy cheesecake and giving it a soulful, nutty upgrade with brown butter and the flecked magic of real vanilla bean. The result? Something familiar but extraordinary, rich but not heavy, and so melt-in-your-mouth smooth it feels like a culinary magic trick.
I know “browned butter” can sound a little chef-y, but trust me—it’s just butter you pay attention to for five extra minutes. That’s it. And that tiny bit of effort unlocks a depth of flavor that makes this dessert taste like it came from a fancy patisserie, not your awesome home kitchen. So, whether you’re celebrating a birthday, impressing the in-laws, or just decided that Tuesday deserves a crown, this recipe is your partner in crime. Let’s roll up our sleeves, get a little butter on our aprons, and cook something awesome together.
The “Aha!” Moment That Started It All
This cheesecake has a little backstory. A few years back, I was tasked with bringing dessert to my grandma’s 80th birthday. Now, my grandma is a Southern baking legend—her pound cake could win blue ribbons in its sleep. The pressure was on! I wanted to make a cheesecake, her favorite, but I needed it to be memorable.
I was making a batch of my brown butter chocolate chip cookies the day before, and as that heavenly, nutty aroma filled the kitchen, it hit me: What if that flavor was in a cheesecake? It was one of those “what if we tried this?” moments that Food Meld is built on. I scraped the seeds from a precious vanilla bean I’d been saving, whisked in the cooled brown butter, and held my breath. The filling tasted like liquid gold. The birthday verdict? Grandma took one bite, put her fork down, and said, “Jackson, that’s the best thing you’ve ever made.” High praise from the queen herself! Now, it’s my go-to for “need to wow” occasions, and I’m so pumped to share that moment with you.
Gathering Your Flavor Arsenal
Here’s everything you’ll need. Remember, great ingredients make a great final product, so use the good stuff! Room temperature is key for the dairy—it ensures a silky-smooth, lump-free filling.
For the Crust:
- 1 ½ cups graham cracker crumbs: The classic foundation. You can buy pre-crumbled or pulse whole crackers in a food processor. Chef’s Swap: Digestive biscuits or vanilla wafers work beautifully too for a different vibe.
- ¼ cup packed brown sugar: This adds a hint of molasses warmth that pairs perfectly with the brown butter. Light or dark brown works—dark will give a deeper caramel note.
- 6 tablespoons unsalted butter, melted: The glue! Using unsalted lets you control the salt level. Melt it and let it cool just slightly before mixing.
For the Brown Butter Vanilla Bean Filling:
- 5 tablespoons unsalted butter: This is where the magic starts. We’re going to transform it into nutty, fragrant brown butter.
- 24 oz (three 8-oz blocks) full-fat cream cheese, softened: Full-fat is non-negotiable for texture and stability. Take it out of the fridge at least 2 hours ahead. It should yield to a gentle press.
- ¾ cup granulated sugar: Sweetens and helps create structure. We’re not over-sweetening here—the brown butter and vanilla are the stars.
- 2 tablespoons all-purpose flour: Our secret stabilizer! It helps prevent cracking and gives the cheesecake a slight, beautiful structure without being cakey.
- 1 vanilla bean OR 2 teaspoons vanilla bean paste: The MVP. A vanilla bean provides incredible fragrance and those gorgeous black specks. Chef’s Tip: If using a bean, slice it lengthwise and scrape the seeds out with the back of your knife. Save the pod for making vanilla sugar! Paste is a fantastic, convenient alternative with real bean specks.
- 3 large eggs, at room temperature: They incorporate much more evenly when not cold. Add them one at a time to keep the emulsion smooth.
- ½ cup full-fat sour cream: Adds a delightful tang and luxurious creaminess. Greek yogurt can sub in a pinch.
- ¼ cup heavy cream: The final touch for a lush, velvety mouthfeel. Don’t skip it!
Let’s Build Some Magic: Step-by-Step
Follow these steps, and you’ll be golden. I’ve packed each one with my tested tips to set you up for success.
- Prep Your Stage: Preheat your oven to 325°F (160°C). Grab a 9-inch springform pan. Cut a round of parchment paper for the bottom (this guarantees no sticking!) and wrap the outside of the pan tightly with heavy-duty aluminum foil. We’re doing a water bath later, and this foil suit of armor keeps water out. Trust the process.
- Make the Crust: In a medium bowl, stir the graham cracker crumbs, brown sugar, and melted butter until it resembles wet sand. Dump it into your prepared pan and press it firmly and evenly into the bottom. I use the bottom of a measuring cup to get it nice and compact. Bake for 10 minutes, then let it cool on a rack. This par-baking sets the crust so it stays crisp.
- Brown That Butter (The Game Changer!): While the crust cools, slice your 5 tablespoons of butter and add it to a light-colored saucepan (so you can see the color change!). Melt over medium heat, then keep cooking. It will foam, then the foam will subside. Swirl the pan often. Soon, you’ll see golden brown milk solids at the bottom and smell a nutty, almost toasty aroma. This takes about 5-7 minutes total. DO NOT walk away—it goes from brown to burnt in seconds! Immediately pour into a heat-proof bowl to stop the cooking, making sure to scrape in all those tasty browned bits. Let it cool for 15-20 minutes.
- Create the Silky Filling: In the bowl of a stand mixer (or with a hand mixer), beat the softened cream cheese on medium-low until it’s completely smooth and lump-free, about 2 minutes. Scrape down the bowl. Add the sugar and flour and beat again until combined. Split your vanilla bean and scrape the seeds into the bowl (or add the paste). Beat to incorporate.
- Incorporate the Wet Ingredients: With the mixer on low, add the eggs one at a time, letting each fully blend in before adding the next. Scrape the bowl. Add the sour cream and heavy cream, mixing just until combined. Finally, stream in the cooled brown butter and mix until the entire filling is a uniform, beautiful beige color. Pro Tip: Don’t over-mix once the eggs are in! Just blend until smooth.
- The Bake (with a Spa Bath): Place your foil-wrapped springform pan into a large roasting pan. Pour the filling over the cooled crust. Place the whole setup in the oven, then carefully pour hot water into the roasting pan until it comes about halfway up the side of the springform. This water bath creates gentle, even heat for a crack-free top. Bake for 55-65 minutes. It’s done when the edges are puffed and set, but the center (about a 3-inch circle) still has a pronounced, gentle jiggle—like Jell-O. It will firm up as it cools.
- The Crucial Cool Down: Turn the oven off, crack the door open about an inch, and let the cheesecake cool in the oven for 1 hour. This gradual cooling is the second secret to preventing cracks. Then, remove it from the water bath, take off the foil, and cool completely on the counter. Once at room temp, cover and refrigerate for at least 4 hours, but overnight is best. This sets the flavor and texture perfectly. Patience is rewarded here!
Plating Your Masterpiece
Okay, it’s chilled, set, and you’re ready to serve. Here’s how to make it look as incredible as it tastes:
Run a thin, hot knife (dip it in hot water and dry it) around the edge of the cheesecake before unclasping the springform ring. Gently lift it off. If you want clean slices, use that same hot-knife method for every cut—clean the blade between slices.
I love serving this on its own to let the complex vanilla and brown butter notes shine. But a little accent never hurts! A dollop of barely-sweetened whipped cream, a few fresh berries (raspberries or blackberries are fantastic), or a delicate drizzle of salted caramel sauce or warm berry compote all make incredible companions. For the ultimate experience, pair a slice with a cup of strong coffee or a glass of dessert wine like a Sauternes. Serve it straight from the fridge for that perfect, firm-yet-creamy texture.
Make It Your Own: Fun Twists & Swaps
This recipe is a fantastic canvas. Here are a few of my favorite ways to play with it:
- Citrus Zest Burst: Add the finely grated zest of one lemon or orange to the filling along with the vanilla. It brightens everything up beautifully.
- Chocolate Swirl: Melt 4 oz of dark chocolate and cool slightly. After pouring the filling into the crust, dollop the chocolate on top and use a knife or skewer to swirl it through for a marbled effect.
- Gingersnap Crust: Swap the graham crackers for gingersnap crumbs. The spicy-snap pairs amazingly with the brown butter.
- Bourbon Caramel Drizzle: Add 1 tablespoon of good bourbon to your favorite salted caramel sauce and warm it gently. Drizzle over each slice just before serving.
- Gluten-Free/Dairy-Swap Option: Use gluten-free graham-style crackers for the crust. For the filling, there are excellent plant-based cream cheese and sour cream alternatives available now. Use vegan butter for browning and coconut cream for the heavy cream. The flavor profile will shift, but you’ll still get a delicious, creamy result.
Jackson’s Kitchen Notes
This recipe has become a staple in my repertoire, and I’ve learned a thing or two along the way. The first time I made it, I was so eager I didn’t let the brown butter cool enough, and it slightly melted the cream cheese, making the filling a bit grainy. Lesson learned: patience with temperatures matters! Now I let it cool until it’s just warm to the touch.
Also, don’t stress a small crack if one appears. It’s a sign of a homemade, lovingly baked dessert! It tastes exactly the same, and a little whipped cream covers a multitude of sins. I’ve found the combination of the flour, room-temperature ingredients, water bath, and slow cool has given me a 99% crack-free success rate. This cheesecake only gets better with time, so making it the day before a big event is my ultimate stress-free strategy.
Your Questions, Answered
Q: Can I make this without a water bath?
A: I really, really don’t recommend it. The water bath is what gives you that even, gentle heat necessary for the smooth, creamy texture and crack-free top. It’s the insurance policy for a perfect cheesecake. If you absolutely can’t, place a pan of hot water on the rack below the cheesecake to add some steam to the oven.
Q: My center is still really wobbly after 65 minutes. What do I do?
A: Ovens vary! Just keep baking in 5-minute increments, checking for that “set edges, jiggly center” doneness. A slight wobble is what you want—it will firm up dramatically as it chills.
Q: Why is my crust soggy?
A: The most common culprit is a leak in the foil wrap during the water bath. Next time, use two large sheets of heavy-duty foil, crisscrossed, to create a super-secure seal. Also, ensuring the crust is fully cooled before adding the filling helps.
Q: Can I freeze this cheesecake?
A> Absolutely! Wrap the fully chilled, whole cheesecake (or individual slices) tightly in plastic wrap, then in foil. Freeze for up to 2 months. Thaw overnight in the fridge before serving.
Nutritional Information*
Here’s a general breakdown per slice (based on 12 servings). Remember, this is a rich, special-occasion dessert meant to be savored!
- Calories: ~400
- Protein: 6g
- Carbohydrates: 28g
- Fat: 30g
- Saturated Fat: 17g
- Fiber: 0g
- Sugar: 22g
*This is an estimate provided by an online nutrition calculator. For precise dietary needs, please calculate with your specific ingredient brands.
Final Thoughts
And there you have it—the Vanilla Bean Brown Butter Cheesecake in all its glory. This isn’t just a recipe; it’s a confidence-builder. It’s proof that with a few simple techniques (browning butter, water bath, patient cooling), you can create a show-stopping dessert that feels both timeless and excitingly new.
I hope this recipe brings as much joy to your table as it has to mine. Remember, cooking is about the journey—the scent of browning butter, the satisfaction of a smooth batter, the pride of that first perfect slice. So don’t be intimidated. Embrace the process, have fun with it, and get ready for those “you’ve gotta try this” moments. Now, go forth and bake something unforgettable! And when you do, tag me @FoodMeld—I’d love to see your masterpiece.
Until next time, keep mixing it up,


