
Antipasto Skewers: Your New Go-To Party Hero (Seriously, They’re That Good)
Hey there, foodie friends! Jackson here from Food Meld. Let’s talk about one of my absolute favorite kitchen truths: the best party food shouldn’t keep you out of the party. You know what I mean. You want to be mingling, laughing, and maybe sneakily double-dipping, not sweating over a hot stove while your guests have all the fun. That’s where these little flavor-packed wonders come in. Today, I’m super excited to share my take on Antipasto Skewers—the easy, elegant, and endlessly customizable party bite that looks like you fussed for hours but secretly comes together in minutes.
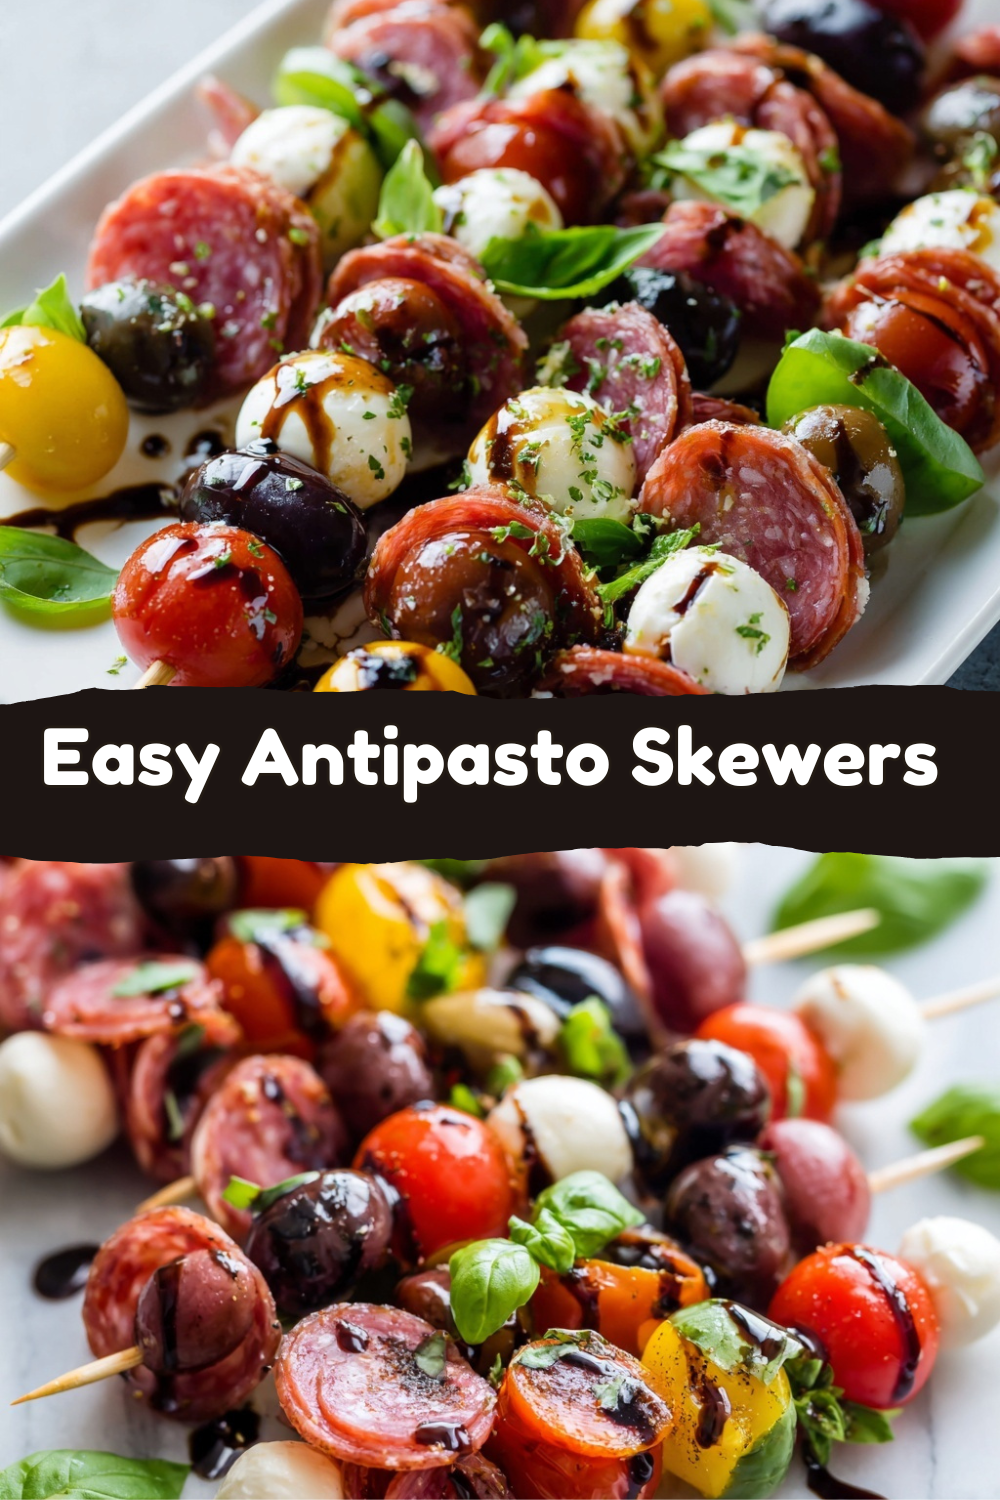
We’re taking everything we love about a sprawling Italian antipasto platter—the salty meats, the creamy cheese, the briny olives, the sweet-tart tomatoes—and stacking it all onto a handy, grab-and-go skewer. It’s a flavor mosaic on a stick! Each bite is a perfect little journey: savory, fresh, creamy, and tangy all at once. Whether you’re hosting a big game day bash, a fancy-ish cocktail hour, or just need a stunning snack for book club, these skewers are your secret weapon. They’re visually stunning, impossible to mess up, and guaranteed to have people hovering around the platter asking, “Who made these?!” Spoiler: it was you, the kitchen genius. So, let’s ditch the stress and cook up some fun, one delightful skewer at a time.
A Skewer, A Story, and My Nonna’s Side-Eye
This recipe always takes me back to my first big “grown-up” dinner party I tried to host in my tiny post-college apartment. I was determined to impress. I attempted some complicated, five-layer dip thing that ended up a beige, soggy mess. Panicking, I looked at the Italian deli ingredients I’d bought for a salad and just started stabbing them onto toothpicks in a moment of desperation. I arranged them haphazardly on my only nice plate. When my Nonna (my Italian grandmother) arrived, she took one look at my chaotic spread, zeroed in on the skewers, and gave me that look—the one that’s half “what have you done?” and half “…I’m intrigued.”
She popped one in her mouth, chewed thoughtfully, and then her face broke into a huge smile. “Jackson,” she said, “sometimes the best food isn’t about the recipe. It’s about the idea. You took the heart of our family table and made it easy to share.” It was a lightbulb moment for me. Food doesn’t have to be complicated to be memorable and soul-filling. These skewers, in all their simple, jumbled glory, became a symbol of that for me. They’re about bringing people together, not showing off. (Though, let’s be real, you will look like a rockstar.)
Gathering Your Flavor Meld
Here’s the beautiful part: this is less of a strict recipe and more of a delicious blueprint. Feel free to play! Here’s what I love to use, with some insider tips to make your skewers next-level.
- 1 cup fresh mozzarella balls (bocconcini): The creamy dream! I highly recommend the fresh kind stored in water. They’re softer, milky, and far superior to the pre-shredded stuff for this. Chef’s Tip: Drain them and pat them dry with a paper towel. A dry cheese means your glaze sticks better and your skewer isn’t watery.
- 1 cup cherry or grape tomatoes: Little bursts of sweetness. Go for the reddest, firmest ones you can find. Give them a rinse and dry them thoroughly, too. A soggy tomato is a sad tomato.
- 1 cup pitted olives (I use a mix of green and Kalamata): The salty, briny backbone. Using pre-pitted olives is my #1 time-saving hack here. No one wants to deal with pits on a skewer! The mix of colors just makes everything pop.
- 20 slices of Italian salami (like Genoa) or peppery pepperoni: Our savory star. Don’t just thread it flat! Fold or roll the slices into quarters to create lovely ruffled cones. It adds fantastic texture and makes the meat easier to eat.
- Wooden skewers (6-inch) or sturdy toothpicks: The foundation. If using longer skewers, you can snip the pointy ends off with kitchen shears after assembling for a safer, cleaner look on the platter.
- Fresh basil leaves: The aromatic green kiss. We’ll use small whole leaves or tear larger ones. Add them just before serving so they stay bright and perky.
- High-quality balsamic glaze for drizzling: This is the magic wand. It adds a glossy, sweet-tart finish that ties every flavor together. You can buy it ready-made (so easy) or reduce regular balsamic vinegar with a touch of honey until syrupy.
Let’s Build Some Flavor Towers: A Step-by-Step Guide
Ready to play the most delicious game of edible Tetris? Let’s do this. Clear a little space on your counter, put on some good music, and let’s assemble.
- Prep Your Players: This is the golden rule. Drain your mozzarella balls and pat them dry with paper towels. Rinse your tomatoes and olives, and dry them. Lay out your salami slices, basil, and skewers. Having everything dry, accessible, and ready to go (chefs call this mise en place) makes the assembly line fly by.
- Fold & Ruffled Salami: Take one slice of salami. Pinch it in the center and fold it into a loose cone or fold it into quarters. This isn’t just for looks (though it looks awesome); it creates little cups that hold onto the other ingredients and glaze, making each bite more dynamic.
- The Threading Order: Here’s my favorite sequence. Pierce a folded salami cone first. Then add a mozzarella ball. Follow with a tomato, then an olive. You can repeat the sequence if using longer skewers. Why this order? Starting and ending with a sturdier item (salami/olive) keeps the softer mozzarella and tomato secure in the middle. It’s a structural integrity hack!
- Keep ‘Em Tight, But Not Too Tight: Gently slide the ingredients down the skewer so they’re snug against each other without being squished. You want a friendly hug, not a squeeze that bursts the tomato. Leave a little handle at the bottom for easy grabbing.
- The Grand Finale – Drizzle & Garnish: Once all your skewers are assembled on a platter or a baking sheet, it’s time for the glamour shots. Drizzle that gorgeous balsamic glaze back and forth in a zig-zag pattern over the whole batch. Just before serving, tuck in fresh basil leaves around and between the skewers. The contrast of the deep green against the red and white is *chef’s kiss*.
How to Serve These Show-Stoppers
Presentation is half the fun! Skip the boring plate. I love using a large, rustic wooden cutting board, a sleek slate slab, or even a simple white platter to let the vibrant colors shine. Arrange the skewers in a sunburst pattern, layer them in a fan, or just pile them high with abandon—it all looks amazing.
For a truly epic spread, place your skewer platter in the center and surround it with the “supporting cast”: a bowl of extra olives, some crusty bread slices or grissini (breadsticks), and maybe a small dish of high-quality extra virgin olive oil for dipping any stray bread. It turns simple skewers into an immersive Italian experience. Remember, food you eat with your hands always tastes better and feels more fun!
Make It Your Own: 5 Flavor-Packed Twists
The beauty of this concept is its flexibility. Here are some of my favorite ways to mix it up:
- The “Everything But The Kitchen Sink”: Add marinated artichoke hearts, roasted red pepper strips, and a small chunk of peppercorn salami. It’s a full antipasto platter on a stick!
- Spicy ‘Nduja Kick: For the heat lovers, swap the salami for spicy soppressata. Even better, spread a tiny dab of ‘nduja (a spicy, spreadable Italian salumi) on the salami before folding it. Fireworks!
- Fresh & Herbaceous: Thread in fresh rosemary sprigs or small bunches of thyme between the ingredients. As people eat, the herbs release their aroma. It’s a next-level sensory trick.
- Vegan/Veggie Delight: Skip the meat! Use marinated tofu cubes, vegan mozzarella, and add components like grilled zucchini rounds, marinated mushrooms, and sun-dried tomatoes. Drizzle with a balsamic reduction (check for no honey).
- Mediterranean Summer: Swap mozzarella for chunks of firm feta. Use cucumber rounds instead of tomato, and add a single mint leaf. Drizzle with a lemon-oregano vinaigrette instead of balsamic.
Jackson’s Chef Notes & Kitchen Confessions
I’ve made these skewers approximately a zillion times, and they’ve never let me down. One time, for a huge summer BBQ, I decided to “save time” and assemble them the night before. Big mistake. The tomatoes and basil released moisture, and by morning, my beautiful skewers were…soggy. Lesson learned! Now, I prep all the ingredients (washing, drying, folding) and store them separately in containers in the fridge. Then, 30 minutes before guests arrive, I have a mini assembly-line party and put them together. They stay fresh, perky, and perfect.
Also, don’t be afraid of the imperfect skewer! If a tomato splits or an olive slides, just eat the evidence and make another. This is supposed to be fun, remember? The slight variations in each skewer just add to the homemade charm.
FAQs: Your Questions, Answered
Q: Can I make these ahead of time?
A: You can, with a strategy! Do: Prep all components (wash, dry, fold meat) up to a day ahead. Store them separately in airtight containers in the fridge. Don’t: Assemble the full skewers more than 1-2 hours before serving, or they’ll get watery. Assemble, then drizzle and garnish right before your event.
Q: My balsamic glaze is too thick/too thin. Help!
A: No sweat! If store-bought glaze is too thick, warm the bottle in a cup of hot water for a few minutes to loosen it. If it’s too thin or you’re making your own and it’s not syrupy enough, just simmer it a bit longer on the stove until it coats the back of a spoon.
Q: What can I use instead of wooden skewers?
A: Sturdy toothpicks work for mini-bite versions! You could also use pre-cut cocktail picks or even small, decorative cocktail forks. For a fancy touch, rosemary sprigs (with the leaves stripped off the bottom half) make stunning and aromatic natural skewers.
Q: How do I keep them from tipping over on the platter?
A: Two tricks: 1) Use a shallow platter and lean them against each other like a teepee. 2) Take a head of lettuce or a few cups of dried beans, place them in a bowl, and cover with parsley or kale. Stick the skewers into this “edible base” for a dramatic, upright display.
Nutritional Info (Because We’re Curious Like That)
Okay, let’s keep it real—these are a party appetizer, meant for enjoying and sharing. But it’s always good to know what you’re biting into! The following is a rough estimate per skewer (based on the core recipe and assuming you get about 10 skewers from the batch):
- Calories: ~130
- Fat: 10g (The good fats from olive oil, cheese, and meat!)
- Carbohydrates: 2g
- Protein: 7g (A nice little protein boost to keep you going.)
Remember, these are satisfying little bites. You’re getting a balanced mix of protein and fat, which is far better than munching on empty-carb chips. To lighten them up, you can use low-fat mozzarella, leaner meats like prosciutto, and add more veggie components like bell peppers or mushrooms.
Final Thoughts: Your Party is About to Get an Upgrade
And that’s it, friends! You’re now armed with the knowledge to create the easiest, most impressive appetizer that will have your friends and family thinking you’re a culinary wizard. These Antipasto Skewers embody everything I love about cooking at Food Meld: big, bold flavors, a creative twist on a classic, and a recipe that empowers you to have fun and make it your own.
So the next time you’re staring into the fridge wondering what to bring or serve, remember this little flavor hack. Grab some skewers, raid the deli section, and build something awesome. I can’t wait to hear how you make them your own. Tag me on social with #FoodMeld so I can see your creations! Now, go forth and skewer with confidence. Let’s cook something awesome together.
Cheers,
Jackson


