Crispy Chicken, No Frying Pan in Sight: Your New Weeknight Hero
Hey friends, Jackson here from Food Meld. Let’s be real for a second. How many times have you stared into the fridge, willing a delicious, satisfying, and not-boring dinner idea to magically appear? You want something crispy, something comforting, but the thought of dealing with a splattering pan of hot oil after a long day? Absolutely not. I get it. That’s why I’m practically doing a happy dance to share this recipe with you today.
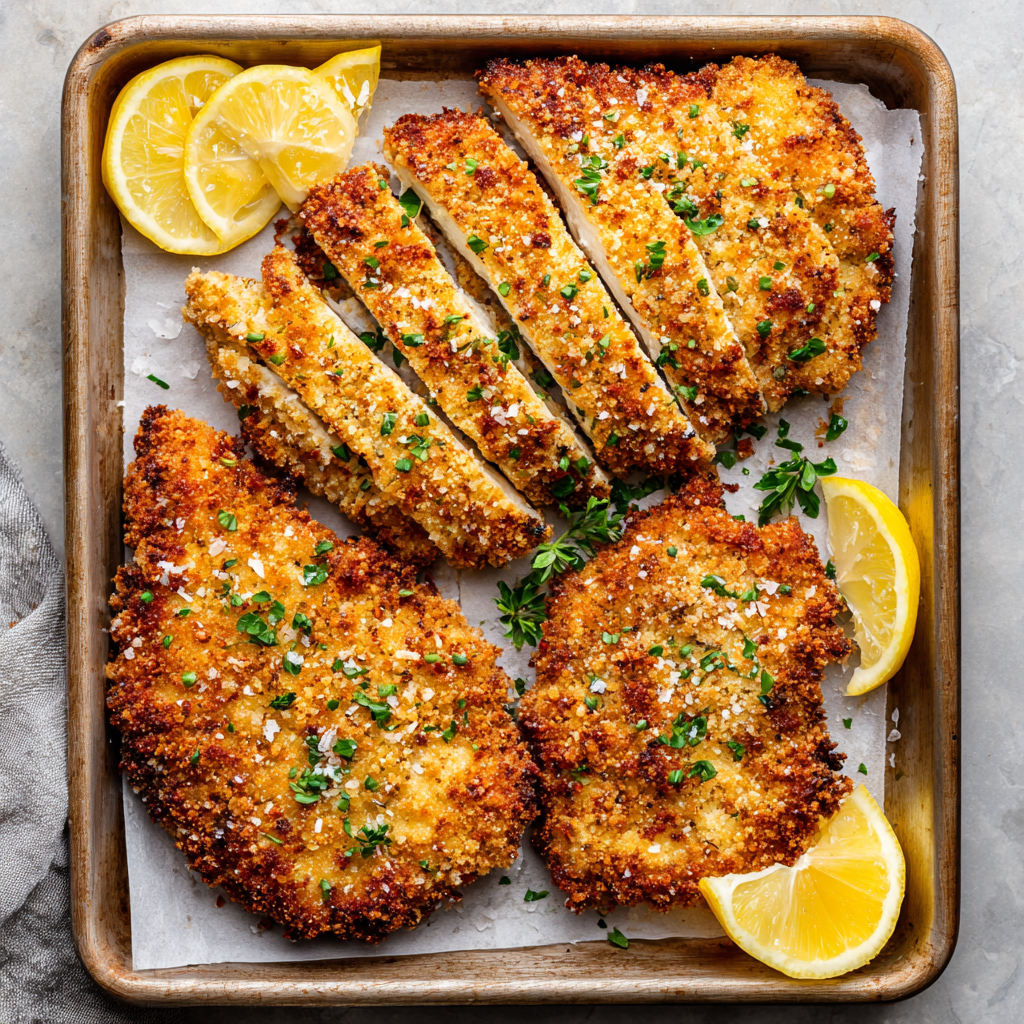
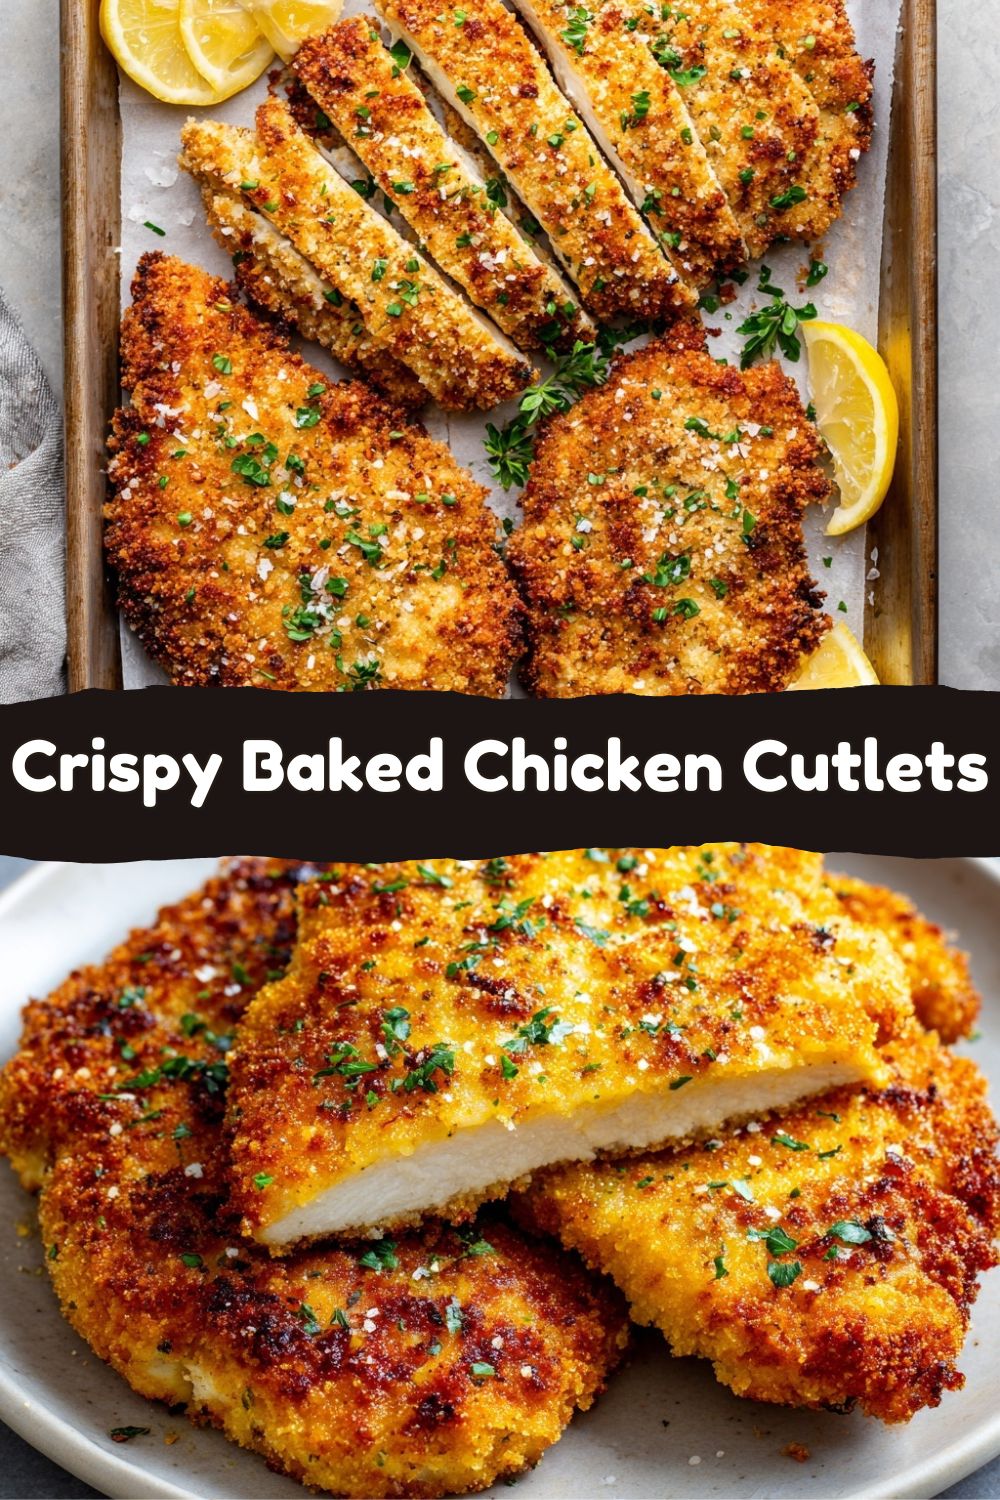
We’re talking about Breaded & Baked Chicken Cutlets – the ultimate kitchen sleight of hand. They’ve got that irresistible, shatteringly golden crunch you dream about, paired with unbelievably juicy, tender chicken inside. The best part? It all happens in your oven, on a single sheet pan, with minimal cleanup and about 40 minutes of your time, start to finish. This isn’t a “good for baked” recipe. This is a “wow, you baked this?!” recipe.
Whether you’re slicing them over a vibrant salad, tucking them into a toasty bun with all the fixings, or serving them up with a big pile of garlicky mashed potatoes and a veggie, these cutlets are your blank canvas for an awesome meal. I’ve packed all my “what if we tried this?” energy into perfecting this method, and I’m handing you every tip and trick I’ve learned. So, tie on your apron, and let’s cook something awesome together that’s guaranteed to break the “what’s for dinner?” cycle for good.
The Crunch That Started It All: A Southern Boy’s Oven Epiphany
My love for a perfectly crispy piece of chicken runs deep, straight to my Southern roots. My grandma made the world’s best fried chicken—a sacred, all-day affair that filled the whole house with a scent that felt like love. But as much as I adored it, I wanted that same soul-satisfying crunch in a way that fit my busy, modern life. I wanted it to be a Tuesday kind of meal, not just a special Sunday supper.
The “a-ha” moment came after one too many attempts at pan-frying that left my kitchen smelling like a diner for days. I was determined to get that texture without the fry. I started playing with breadcrumbs, temperatures, and rack positions like a mad scientist. The day I pulled out a tray of cutlets that actually sounded crispy when I tapped them? Game over. I’d captured the spirit of that nostalgic crunch in a way that was simple, healthier, and just as downright delicious. It’s my little tribute to tradition, with a Food Meld twist. Every time I make these, I think of my grandma, and I know she’d approve of this clever, less-messy version.
Gathering Your Flavor Arsenal
Here’s everything you’ll need to build layers of flavor and that iconic crunch. The beauty is in the simplicity and the smart swaps you can make!
- 4 boneless, skinless chicken breasts: The main event! Look for breasts that are similar in size for even cooking. Chef’s Insight: If they’re very thick, you’ll have an easier (and faster-cooking) time if you slice them in half horizontally into cutlets first.
- ½ cup all-purpose flour: Our first layer. This creates a dry base for the egg to stick to, which is the glue for our breadcrumbs. Sub Tip: Gluten-free 1-to-1 flour works perfectly here if needed.
- 2 large eggs + 1 tbsp water: The all-important binder. The water just loosens the eggs up a bit for a thinner, more even coat. Chef’s Hack: Beat these really well in a wide, shallow bowl – it makes dipping a breeze.
- 1½ cups panko breadcrumbs: The SECRET to the crunch! Panko is airier and flakier than regular breadcrumbs, so it bakes up incredibly crisp. Don’t swap for regular crumbs here—trust me on this.
- ½ cup grated Parmesan cheese: This is where the magic happens. Parmesan bakes into the panko, adding a savory, salty, umami depth that’s absolutely irresistible. Sub Tip: For a dairy-free version, use a tablespoon of nutritional yeast or just omit it and add a pinch more salt to the panko mix.
- 1 tsp garlic powder & 1 tsp Italian seasoning: The flavor boosters! No chopping required. This dynamic duo seasons the breading from the inside out. Get Creative: Swap in smoked paprika, onion powder, or dried herbs de Provence for a different vibe.
- Salt & pepper to taste: Season every layer—a little on the chicken itself, and always in your flour and panko mixtures. This is non-negotiable for tasty chicken!
- Olive oil spray or a light drizzle: This is the final touch that ensures golden-brown perfection. The oil helps the breading crisp up and color beautifully in the oven.
Let’s Build Some Crunch: Your Step-by-Step Roadmap
Okay, team. Let’s do this. It’s a simple process, but a few pro tips will make all the difference between good and “can I have your recipe?” great.
Step 1: Prep Your Station. Preheat your oven to a hot 425°F (220°C). This high heat is crucial for mimicking the fry and getting that crunch. Line a baking sheet with parchment paper (for easy cleanup) and place a wire rack on top. Why the rack? It allows hot air to circulate all around the cutlet, so the bottom gets crispy instead of soggy. If you don’t have one, it’s okay—just flip them carefully halfway through.
Step 2: Chicken Prep. Place your chicken breasts on a cutting board. If they’re plump, use your palm to hold them steady and carefully slice them horizontally through the middle to create two thinner cutlets. Pound them gently to an even ½-inch thickness if needed. Season both sides generously with salt and pepper. Chef’s Story: I use the bottom of a heavy pan if I can’t find my mallet. Improvise!
Step 3: The Breading Assembly Line. Set up three shallow dishes (pie plates or wide bowls are perfect). 1: Flour, mixed with a pinch of salt and pepper. 2: The eggs and water, beaten until smooth. 3: Panko, Parmesan, garlic powder, and Italian seasoning, all mixed together. This “standard breading procedure” is your ticket to perfection. Keep one hand for dry steps (flour and panko) and one for the wet (egg) to avoid “club fingers.”
Step 4: The Dance: Dredge, Dip, Coat. Take a seasoned cutlet and dredge it in the flour, shaking off any excess. Then, dunk it fully into the egg wash, letting the excess drip off. Finally, press it firmly into the panko mixture. I mean it—press! Get it coated on all sides, gently pressing the crumbs into the meat. This ensures a solid, even layer that won’t fall off. Place it on the wire rack. Repeat with love for all cutlets.
Step 5: The Crispifying. Give the tops of your breaded cutlets a very light spray or drizzle of olive oil. This helps them brown. Slide the tray into your hot oven. Bake for 10-12 minutes, then carefully flip each one. You’ll see they’re already getting gorgeous! Bake for another 10-12 minutes, until the coating is a deep, golden brown and the internal temperature reads 165°F (74°C) on a meat thermometer.
Step 6: The Patience Payoff. I know it’s hard, but let the cutlets rest for 5 minutes on the rack after baking. This lets the juices redistribute throughout the chicken, guaranteeing that every bite is moist. Then, dig in!
Plate It Like a Pro (Or Just Dig In!)
Now for the fun part: how to enjoy your masterpiece! For a classic, comforting plate, slice a cutlet and fan it over a bed of creamy polenta or buttery mashed potatoes, drizzled with a little pan sauce (see variations!). Roasted broccoli or a simple arugula salad with lemon vinaigrette cuts through the richness perfectly.
Want the ultimate sandwich? Toast a brioche bun, slather it with garlic aioli, add a crisp leaf of romaine, a juicy tomato slice, and the whole chicken cutlet. It’s a meal unto itself. Or, slice them into strips and pile them high on top of a Caesar salad or a grain bowl with quinoa, roasted veggies, and a herby yogurt dressing. The options are endless, which is why this recipe earns a permanent spot in your rotation.
Mix It Up! Your Creative Playground
Once you’ve mastered the basic formula, the world is your crispy oyster. Here are a few of my favorite twists:
- Spicy ‘Nashville’ Style: Add 1-2 tbsp of cayenne pepper and a tablespoon of brown sugar to the panko mixture. After baking, brush the cutlets with a mix of melted butter and a dash of hot sauce for that iconic kick.
- Lemon-Herb Bliss: Add the zest of one lemon and 2 tbsp of freshly chopped herbs (like parsley, dill, and chives) to the panko-Parmesan mix. Serve with extra lemon wedges.
- ‘Everything Bagel’ Chicken: Swap the Italian seasoning for 2 tablespoons of everything bagel seasoning. It’s insane on a chicken sandwich with scallion cream cheese.
- Gluten-Free & Dairy-Free Champion: Use gluten-free 1-to-1 flour and gluten-free panko. Replace the Parmesan with 2 tbsp of nutritional yeast for a cheesy flavor, or simply omit it.
- Quick Piccata Sauce: While the chicken rests, melt 2 tbsp butter in a pan. Add ¼ cup lemon juice, ½ cup chicken broth, and 2 tbsp capers. Simmer for 5 minutes until slightly reduced. Spoon generously over the cutlets.
Jackson’s Kitchen Notes & Stories
This recipe has seen some things in my kitchen! I once accidentally used sweetened coconut flakes instead of panko (don’t ask how I confused the containers). It was… interesting, but not the vibe we’re going for. Lesson learned: label your pantry jars! Over time, I’ve learned that the quality of your Parmesan matters. Freshly grated from a wedge makes a noticeable difference versus the pre-shaken stuff, but use what you have—it’ll still be delicious. The biggest evolution was committing to the wire rack. It was a game-changer for ultimate bottom crispiness. This recipe is a testament to the idea that the best comfort food doesn’t have to be complicated or heavy—it just has to be made with a bit of know-how and a lot of flavor.
Your Questions, Answered
Q: My breading fell off! What happened?
A: The most common culprit is not shaking off the excess flour after the first dredge. A thick layer of flour prevents the egg from making proper contact with the chicken. Also, make sure you’re pressing the panko in firmly. A gentle pat won’t do it!
Q: Can I make these ahead of time?
A> You can bread the cutlets, place them on the rack on the baking sheet, cover loosely with plastic wrap, and refrigerate for up to 4 hours before baking. This can actually help the coating set! I don’t recommend freezing them breaded before baking, as the coating can get soggy.
Q: Why are parts of my breading still pale?
A> An uneven spray of oil can cause this. Make sure you’re covering all the nooks and crannies. Also, oven hot spots are real! Rotating your tray front-to-back halfway through baking (in addition to flipping) can help.
Q: Can I use chicken thighs?
A> Absolutely! Boneless, skinless thighs will work great. They may need a minute or two longer in the oven due to their higher fat content—just always trust your thermometer to hit 165°F.
Nourishing Your Crunch Craving
Let’s talk about what’s fueling you. This baked method is a fantastic way to enjoy crispy chicken with significantly less fat than traditional frying. Using a lean protein like chicken breast packs a powerful protein punch (about 35g per serving!) to keep you satisfied. The carbohydrates come primarily from the panko and flour, providing energy and that craveable texture. The olive oil and Parmesan contribute the fat, which helps with flavor, browning, and satiety. Remember, these are estimates and can vary based on the exact ingredients and portion sizes you use. It’s a balanced, wholesome meal that proves healthy eating doesn’t mean sacrificing flavor or fun.
The Last Bite
And there you have it, friends—your new secret weapon for a stress-free, flavor-packed dinner. This recipe embodies everything I believe in at Food Meld: big, comforting flavor, a creative twist on a classic, and a method that’s genuinely approachable for any cook. It’s the kind of dish that makes you feel like a kitchen rockstar without any of the drama.
I hope these cutlets bring as much joy and crunch to your table as they have to mine. Give one of the fun variations a shot next time, and make it your own. That’s what cooking is all about. If you make them, I’d love to hear how it went! Tag me @FoodMeld or drop a comment on the blog. Now, go enjoy every single bite of that crispy, juicy goodness. Until next time, keep melding those flavors!
Jackson


