
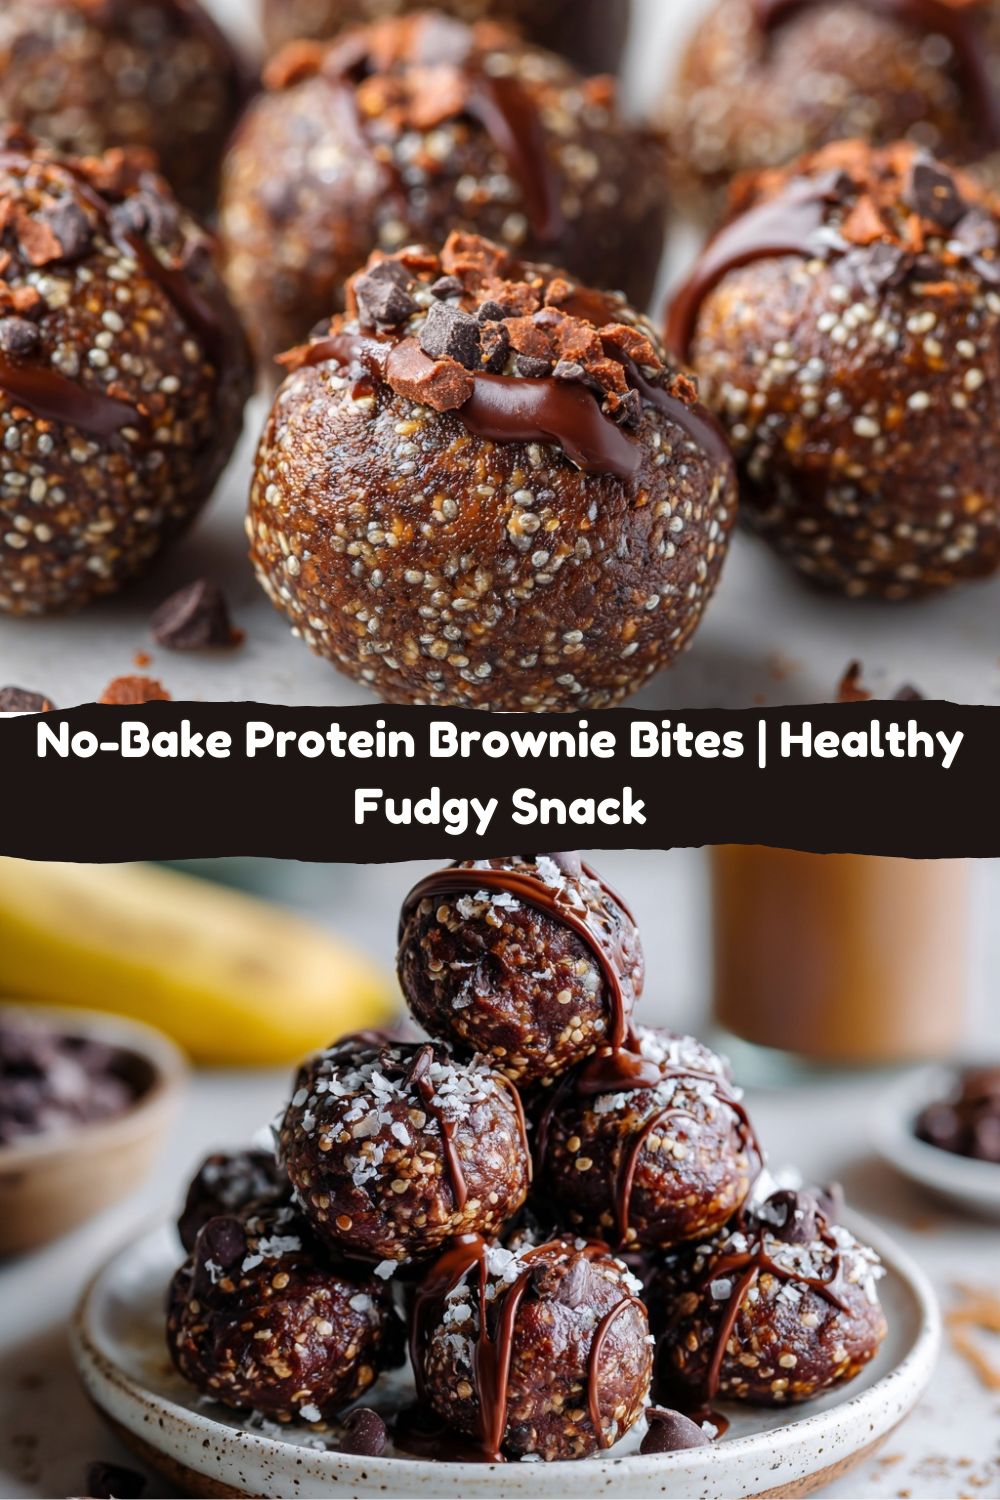
No-Bake Protein Brownie Bites: Your New Favorite Fudgy, Healthy Snack
Hey friends, Jackson here from Food Meld. Let’s be real for a second. We’ve all been there. It’s 3:17 PM, your energy is hitting a wall, and the siren song of the snack cabinet starts whispering your name. You want something chocolatey. Something fudgy. Something that feels like a total treat. But you also don’t want that sugar crash 20 minutes later that leaves you feeling more sluggish than before. Am I right?
For the longest time, I felt like I had to choose: indulgence or fuel. Decadent dessert or smart snack. But what if I told you that you can have both in one delicious, no-fuss bite? That’s the whole magic behind these No-Bake Protein Brownie Bites.
These little guys are my kitchen superheroes. They’re deeply chocolatey, have that perfect brownie chew, and are seriously packed with the good stuff to keep you going. And the best part? Zero baking required. We’re talking about 10 minutes of hands-on time, one bowl, and a whole lot of “wow, I made this?” satisfaction. This is the kind of recipe that proves healthy eating doesn’t have to be bland, complicated, or require a pantry straight out of a science lab. It’s just simple, real ingredients melded into something unforgettable. So, grab your mixing bowl—we’re about to make your snack dreams come true.
Why These Bites? A Story of Messy Fingers & Happy Taste Buds
This recipe didn’t start in some fancy test kitchen. It started on a hiking trail, miles from my car, with a very sad-looking energy bar crumbling in my pocket. I love being outdoors, but my post-hike hunger is a force of nature. I needed a snack that could survive an adventure, taste amazing, and actually refuel my tired muscles. Store-bought options either tasted like sweetened cardboard or were loaded with stuff I couldn’t pronounce.
I got home that day, still dreaming of brownies, and went straight to the kitchen with a mission: create the perfect grab-and-go fuel that tasted like a reward. The first batch? Let’s just say it was… a learning experience. Too dry. Too sticky. Not chocolatey enough (a cardinal sin in my book!). But after a few (dozen) taste tests—my friends were very willing volunteers—we landed on this version. The one that makes you close your eyes and do a little happy dance. Now, I always have a container of these in the fridge. They’ve been to soccer games, road trips, and have saved many a late-afternoon work slump. They’re my edible reminder that the best food comes from a little curiosity and a desire to feel awesome.
Your Flavor Line-Up: Simple Ingredients, Big Impact
Here’s everything you need to build these fudgy bites of joy. I’ve added my little chef insights and swaps so you can make it work with what you’ve got!
- ½ cup oat flour: This is our base, giving the bites heartiness and a chewy texture. Chef’s Tip: You can easily make your own by blitzing rolled oats in a food processor or blender until fine! It adds a lovely, toasted flavor.
- ¼ cup cocoa powder: Non-negotiable for that deep, rich brownie flavor. Use a good-quality unsweetened cocoa powder—it’s the soul of this recipe.
- ⅓ cup chocolate chips: We’re doubling down on chocolate! You can melt them to create a fudge-like binder or fold them in whole for little melty pockets. Dark, semi-sweet, or even sugar-free chips all work great.
- ¼ cup protein powder (chocolate or vanilla): The protein powerhouse! This adds structure and makes these bites filling. Substitution Tip: If you don’t have protein powder, you can use an extra ¼ cup of oat flour, but the protein content will be lower, and you may need a touch more milk.
- 1 tbsp chia seeds: My sneaky nutrient boost! They help bind the dough and add omega-3s and fiber. If you don’t have chia, ground flaxseed works perfectly.
- ¼ tsp vanilla extract: The flavor enhancer. It rounds out the chocolate and makes everything taste more “baked good.”
- A generous pinch of salt: Crucial! Salt makes the chocolate flavor pop and balances the sweetness. Don’t skip it.
- 2–4 tbsp milk of choice: This is your texture adjuster. Start with 2 tablespoons and add more as needed to bring the dough together. Almond, oat, dairy, pea milk—any work!
Let’s Make Some Magic: Step-by-Step Instructions
Ready? This is the fun part. Put on some good music, and let’s get mixing.
- Combine Your Dry Team. In a medium-sized mixing bowl, add the oat flour, cocoa powder, protein powder, chia seeds, and that all-important pinch of salt. Grab a whisk and give it a really good stir. We want everything evenly distributed so every bite is consistent. Pro Hack: Sifting the cocoa and protein powder can help avoid little dry clumps, but a vigorous whisking does the trick too!
- Handle the Chocolate. Now, decide your chocolate fate! For an ultra-fudgy, dense brownie bite, melt your chocolate chips (microwave in 20-second bursts, stirring between, works great). For bites with little bursts of chocolate, keep them whole. I usually go the melted route—it makes the dough incredibly rich.
- Bring It All Together. Pour the vanilla extract and your melted chocolate (if using) into the dry ingredients. Start with 2 tablespoons of milk and mix. It will seem dry at first—that’s normal! Keep mixing. The dough will start to clump. If it’s too crumbly and won’t hold together when pinched, add the extra milk, one tablespoon at a time. If you’re using whole chocolate chips, fold them in now. The goal: a pliable, slightly sticky dough that holds its shape when rolled.
- Roll & Relax. Scoop out about a tablespoon of dough. Roll it between your palms to form a neat ball. If the dough is sticking to your hands, lightly dampen them with water or a tiny bit of oil. Place each bite on a plate or baking sheet lined with parchment paper. Repeat with the rest of the dough. You should get about 10 perfect, bite-sized energy balls.
- The Chill Factor. This is the only “hard” part—waiting! Pop the plate into the fridge for at least 30 minutes. This lets the chia seeds hydrate and everything firm up into that perfect, chewy texture. Trust me, it’s worth it.
How to Serve & Savor Your Creation
Once they’re set, the world (or your fridge) is your oyster! I love keeping them in a sealed container in the refrigerator—they stay firm and last for up to a week (if they even make it that long). For a real treat, I sometimes give them a quick roll in extra cocoa powder, a drizzle of melted peanut butter, or a sprinkle of sea salt right after rolling. They’re perfect straight from the fridge with a cup of coffee for an afternoon pick-me-up, tucked into a lunchbox, or even slightly warmed for 10 seconds in the microwave for a gooier, dessert-like experience. Enjoy them anytime you need a burst of flavor and energy that actually feels good.
Make It Yours: 5 Delicious Twists
The basic recipe is a flawless canvas. Here’s how to get creative and mix it up!
- Peanut Butter Cup: Replace 1 tablespoon of the milk with 2 tablespoons of creamy natural peanut butter. Roll the finished bites in crushed, salted peanuts.
- Mint Chocolate Chip: Swap the vanilla extract for ⅛ tsp of peppermint extract (a little goes a long way!). Fold in whole chocolate chips for that classic chip vibe.
- Rocky Road: Fold in 2 tablespoons of mini marshmallows and 2 tablespoons of chopped walnuts or almonds along with the chocolate chips.
- Double Chocolate Cherry: Add 2 tablespoons of dried tart cherries (chopped) and use dark chocolate chips. The cherry-chocolate combo is unreal.
- “Cookie Dough” Style: Use vanilla protein powder, skip the cocoa powder, and use ½ cup of oat flour. Fold in mini chocolate chips. It’s like eating safe-to-consume cookie dough!
Jackson’s Chef Notes & Kitchen Stories
This recipe has become such a staple in my home that I hardly measure anymore—I just go by feel. The funniest thing? I once accidentally used chili-spiced cocoa powder (meant for a mole sauce experiment). The result? Spicy chocolate protein bites! My friend loved them, and it became a requested variation. So don’t be afraid of a happy accident.
The recipe has evolved too. I started adding a touch of espresso powder (just ½ tsp) to intensify the chocolate flavor, and it’s a game-changer for fellow coffee lovers. Remember, cooking is about making it yours. If you want it sweeter, add a splash of maple syrup. If you want more crunch, add cacao nibs. This is your kitchen, your rules. Just make sure you have fun with it.
Your Questions, Answered
Q: My dough is too wet and sticky! What do I do?
A: No sweat! Just add a little more oat flour, a teaspoon at a time, until it’s manageable. It can depend on your protein powder’s absorbency or the nut butter you might have added.
Q: Can I make these without protein powder?
A> Absolutely. Substitute it with an additional ¼ cup of oat flour (or almond flour). The texture will be slightly different but still delicious. You could also try collagen peptides if you have those.
Q: How long do they last, and can I freeze them?
A: They’ll stay perfect in the fridge for 1-2 weeks in an airtight container. And yes, they freeze beautifully for up to 3 months! Just thaw in the fridge or at room temperature for a few minutes.
Q: My bites are too dry/crumbly. Help!
A> Next time, add that extra tablespoon of milk or a teaspoon of maple syrup or honey. The chia seeds also continue to absorb moisture in the fridge, so if they seem a bit dry right after mixing, they might perfect up after chilling.
No-Bake Protein Brownie Bites (Fudgy, Healthy & High-Protein)
- Total Time: 40 minutes
- Yield: 10 Bites 1x
Description
These no-bake Protein Brownie Bites are deeply fudgy, perfectly sweet, and loaded with nutrients. Made with oat flour, chia seeds, and protein powder, they’re the kind of snack that tastes like dessert but fuels like a workout buddy. Easy to prep, naturally sweetened, and free from refined junk.
Ingredients
½ cup oat flour
¼ cup cocoa powder
⅓ cup chocolate chips (melted or folded in)
¼ cup protein powder (chocolate or vanilla)
1 tbsp chia seeds
¼ tsp vanilla extract
Pinch of salt
2–4 tbsp milk of choice (as needed for texture)
Instructions
In a mixing bowl, combine oat flour, cocoa powder, protein powder, chia seeds, and salt.
Stir in vanilla and milk, one tablespoon at a time, until a dough forms.
Fold in or drizzle with melted chocolate chips.
Roll into bite-sized balls and refrigerate for 30 minutes to set.
Store chilled and enjoy anytime you need a chocolatey protein boost.
- Prep Time: 10 minutes
- Cook Time: 30 minutes
Nutrition
- Calories: 110 / Bite
- Sugar: 4g / Bite
- Fat: 5g / Bite
- Carbohydrates: 10g / Bite
- Fiber: 2g / Bite
- Protein: 6g / Bite
Nutritional Info & Prep Details
Please note: This is an estimate and can vary based on specific ingredient brands and substitutions used.
Prep Time: 10 minutes | Chill Time: 30 minutes | Total Time: 40 minutes | Yield: ~10 bites
Per Bite (Approximate):
Calories: ~110 | Protein: 6g | Fat: 5g | Carbohydrates: 10g | Fiber: 2g | Sugar: 4g
These bites are a fantastic source of plant-based protein and fiber, thanks to the oat flour, chia seeds, and protein powder. The healthy fats and complex carbs provide sustained energy, making them a much smarter choice than a processed snack bar. They’re naturally sweetened by the chocolate chips, keeping added sugars in check.
Final Thoughts: Let’s Keep Melding Flavors!
And there you have it! Your secret weapon against boring snacks and midday slumps. I hope these No-Bake Protein Brownie Bites show you just how easy and fun it is to make healthy choices that don’t sacrifice an ounce of flavor. They’re proof that a little creativity in the kitchen can solve so many cravings.
I’d love to hear how your batch turns out! Did you add a twist? Was it a hit with your family? Tag me on social @FoodMeld or drop a comment on the blog. Sharing our kitchen wins (and even our funny fails) is what the Food Meld community is all about.
Now, go enjoy those bites. You’ve earned them. Until next time, keep cooking with curiosity and eating with joy.
— Jackson


