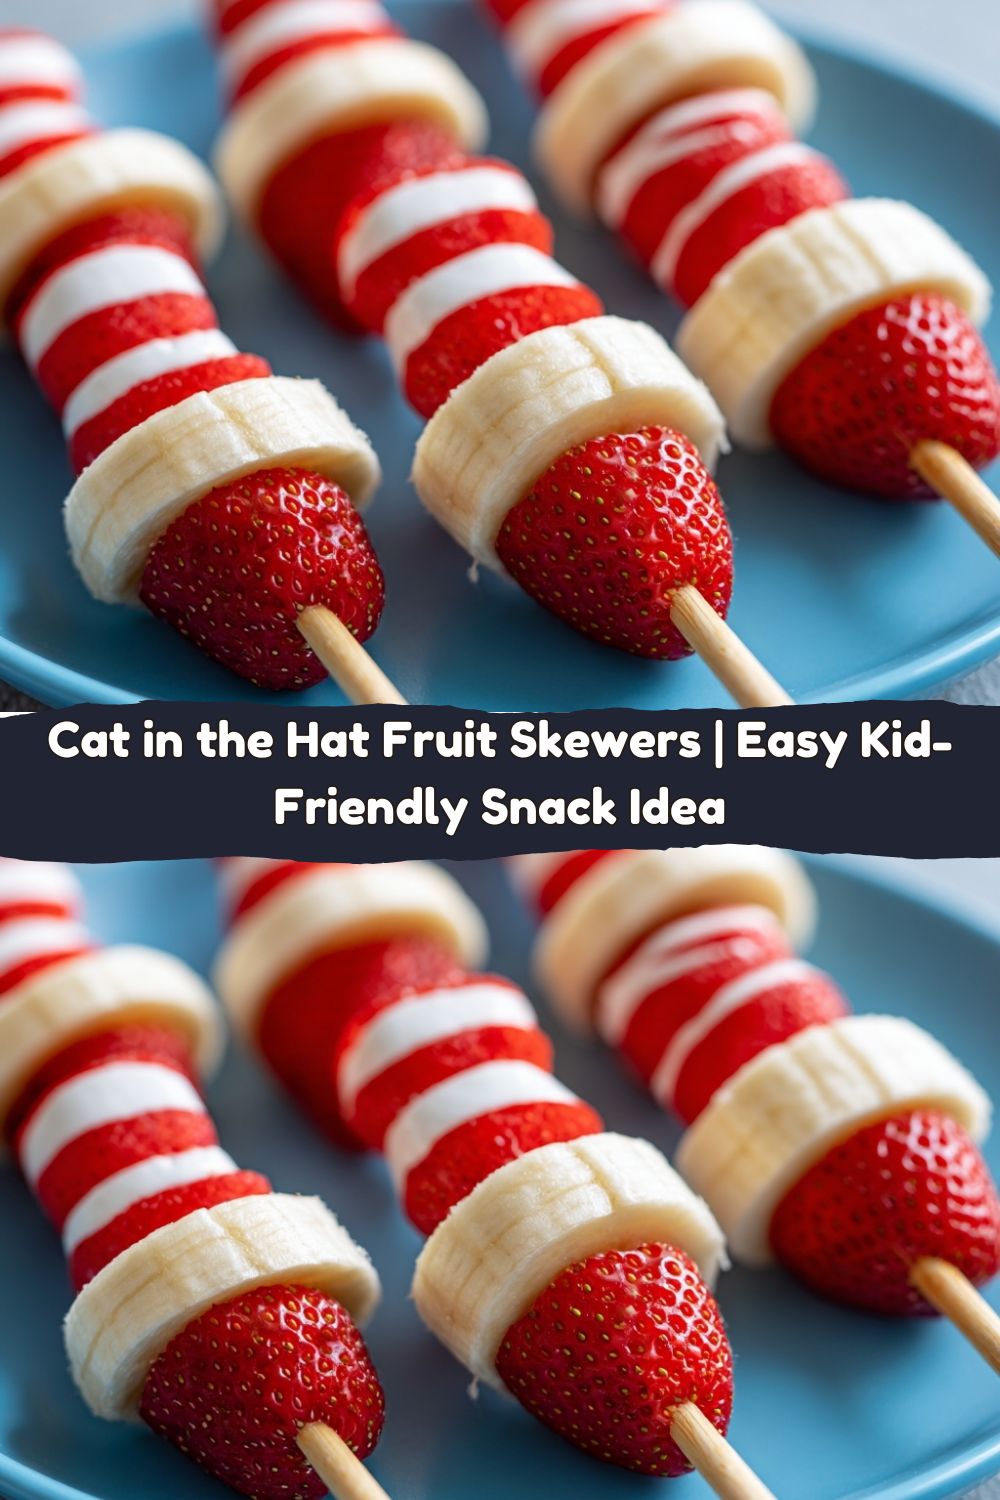
Cat in the Hat Fruit Skewers: Where Storytime Meets Snack Time!
Hey there, Food Meld fam! Jackson here. Let’s be real for a second: getting kids excited about healthy snacks can sometimes feel like trying to herd… well, Things 1 and 2. You want something nutritious, but they want something fun. What if I told you the secret weapon has been hiding on your bookshelf this whole time?
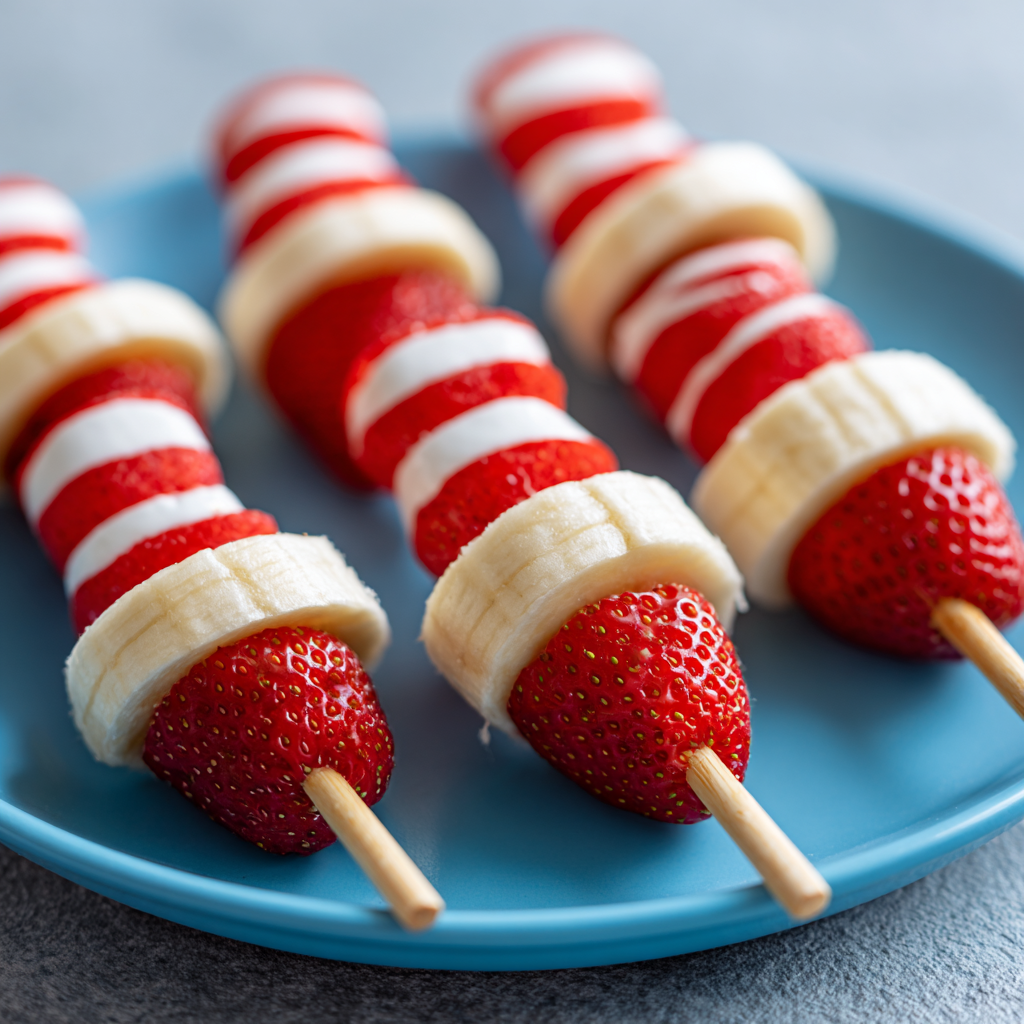
Today, we’re not just making a snack. We’re creating an experience. We’re taking a page straight out of a classic, beloved story and turning it into a bite-sized celebration. Enter: the Cat in the Hat Fruit Skewer. This is the ultimate kitchen magic trick—minimal effort, maximum wow factor. With just strawberries, bananas, and a little imagination, we’re building edible tributes to the most mischievous, hat-sporting feline in literature.
This isn’t about complicated techniques or fancy tools. This is about the joy of playing with your food, of seeing your kid’s eyes light up when they recognize the familiar red-and-white stripes from their favorite book. It’s about transforming the ordinary (fruit on a stick) into the extraordinary (a story you can eat!). Whether you’re prepping for a Dr. Seuss-themed birthday party, need a show-stopping snack for Read Across America week, or just want to inject a little Tuesday afternoon whimsy, these skewers are your ticket. So, grab your favorite apron, channel your inner “Cat,” and let’s cook (or rather, assemble) something awesome together.
The Book That Fed My Imagination (And My Stomach)
My love for food that tells a story? It probably started on the worn-out carpet of my elementary school library. I can vividly remember sitting cross-legged, utterly captivated as my librarian read The Cat in the Hat aloud. The chaos, the rhyming, that towering, perilous stack of things! But what stuck with me just as much was the imagery—the bold, graphic, red and white of that famous hat. It looked like a candy cane, like a peppermint, like something that should be edible.
Fast forward to my first real cooking gig, helping out at a summer camp. We needed a snack that was quick, healthy, and could quiet down 30 overexcited kids. The answer hit me like a splash from that infamous pink bath: fruit skewers. But not just any skewers. As I sliced the strawberries and bananas, the pattern emerged. Red, white, red, white… a culinary lightbulb went off. We called them “Magic Hat Sticks,” and I’ve never seen cucumbers and carrot sticks abandoned so quickly. The connection between a cherished story and a simple, healthy treat created a kind of magic that went beyond flavor. It was a reminder that the best cooking often starts not with a recipe, but with a memory.
Gathering Your Whimsical Ingredients
Beautifully simple, right? That’s the point. Here’s what you need to build your edible masterpieces, along with a few chef insights to make sure everything is *chef’s kiss*.
- 10 large strawberries: Look for berries that are uniformly red, firm, and fragrant. The size matters here—bigger berries give us those nice, wide “stripes” for our hat. Chef’s Insight: Don’t rinse them until you’re ready to use them, as extra moisture can make them soggy. If strawberries aren’t in season, don’t panic! You can use large chunks of red apple (tossed in a little lemon juice) or even watermelon cut into thick cubes.
- 2 just-ripe bananas: We want bananas that are yellow, maybe with a tiny freckle or two, but not mushy. Too green, and they’re starchy; too ripe, and they’ll squish on the skewer. Pro Tip: Buy them a day or two ahead if needed. They ripen perfectly on the counter while you plan your Seussian snack attack.
- 6 wooden skewers or lollipop sticks: The foundation of our hat! Standard 6-inch skewers are perfect for adult hands. For little ones, blunt-tipped lollipop sticks are safer and easier to grip. Fun Swap: For a truly “Cat in the Hat” vibe, you could use striped paper straws (just be cautious with very small children).
- Optional: Lemon juice: This is our anti-browning insurance policy. The citric acid in the lemon juice creates a protective barrier on the banana slices, keeping them looking fresh and bright for hours. Substitution Tip: No lemon? A little pineapple or orange juice works in a pinch, or you can use a product like “Fruit-Fresh.” But honestly, if you’re serving them immediately, you can skip it—the bananas will be fine!
Building Your Edible Masterpiece: Step-by-Step
Ready to play food architect? Let’s stack some stripes! This process is so simple and satisfying—a great activity to do with your mini sous-chefs.
Step 1: Prep Your “Stripes”
Wash your strawberries and pat them completely dry with a clean kitchen towel or paper towels. Grab a sharp paring knife. Here’s the key move: we’re not slicing from top to bottom. We’re slicing horizontally, right through the middle of the berry. You want to create two flat, round discs from each strawberry—these are the iconic red bands of the hat. If your strawberries have a very pointed tip, you can slice off a tiny bit from the bottom (non-stem end) to help it sit flat. Chef’s Hack: Save the strawberry tops! They’re perfect for blending into a smoothie, muddling into water, or composting. No waste in this kitchen!
Step 2: Slice the Bananas
Peel your bananas and lay them on your cutting board. Using the same knife, slice them into rounds about ½-inch thick. Why ½-inch? Thinner slices might break, and thicker slices can make the skewer wobbly. This is the Goldilocks zone for perfect stacking. If you’re using the lemon juice, now’s the time! Put your banana slices in a shallow bowl, give them a very light drizzle or spritz of juice, and toss them gently with your fingers to coat. A little goes a long way!
Step 3: The Grand Skewering!
This is where the magic happens. Lay out your skewers. We’re going to build from the bottom up, just like the Cat balancing his cake!
First, slide on a strawberry half, cut-side down. This is the wide brim of the hat, our solid foundation.
Next, add a banana slice. Then another strawberry half. Then another banana. See the pattern? Red, white, red, white.
My secret for a tall, proud hat: Aim for 3-4 banana slices and 3-4 strawberry halves per skewer, ending with a final strawberry half at the very top. Gently press the pieces together as you go so there are no big gaps, but don’t smash them. You want a tight, tidy stack. Fun Tip: Let kids design their own! They might want a short hat, a super tall hat, or even a “hat” that’s all strawberries. There are no wrong answers here.
Step 4: Serve & Celebrate!
You can serve these whimsical creations immediately on a fun platter. If you need to prep ahead, place them gently in a single layer on a plate or baking sheet, cover loosely with plastic wrap, and refrigerate for up to 2 hours. The lemon juice will work its magic, keeping everything picture-perfect until showtime.
How to Serve with Seussian Flair
Presentation is half the fun with a recipe like this! You’ve made these adorable snacks, now let’s give them a stage worthy of their charm.
Think about the world of Dr. Seuss: it’s curvy, quirky, and full of movement. Instead of a plain white plate, try serving your skewers sticking out of a bright blue vase or cup (to represent the “thing”-containing pot!), or lay them in a wavy line on a long, rectangular platter. For a classroom party, stand them up in a foam block or even a halved head of green cabbage to look like a whimsical garden.
Want to turn snack time into story time? Serve the skewers alongside the book! You could also add other thematic elements: a bowl of “Thing 1 & Thing 2” blueberries, some “Green Eggs” (maybe honeydew melon balls), or “Hop on Pop” popcorn. The goal is to create a moment of joy and connection. Watch as kids (and let’s be honest, adults too) grin when they make the connection between the story in their hands and the delicious, healthy treat in front of them.
Mix It Up! Creative Twists on the Classic
The basic formula is a launchpad for creativity. Here are a few ways to “Meld” it up and make this recipe your own:
- The “Truffula Tree” Twist: Swap the bananas for peeled, cored, and cubed pineapple (the yellow flesh). Use the red strawberries and alternate them with the pineapple cubes. It’s a vibrant, tropical hat that nods to The Lorax!
- Dairy-Free “Cream” Hat: For a richer, creamier white layer, use large marshmallows instead of bananas! They hold their shape perfectly and are a major kid-pleaser. (Note: not for very young children due to choking risk).
- Rainbow Hat Parade: Who says the hat has to be red and white? Use a variety of fruits to make a whole spectrum of hats! Try kiwi (green) and mango (orange), raspberries (pink) and pear (white), or blueberries and cantaloupe.
- The Grown-Up Garnish: Serving these at a book club or baby shower? Give each skewer a sophisticated drizzle right before serving—a tiny zigzag of dark chocolate or a light drizzle of honey-sweetened Greek yogurt mixed with a pinch of cinnamon.
- Deconstructed “Hat” Cups: For toddlers or a quicker option, skip the skewers. Simply layer diced strawberries and banana slices in clear cups, creating the red and white stripes in a glass. Top with a whole strawberry for the “brim.”
Chef’s Notes: A Pinch of Wisdom
This recipe has been my go-to “happy maker” for years, and it’s evolved in silly ways. I once made a six-foot-long “skewer” for a library event using a wooden dowel and giant foam fruit—now that was a photo op! The beauty of this concept is its resilience. I’ve made these with slightly soft bananas, with oddly shaped strawberries, and once, in a true kitchen scramble, with canned peach slices when I was out of bananas (it worked!).
The real lesson here? It doesn’t have to be perfect. If a banana slice breaks, eat it. If the stack is a little crooked, it has more character. The goal is fun, not flawless execution. Some of the best kitchen memories come from the little “oops” moments you laugh about later. So, embrace the playful spirit of the Cat himself, and don’t be afraid to make a happy mess.
FAQs & Troubleshooting
Q: How far in advance can I make these?
A: For the absolute best appearance and texture, assemble them no more than 2 hours before serving, especially if you skip the lemon juice. The bananas will start to soften and brown after that. If you need to prep earlier, you can pre-slice all your fruit, store the components separately in airtight containers in the fridge (bananas tossed in lemon juice), and assemble quickly right before the party starts.
Q: My bananas are browning even with lemon juice! What happened?
A: First, don’t worry—they’re still perfectly safe and tasty to eat! Browning can happen if the bananas were very ripe to begin with, or if they were coated in too much lemon juice (the excess acidity can break down the cells). Next time, use a lighter touch. A quick dip or a fine mist is better than a soak.
Q: Can I use other fruits?
A: Absolutely! See the variations above for inspiration. The core principle is a firm, sliceable fruit that creates contrast. Apples, firm pears, mango, even thick slices of kiwi can work. Just make sure to pat any very juicy fruit dry before skewering.
Q: Are these safe for young children?
A: Always supervise young children with skewers. For toddlers, I strongly recommend using blunt lollipop sticks and making shorter stacks. You can also remove the fruit from the stick for them and serve it as a deconstructed pile on their plate. Safety first, fun always.
A Note on Nutrition
Let’s talk about what’s powering this fun. These skewers may look whimsical and playful, but they’re quietly delivering a whole lineup of nutrients your body—and your kids’ bodies—will love. Strawberries are little red powerhouses packed with vitamin C, antioxidants, and fiber. They help support immunity, digestion, and overall energy. Bananas bring natural sweetness, potassium for growing muscles, and slow-burning carbs that keep little ones fueled through story time, play time, and everything in between.
And the best part? There’s no added sugar, no artificial colors, and no hidden ingredients here—just real, fresh fruit presented in a way that feels exciting. It’s the kind of snack that hits the sweet spot between “fun food” and “good-for-you food,” proving you don’t have to choose one or the other. If you’re looking to encourage healthier eating without the power struggle, these skewers are a delicious and delightful place to start.
Final Thoughts: A Snack Worth Smiling About
And there you have it, friends — the simplest little snack that somehow manages to feel magical every single time. These Cat in the Hat Fruit Skewers remind me why I fell in love with cooking in the first place: it’s not just about flavor, it’s about feeling. It’s about turning something ordinary into something memorable. It’s about watching kids giggle as they recognize the “hat,” or seeing adults light up with nostalgia from a book they haven’t thought about in years.
What I love most is how approachable this recipe is. No oven. No fancy tools. Just fruit, a stick, and a dash of whimsy. You can make them for a classroom, a themed party, a library event, or a quiet afternoon at home when you want to inject a little joy into snack time. And every single time, they deliver.
If you give these a try (and I really hope you do!), tag @FoodMeld so I can cheer you on. I love seeing how you put your own twist on my recipes — taller hats, rainbow hats, marshmallow hats… it all counts in my book. Thanks for being here, for cooking with me, and for bringing a little Seussian magic into your kitchen.
Until next time, keep it playful, keep it delicious, and never stop mixing fun with food.
— Jackson


