Carrot Patch Cupcakes: Your New Favorite Easter Tradition
Hey friends, Jackson here from Food Meld! Can you feel it? That little shift in the air? The sun’s hanging around a bit longer, the first brave flowers are popping up, and there’s this undeniable buzz of energy that only comes with spring. And right at the heart of it all, for me, is Easter. It’s not just a holiday; it’s a whole vibe. It’s about bright colors, big family tables, that joyful chaos of a kids’ egg hunt, and, let’s be real, some seriously good food.
But sometimes, we get stuck in a dessert rut. Same pie, same cake, year after year. I’m all about traditions, but I’m also about that “what if we tried this?” energy, remember? I wanted to create a dessert that captured the pure, playful magic of the season—something that would make both kids’ eyes go wide and adults sneak a second (or third) when they think no one’s looking.
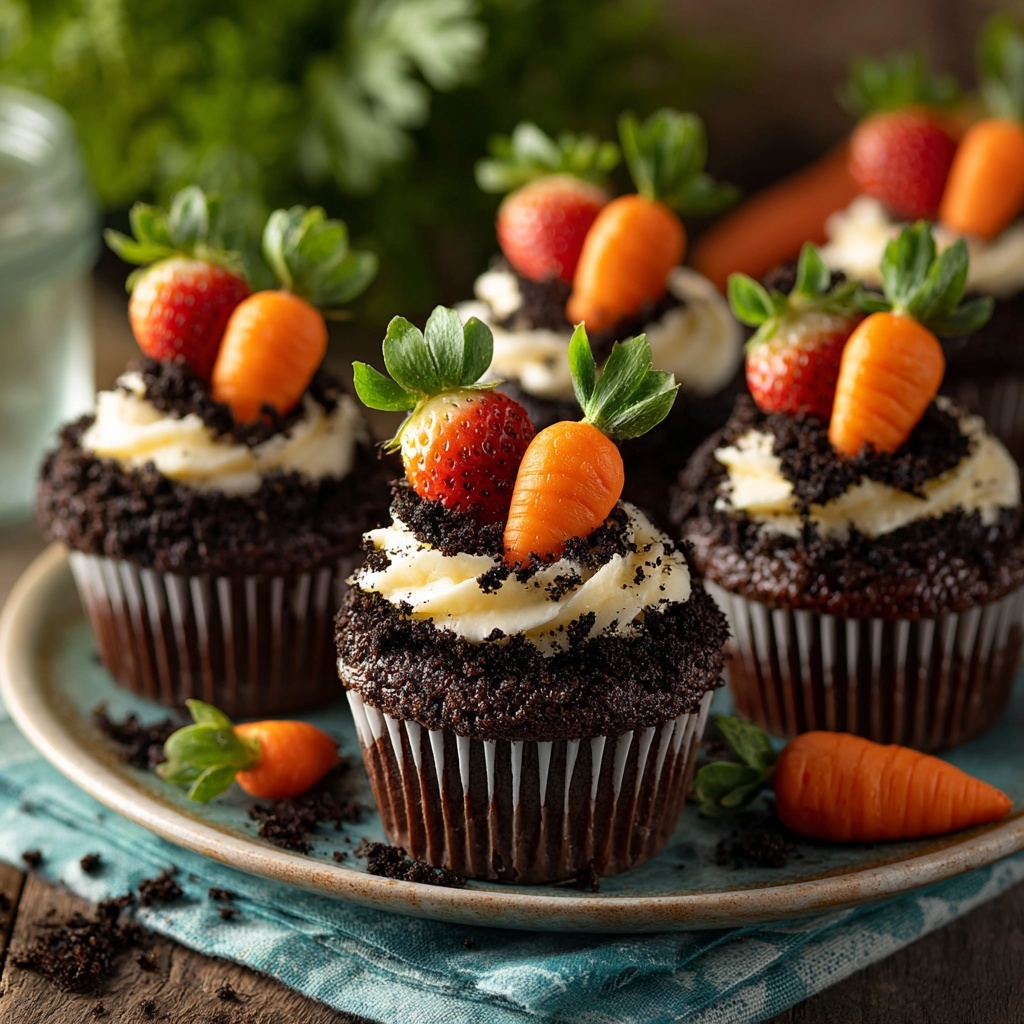
So, let’s talk about these Carrot Patch Cupcakes. We’re taking a deeply delicious, moist chocolate cupcake (the rich, dark “soil”), piling it high with crushed Oreo “dirt,” and then planting the cutest little “carrots” you’ve ever seen, made from chocolate-dipped strawberries. It’s part dessert, part edible art project, and 100% a guaranteed showstopper. The best part? It’s so much easier than it looks. This is about fun in the kitchen, not fuss. So, grab your favorite mixing bowl, and let’s dig into something truly awesome together.

The “Aha!” Moment: A Story from My Grandma’s Garden
This recipe didn’t just pop into my head out of nowhere. It’s got roots—pun totally intended. It takes me back to my Grandma Ginny’s backyard, a place that felt like a sprawling, wild kingdom to a five-year-old me. She had this tiny, perfect vegetable patch, and my designated “important job” was helping her pull up carrots.
I’d grip those green tops, give a gentle wiggle and a pull, and out would pop this bright orange treasure, covered in clumps of dark, rich earth. The contrast was everything—the vibrant carrot against the dark soil felt like finding buried gold. We’d rinse them off right there with the hose, and she’d let me take the first crunchy bite. It was sweet, earthy, and tasted like sunshine.
Years later, staring at a pint of strawberries and a plate of chocolate cupcakes, that memory came rushing back. What if I could turn that memory into a dessert? The chocolate cake was the perfect rich base, the Oreos made shockingly convincing “dirt,” and those strawberries, once dipped in orange chocolate, were the spitting image of my childhood treasures. It was a full-circle, flavor-meets-fun moment, and I knew I had to share it with you. It’s more than a cupcake; it’s a little bite of springtime joy.
Gathering Your Garden Tools & Ingredients
Here’s everything you need to build your edible carrot patch. I’ve added my chef insights and swaps so you can make this your own with what you’ve got!
- 1 box chocolate cake mix (plus the ingredients listed on the box) – This is our “simple, real, and packed with flavor” hack. I use a devil’s food mix for that deep, dark “soil” color. Chef’s Insight: Swap the water for hot coffee or milk, and use melted butter instead of oil for a richer, more homemade taste. Or, use your favorite homemade chocolate cupcake recipe—you do you!
- 15–18 fresh strawberries – The star of the show! Look for ones that are firm, brightly colored, and have a nice pointed tip to really sell the “carrot” shape. Pro Tip: Rinse and dry them THOROUGHLY. Any water will cause the chocolate to seize up.
- 1 cup orange candy melts – These are my go-to for easy dipping. They set quickly and have a perfect matte finish. Chef’s Swap: No candy melts? Use 1 cup of white chocolate chips plus 1-2 tablespoons of orange gel food coloring. Gel works better than liquid for vibrant color without messing with texture.
- 15–18 chocolate sandwich cookies (like Oreos) – Our “dirt!” The classic dark cookie with the cream filling is perfect. Chef’s Hack: Toss them in a zip-top bag and crush them with a rolling pin. Leave some bigger chunks for realistic texture!
- 1 tub chocolate frosting – This is the “glue” that holds our dirt on. I love a good fudge frosting here. Homemade Hero: If you’re feeling fancy, a quick buttercream with melted dark chocolate and a pinch of salt is next-level amazing.
- Optional: Fresh mint sprigs or green decorator icing – For the carrot greens! A tiny sprig of mint poked into the top of the strawberry is gorgeous and adds a fresh flavor note.
Let’s Build Your Garden: Step-by-Step
Okay, team! Let’s get our hands dirty (metaphorically first, literally with Oreo crumbs later). Follow these steps, and you’ll have a perfect patch in no time.
- Bake & Cool Your Foundation. Whip up your chocolate cupcake batter according to the package or recipe directions. I always line my muffin tin with festive liners—pastel colors are perfect for Easter. Fill them about 2/3 full and bake until a toothpick comes out clean. Here’s the most important step in this whole process: LET THEM COOL COMPLETELY. I’m talking room temperature. If you frost warm cupcakes, it’ll melt into a sad, soggy puddle. Patience makes perfect here!
- Craft Your Chocolate Carrots. While the cupcakes cool, let’s make our magic carrots. Melt your orange candy melts or white chocolate in a microwave-safe bowl in 30-second bursts, stirring well between each. You want it smooth and glossy. Hold a strawberry by the leaves (or the stem end), and swirl it in the chocolate, coating about ¾ of the way up. Let the excess drip off, then place it on a sheet of parchment paper. Repeat with all berries. If you’re using mint for greens, gently press a small sprig into the top of the strawberry while the chocolate is still wet. Let these set completely at room temperature. Speed Hack: You can pop the tray in the fridge for 10 minutes to speed things up!
- Create the “Dirt” Layer. Take your chocolate cookies and crush them! I love the zip-top bag method—it’s therapeutic. You want a mix of fine crumbs and some small pebble-sized bits. Pour this into a shallow bowl or plate. Now, generously frost your completely cooled cupcakes with the chocolate frosting. Don’t be shy!
- Plant Your Garden! Here’s the fun part. Take a frosted cupcake and, in one confident motion, press the top down into the bowl of cookie crumbs. Twist it a little to get full coverage. Lift it up, and boom—instant garden plot. Now, take a fully set chocolate strawberry “carrot” and gently press it into the center of the cupcake. You did it! Repeat with the rest of your cupcakes.
How to Serve Your Edible Masterpiece
Presentation is half the fun with these! You don’t just serve these on a plain plate. Let’s create a whole scene.
Arrange your cupcakes on a large serving platter or a rustic wooden board. Crumble a few extra Oreo crumbs around the base of the cupcakes to look like freshly tilled soil. For the ultimate garden party vibe, tuck in a few clean plastic gardening tools—a tiny shovel or rake—as decor. You can even write little “Carrot Patch” signs on toothpicks!
These are perfect for an Easter brunch centerpiece, the star of the kids’ dessert table, or as a delightful gift for neighbors. Hand them out in a little cardboard box lined with parchment paper—they’ll be the talk of the street.
Make It Your Own: Fun Twists & Swaps
Got a different vision? Or need to cater to an allergy? No problem. Here’s how to mix it up:
- Berry Patch Variation: Use the same concept but with different berries! Try coating raspberries in yellow candy melts for “corn kernels,” or blueberries in purple for “beets.” Get creative with your garden harvest.
- Gluten-Free Garden: Easily done! Use a certified GF chocolate cake mix and gluten-free chocolate sandwich cookies (like Glutino’s version). The rest is naturally gluten-free.
- “Dirt” Flavor Swap: Not a chocolate fan? Use vanilla cupcakes, vanilla frosting, and crush golden Oreos or graham crackers for a “sandy soil” look. Dip your strawberries in dark chocolate for a reverse color scheme!
- “Carrot” Shortcut: Short on time? Skip dipping the strawberries yourself. Look for pre-dipped orange chocolate strawberries at your local grocer or candy shop around Easter.
- Savory-Sweet Combo: Add a surprise inside the cupcake! Before baking, drop a small cube of cream cheese or a dollop of salted caramel into the center of each cupcake batter-filled liner. It bakes into a hidden, gooey treasure.
Jackson’s Chef Notes & Kitchen Confessions
This recipe has seen a few… experiments. The first time I tested it, I was so excited I tried to dip the strawberries while the cupcakes were still warm. Let’s just say I created a delicious but decidedly un-garden-like mudslide. Lesson learned: cooling is not a suggestion.
I’ve also learned that the brand of candy melts matters. Some set with a beautiful matte finish, others stay a bit shiny. Both are delicious, so don’t stress. If your chocolate is too thick for dipping, add a tiny, tiny bit of coconut oil (like ½ teaspoon) to thin it out for smoother coverage.
Most importantly, this is supposed to be fun. If your carrots look a little lopsided, or your dirt is uneven, that’s just part of the charm. It’s a homemade garden, after all! The laughter and the “wow!” moments you’ll get when you bring these out are the real secret ingredients.
Your Questions, Answered
Q: My candy melts/chocolate is clumpy and won’t coat the strawberries smoothly. What happened?
A: This usually means it got too hot or a tiny bit of water got in. Chocolate is finicky! For candy melts, try adding a splash of vegetable oil or paramount crystals (made for candy) and stir vigorously. For real chocolate, a tiny bit of coconut oil can help. And always ensure your strawberries are bone dry!
Q: Can I make these ahead of time?
A: Absolutely! You can bake and freeze the unfrosted cupcakes up to a week ahead. Thaw at room temperature before decorating. The chocolate-dipped strawberries are best made the day of, but you can store them in a single layer in the fridge for up to 24 hours. Assemble the full cupcakes a few hours before serving.
Q: The Oreo crumbs won’t stick to my frosting. Help!
A: This means your frosting might be a bit too stiff or the cupcakes are still slightly warm. Make sure your frosting is at a spreadable consistency. If it’s too thick, give it a quick stir or even a 5-second zap in the microwave to soften it slightly. A slightly sticky frosting surface is your best friend for adhesion.
Q: Any tips for kids helping with this recipe?
A> Yes! This is a fantastic kid-friendly project. Let them be in charge of crushing the Oreos (seal that bag tightly!), stirring the batter (supervised), and most fun of all—pressing the cupcakes into the “dirt” and planting the carrots. It’s messy, joyful, and creates the best memories.
Nutritional Info (A Quick Note)
Alright, let’s keep it real. This is a celebratory treat, through and through. While I’m all about balance, some desserts are just for joy. Here’s a general breakdown per cupcake (based on 18 cupcakes, using standard box mix and ingredients), so you can enjoy it mindfully.
Per Cupcake (Approximate): Calories: 310 | Carbohydrates: 38g | Protein: 2g | Fat: 17g | Saturated Fat: 8g | Sugar: 28g | Sodium: 240mg
Remember, you can lighten things up slightly by using a sugar-free cake mix, light frosting, or by just enjoying one (good luck with that—they’re addictive!). But for a holiday like Easter, I’m a firm believer in savoring the real, delicious deal with your favorite people.
Let’s Keep the Fun Growing
And there you have it, friends—your guide to creating the most fun, festive, and downright delicious Easter dessert on the block. These Carrot Patch Cupcakes are more than just a recipe; they’re an experience. They’re about playing with your food, sparking joy, and creating a moment of pure, edible magic around your table.
I hope you bake up a batch, get a little messy, and share those “you’ve gotta try this!” moments with the people you love. That’s what Food Meld is all about. If you make them (and I really hope you do), tag me on social @FoodMeld—I wanna see your beautiful, creative gardens!
Until next time, keep mixing it up, making it yours, and enjoying every single bite. Happy Easter, and happy baking!
— Jackson


