The Easiest, Most Magical Easter Treat You’ll Ever Make
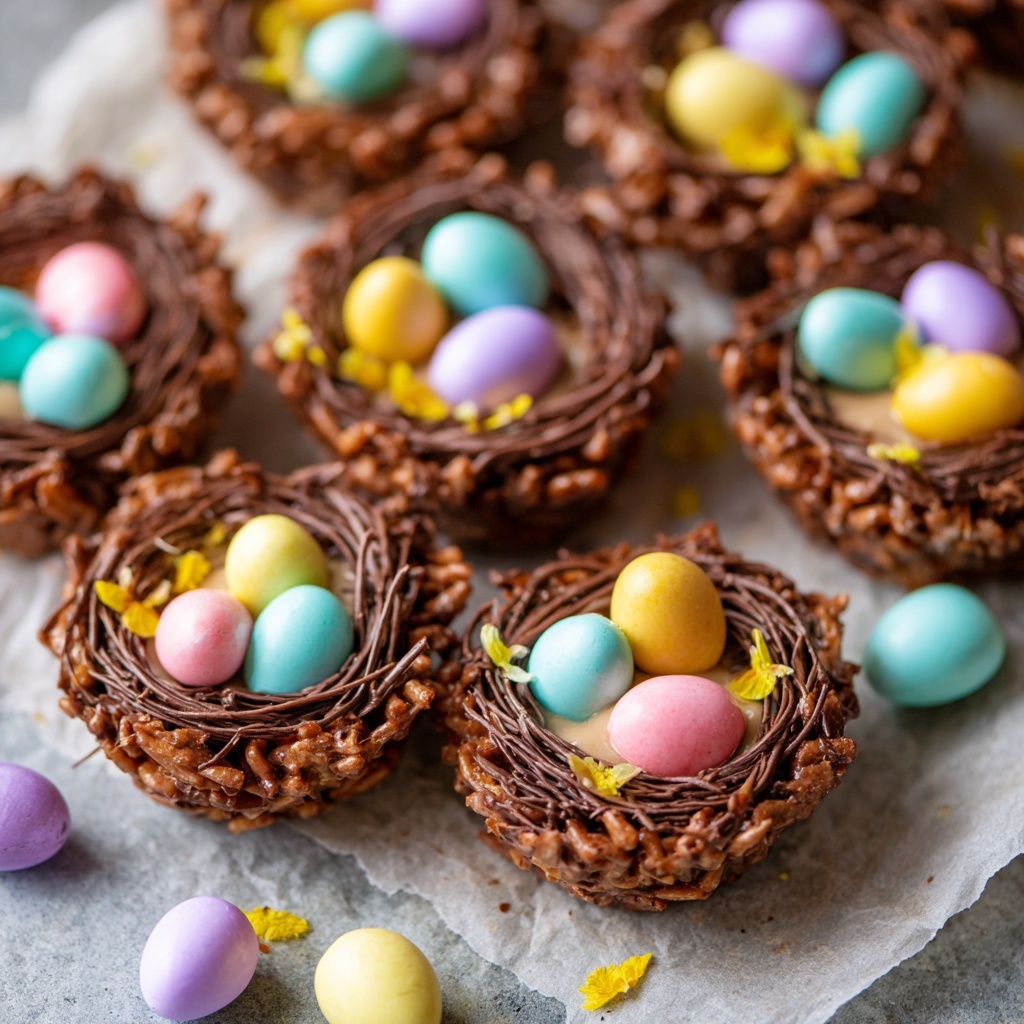
Hey friends, Jackson here from Food Meld. Can we talk about that magical intersection where a dessert is ridiculously easy, totally adorable, and absolutely delicious? That’s my sweet spot, and these Chocolate Nest Cookies hit it perfectly. We’re talking crunchy, chocolaty little nests cradling pastel mini eggs—a treat that screams spring and brings a smile to everyone’s face, from the littlest helper to the most seasoned foodie at the table.
The best part? You don’t even need to turn on your oven. That’s right, this is a no-bake wonder. In about 45 minutes flat—most of which is just letting them chill—you can have a platter of these charming cookies ready to wow your crew. Whether you’re prepping for an Easter brunch, a spring potluck, or just need a fun kitchen project with the kids on a rainy afternoon, this recipe is your new best friend. It’s forgiving, flexible, and packed with that “creative twist” energy I love so much. So, tie on an apron, grab a big mixing bowl, and let’s create some delicious, mess-is-okay memories together.

A Nostalgic Nibble: My First “Chef” Moment
This recipe takes me straight back to my grandma’s linoleum-floored kitchen, where I was officially promoted from “observer” to “sous chef” at the ripe age of six. Her version used cornflakes and butterscotch chips, and my job was the most important one: gently folding the cereal into the melted chocolate so we didn’t crush all the crunch. I remember the sheer concentration on my face, my tongue peeking out the side of my mouth, and the monumental pride I felt when she let me place the jelly bean “eggs” in the center of each nest.
That moment—the smell of melting chocolate, the sticky spoon in my hand, her patient guidance—is baked into my food DNA. It taught me that cooking isn’t about perfection; it’s about the joy of creating something with your own two hands (even if they get a little messy). It’s the feeling I try to bring to every recipe on Food Meld. When I make these nests now, I still get that same kid-like grin. It’s a simple recipe, but it’s woven with the magic of tradition, playfulness, and shared joy. That’s the flavor that really matters.
What You’ll Need: Simple Ingredients, Big Flavor
Here’s the beautiful shortlist for our edible art project. I’ve included my favorite swaps and chef-y insights so you can make this recipe work with what you’ve got!
- 2 cups Chow Mein Noodles OR Cornflakes: This is your “nest” structure! Chow mein noodles give you that classic, authentic woven look and a fantastic crunchy-chewy texture. Cornflakes are a brilliant, more accessible swap—they offer a lighter, flakier crunch and hold the shape wonderfully. No need for exact precision here; just lightly fill your measuring cup.
- 1 cup Semi-Sweet Chocolate Chips: The rich, chocolaty glue that holds it all together. I like semi-sweet for its balanced flavor that isn’t too sweet. Chef Tip: Using good-quality chocolate chips makes a noticeable difference here—they melt smoother and taste richer. In a pinch, milk chocolate or dark chocolate chips work great too!
- ½ cup Creamy Peanut Butter: This acts as a secondary binder, adds a hint of salty richness, and makes the chocolate coating extra luscious. For a nut-free version, swap in an equal amount of Biscoff cookie spread (for a caramelized cinnamon vibe) or Nutella (for a double chocolate-hazelnut punch).
- ¼ cup Butterscotch Chips (Optional but Highly Recommended): My grandma’s secret weapon! A handful of butterscotch chips melted in with the chocolate adds a layer of buttery, caramel-like depth that’s honestly addictive. If you don’t have them, it’s still delicious without.
- 1 bag Mini Chocolate Eggs or Candy-Coated Eggs: The jewel-toned finish! These are your “eggs.” You can use the candy-shell chocolate eggs, mini robin’s eggs, or even jelly beans for a fruity twist. Get creative with the colors!
Let’s Build Some Nests: Your Foolproof Guide
Ready? This is where the fun (and the minimal mess) happens. I’ll walk you through every step with my favorite kitchen hacks.
Step 1: Prep Your Landing Zone. Line a large baking sheet with parchment paper or a silicone baking mat. This is non-negotiable for easy cleanup and prevents the nests from sticking. Set this aside. Now, measure out all your ingredients (this is called *mise en place* – fancy term for “having your stuff ready”) so you can move smoothly.
Step 2: Melt the Magic Glue. In a large, microwave-safe bowl, combine the chocolate chips, peanut butter (or your chosen spread), and butterscotch chips if using. Microwave in 30-second bursts, stirring vigorously with a spatula after each burst. This usually takes about 90 seconds total. Chef Hack: Stop when there are still a few unmelted chips or lumps. The residual heat as you stir will melt them completely, preventing you from overheating and seizing the chocolate. You want it smooth and glossy!
Step 3: The Gentle Fold. Time to add your chosen nest material. Dump your chow mein noodles or cornflakes into the bowl of melted chocolate. Here’s the key move: using a large rubber spatula, gently fold the mixture. Don’t stir aggressively! We want to coat every piece beautifully without smashing all our lovely crunch. Take your time here—ensure every noodle or flake gets kissed by that chocolatey goodness.
Step 4: Shape with Love (and a Spoon). Using two spoons or a cookie scoop, drop heaping tablespoon-sized mounds onto your prepared baking sheet. Leave a couple of inches between them. Now, take the back of your spoon and gently press into the center of each mound, pushing outwards slightly to create a nest-like indentation and shape. It doesn’t have to be perfect! Rustic nests are charming.
Step 5: The Grand Finale – Adding the Eggs! This is the best part, and a perfect job for little helpers. Press 2 or 3 mini eggs into the center of each chocolate nest. Gently push them down so they nestle in and stay put.
Step 6: Chill Out. Carefully transfer the baking sheet to the refrigerator. Let the nests chill for at least 30 minutes, until the chocolate is completely firm and set. This is the hardest part—waiting! But trust me, it’s worth it for the perfect snap.
How to Serve These Little Masterpieces
Presentation is half the fun with these guys! Once they’re set, you can arrange them on a simple platter, but let’s get creative. Scatter a little shredded coconut (toasted or green-colored for “grass”) on the platter first, then nestle the cookies on top. It looks incredible. For a spring party, place each nest in a pastel-colored mini cupcake liner for individual servings—it keeps fingers clean and looks super festive.
These are the ultimate treat to bring to a gathering. They travel like a dream (just keep them cool) and are always the first dessert to disappear. Pair them with a pot of fresh coffee, a glass of cold milk, or even a bubbly mimosa for the adults. They’re sweet, satisfying, and an instant conversation starter.
Mix It Up! Creative Twists on the Classic Nest
One of my core Food Meld principles is “make it yours.” This recipe is a fantastic canvas for your own flavor experiments. Here are a few of my favorite twists:
- Salted Caramel Pretzel Nest: Swap the cornflakes for broken-up pretzel sticks or mini twists. Use the butterscotch chips and add a tiny pinch of flaky sea salt to the melted chocolate mixture. The sweet-salty-crunchy combo is unreal.
- Tropical Coconut Nest: Use toasted coconut flakes as your main “nest” material (you might need a touch more chocolate/PB to bind). Press in mango or passionfruit-flavored jelly beans for the “eggs.” Instant island vacation!
- Cookie Butter Crunch Nest: Use Biscoff spread instead of peanut butter, and fold in 1/2 cup of crushed Biscoff cookies along with the chow mein noodles. This is a next-level, spiced-speculoos dream.
- “Everything But The…” Trail Mix Nest: Go wild! Use a mix of cornflakes, chow mein noodles, mini pretzels, and even a handful of raisins or chopped nuts. It’s a kitchen sink approach that’s always a hit.
- White Chocolate Berry Nest: Use white chocolate chips as your base. Fold in freeze-dried raspberries or strawberries (crushed a bit) for a gorgeous pink hue and tart flavor. Use yogurt-covered berries or raisins as your “eggs.”
Jackson’s Chef Notes & Kitchen Stories
Over the years, I’ve made probably a hundred batches of these. I’ve learned a thing or two! First, the mixture might seem a little loose when you first fold it, but it firms up perfectly as it chills. Resist the urge to add more “stuff”—trust the process. Second, if you’re in a warm climate or your kitchen is hot, let them set in the freezer for 15 minutes instead. They’ll be rock-solid and less prone to melting on your fingers.
A funny story: I once tried to get *too* creative and used spicy ghost pepper chocolate. Let’s just say my “fiery bird nest” experiment was not a hit with the family. The classic combo exists for a reason! But hey, that’s the “what if we tried this?” energy in action—sometimes you win, sometimes you learn. With this base recipe, you’re definitely going to win.
Your Questions, Answered
Q: My chocolate mixture got thick and clumpy when I added the cereal. What happened?
A: Sounds like the chocolate might have seized or cooled too much. Next time, ensure your bowl is completely dry before melting (even a drop of water can cause seizing). If it happens, you can gently re-warm the whole mixture in the microwave for 10-15 seconds to loosen it up.
Q: Can I make these ahead of time?
A: Absolutely! They are fantastic make-ahead treats. Store them in a single layer in an airtight container in the refrigerator for up to 5 days. You can also freeze them for up to a month—just thaw in the fridge before serving.
Q: Are they gluten-free?
A> They can be! Ensure you use certified gluten-free cornflakes and check that all your other ingredients (chocolate chips, etc.) are GF. Chow mein noodles typically contain wheat.
Q: The nests are too fragile and falling apart.
A> This usually means you needed a bit more of the “glue” (chocolate/PB mixture). Next batch, try adding an extra 1-2 tablespoons of peanut butter or 1/4 cup more chocolate chips. Also, packing the mounds slightly when shaping helps them hold together.
Nutritional Info (A Quick Note!)
Okay, let’s be real—these are a celebratory treat, not a health food. But I believe in transparency! The info below is a general estimate per cookie (assuming a batch of 12). Using cornflakes and peanut butter, and without butterscotch chips, each nest comes in around: 180 calories | 9g fat | 22g carbs | 3g protein. Using a nut-free spread like Biscoff will change these values slightly (often a bit higher in sugar). The beauty of homemade treats is you control the ingredients and the portion size. Enjoy one or two mindfully as part of your spring celebration!
Let’s Keep the Fun Going!
And there you have it! My go-to, no-fuss, maximum-fun Easter treat. I hope this recipe brings as much laughter and deliciousness to your kitchen as it has to mine over the years. Remember, cooking is about the experience—the chocolate on your thumb, the kids arguing over who gets to put the last egg in, the proud moment you set them on the table. Don’t stress over perfection.
I’d love to see your creations! Tag me @FoodMeld on social media so I can admire your beautiful nests and your creative twists. Got a question or a genius variation I have to try? Drop it in the comments below. Now, go make something awesome—and have a blast doing it.
Happy cooking,
Jackson


