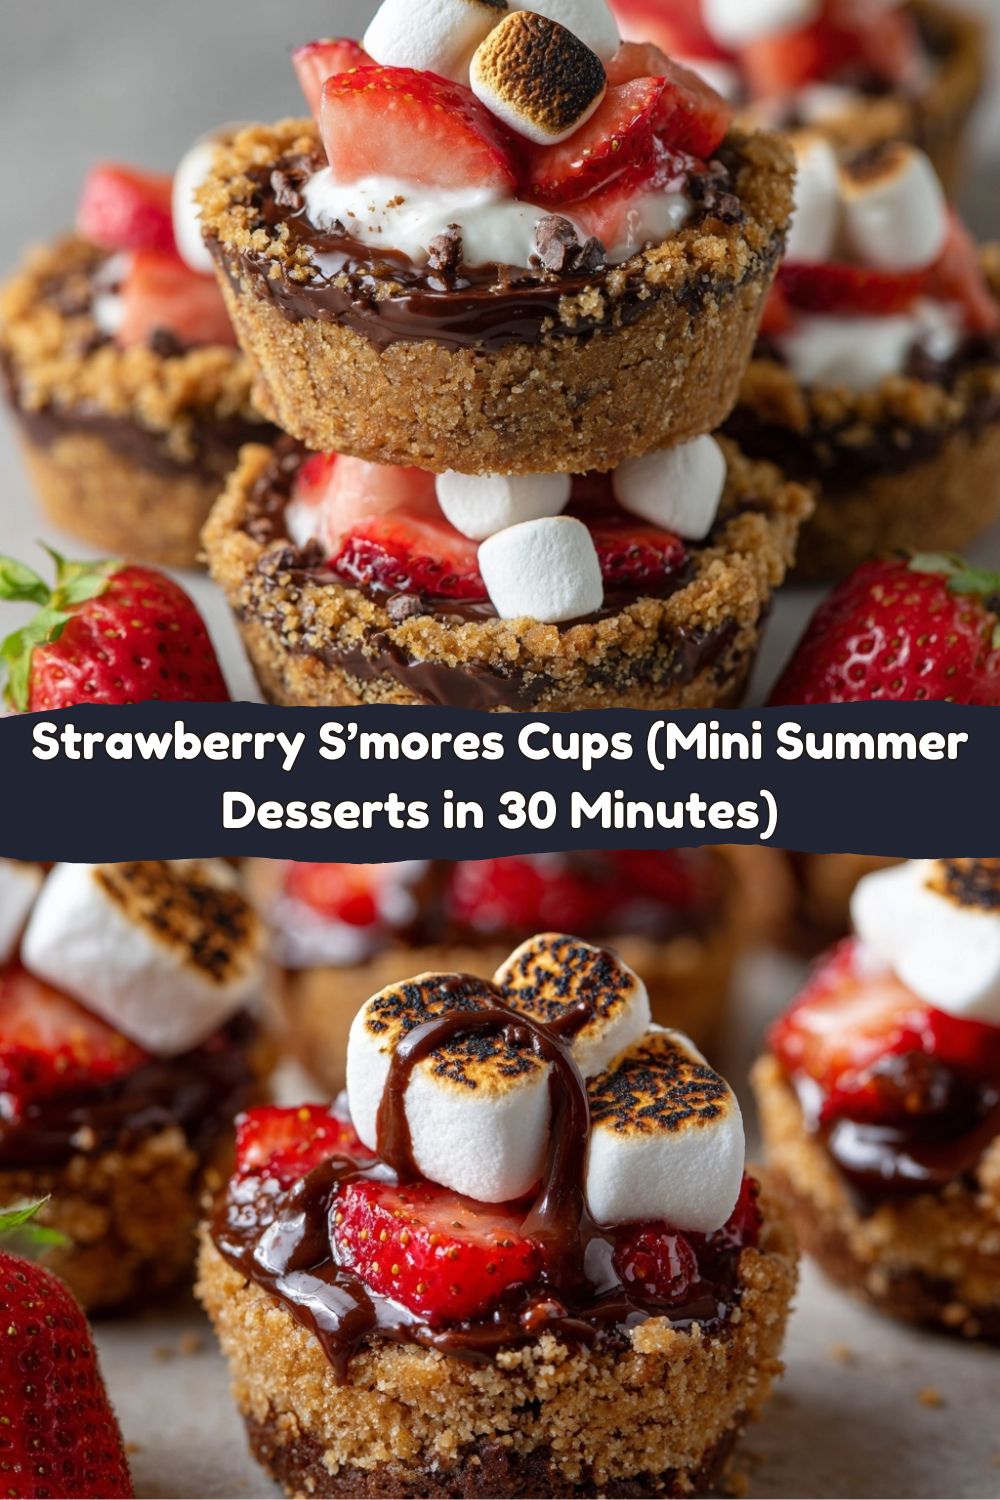
Strawberry S’mores Cups: Your New Favorite Bite of Summer
Hey friends, Jackson here from Food Meld. Let’s talk about that magical moment when you bite into something and your brain just goes, “Whoa. This is it.” That’s the feeling I chase in my kitchen, and it’s exactly what I’m bringing you today. We’re taking a classic—the humble, glorious, campfire s’more—and giving it a juicy, vibrant, totally Instagram-worthy glow-up. Introducing Strawberry S’mores Cups.
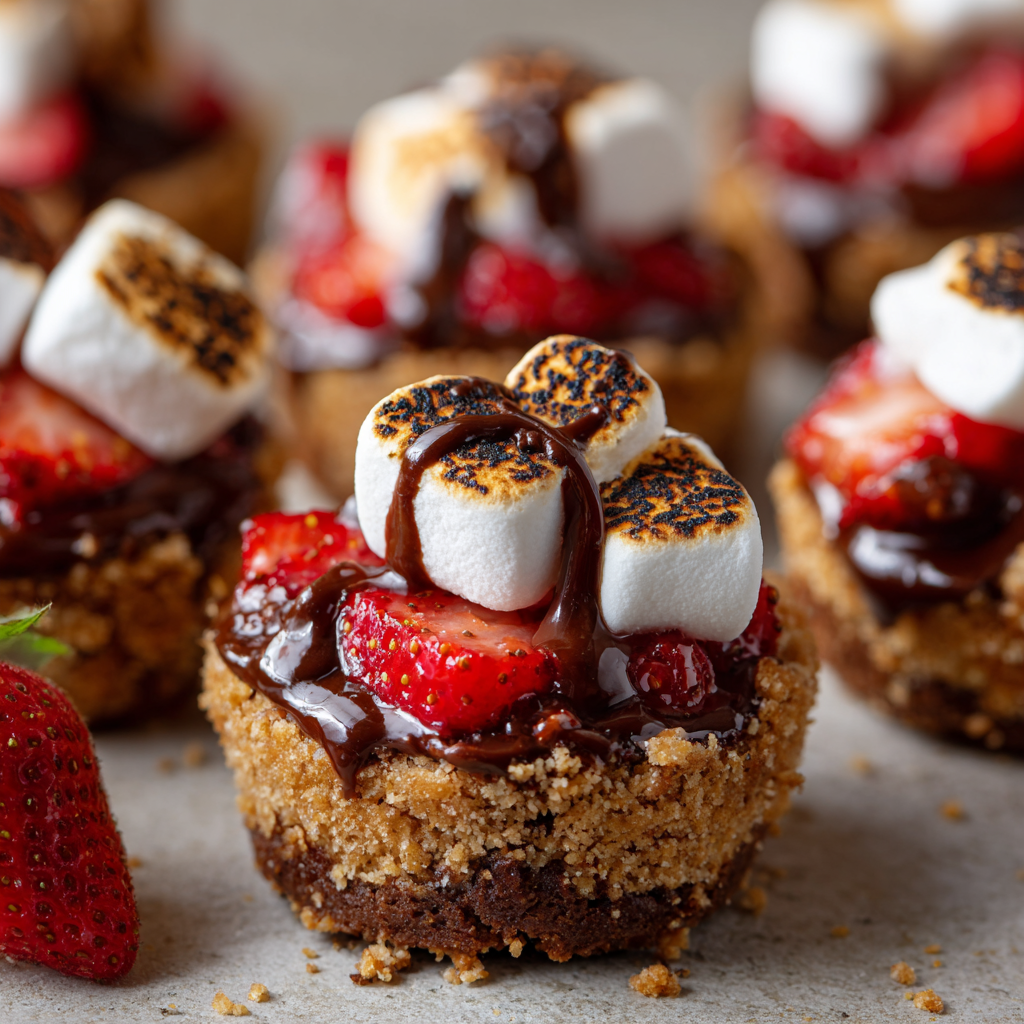
Imagine this: a buttery, crunchy graham cracker crust. A pocket of melty, rich chocolate. A sweet, fresh burst of strawberry. All crowned with a perfectly toasted, gooey marshmallow top. It’s a flavor explosion that manages to be nostalgic and exciting all at once. The best part? You don’t need a single log, fire pit, or mosquito repellent to make it happen. Your oven does all the “campfire” work for you.
I created these cups for those nights when you crave that s’mores magic but want something a little more special, a little more “wow,” and a whole lot easier to share (or, you know, not share). They’re the ultimate crowd-pleaser—perfect for potlucks, backyard BBQs, or just treating yourself after a long day. They come together in under 30 minutes, they’re almost impossible to mess up, and they deliver that unforgettable, flavor-packed experience I’m always raving about. So, preheat that oven, grab your mini muffin pan, and let’s turn your kitchen into the coolest dessert spot in town. Let’s cook something awesome together!
The S’more That Started It All: A Sticky, Sweet Memory
My love affair with s’mores goes way back. Picture an 8-year-old me at my grandparents’ lake house in Georgia, holding a whittled-down stick that was definitely a little too long, trying to roast a marshmallow without setting my eyebrows on fire. The goal was always the same: achieve that perfect golden-brown shell without the dreaded charcoal-black “flamethrower” result. My granddad, a man of few words but incredible grilling skills, would just chuckle and say, “Patience, Jack. Good things take time.”
When that marshmallow was finally ready, we’d sandwich it between graham crackers and a slab of Hershey’s, and the resulting messy, gooey, chocolate-smeared masterpiece was pure happiness. It wasn’t just a dessert; it was an event. The crackle of the fire, the laughter, the stars—it all got baked into that first bite.
These Strawberry S’mores Cups are my way of bottling that feeling. The strawberry twist came from my wife, actually. One summer, we had a haul of berries so ripe and sweet they were practically begging to be involved. We tossed a few into a classic s’more, and it was a revelation. The bright, slightly tart berry cut through the sweetness and added this incredible fresh dimension. I knew I had to build a recipe around it. This is that recipe—a little piece of my Southern summer childhood, remixed with a creative, “what-if-we-tried-this” twist. It’s fun, it’s messy in the best way, and it’s absolutely packed with flavor.
What You’ll Need: Simple Ingredients, Big Flavor
Here’s the beautiful part: you only need a handful of simple ingredients to create these flavor bombs. I’ll walk you through each one, because knowing your ingredients is the first step to making a recipe truly your own.
- 1 cup graham cracker crumbs: This is our foundation. That iconic, honey-kissed, slightly cinnamon flavor is non-negotiable for authentic s’mores vibes. Chef’s Insight: You can buy pre-crushed crumbs, but I often just throw whole crackers into a zip-top bag and roll them with a rolling pin. It’s weirdly therapeutic. For a gluten-free swap, gluten-free graham-style crackers work perfectly.
- ¼ cup (4 tablespoons) unsalted butter, melted: This is the glue that holds our crust together and gives it that rich, tender crunch. Using unsalted lets you control the salt level. Sub Tip: Vegan butter or even coconut oil works great here for a dairy-free version.
- 2 tablespoons granulated sugar: A little extra sweetness to caramelize the crust slightly as it bakes, making it extra sturdy and delicious.
- ¼ cup chocolate chips or chopped chocolate: The heart of the operation! I like semi-sweet chips for balance, but this is your playground. Use milk chocolate for classic nostalgia, dark chocolate for a more grown-up bite, or even a flavored bar like sea salt or orange. Chef’s Hack: A small, flat square of a chocolate bar melts beautifully and looks gorgeous.
- 6–8 fresh strawberries, hulled and finely chopped: Our star twist! Look for berries that are red all the way through and smell sweet. The juicy burst they provide is everything. Pro Tip: Pat them dry with a paper towel after chopping to prevent too much liquid from seeping into the crust.
- 12 mini marshmallows (or 6 regular, halved): The crowning glory. Minis are the perfect size, but halving a big one works too. For that ultimate gourmet touch, seek out vanilla bean marshmallows—they’re a game-changer.
Let’s Build These Cups: Step-by-Step with Chef Jackson
Alright, team. Time to get our hands dirty (in the sweetest way possible). Follow these steps, and you’ll be in s’mores heaven in no time. I’ve packed each one with my best tips to guarantee your success.
- Prep and Preheat: First, crank your oven to 350°F (175°C). This is our “campfire.” While it heats, grab your mini muffin pan and give it a very light coating of non-stick spray or butter. Trust me, this makes the “pop-out” moment later so much smoother. Little Hack: I sometimes preheat the empty pan for a minute or two. A hot pan helps the crust set faster, giving it an extra crisp edge.
- Make the Crust: In a medium bowl, combine your graham cracker crumbs, melted butter, and sugar. Mix it with a fork until it looks like wet sand and holds together when you pinch it. The texture should be like a dense, buttery beach. Chef’s Commentary: Don’t be shy here—really work that butter in. It’s what creates that perfect, packable texture.
- Form the Cups: This is the fun part! Scoop about 1 tablespoon of the crust mixture into each muffin cup. Now, take something with a flat bottom—a small shot glass, the end of a wooden spoon, even your thumb—and press the crumbs down firmly and evenly, pushing them slightly up the sides to form a little cup. A solid, compact crust is key; it won’t crumble when you eat it. Pro Tip: I do one pan at a time, focusing on getting those cups perfect.
- First Bake: Slide the pan into your preheated oven and bake for just 5-6 minutes. You’re not looking for color, just for the crust to set. It will smell amazing. This quick pre-bake ensures our base stays crisp under the juicy strawberries and melty chocolate.
- The Flavor Layers: Pull the pan out (carefully—it’s hot!). Now, let’s layer up the magic. Into each warm crust cup, drop a few chocolate chips (or a chocolate square). Then, add a small spoonful of your chopped strawberries, right on top of the chocolate. The residual heat will start melting the chocolate already—this is a good thing!
- Top & Toast: Finish each cup with a mini marshmallow (or a halved large one), plopping it right on top. Return the pan to the oven for just 2-3 minutes. Watch it like a hawk! You want the marshmallows to puff up, get glossy, and develop those perfect golden-brown spots. Watch Out: They go from perfect to *whoosh* very quickly. Oven times vary, so use your eyes, not just the timer.
- The Grand Finale – Cooling: This is the hardest step: patience. Let the pan cool on a wire rack for at least 10-15 minutes. The cups need time to firm up, and the molten sugar in the marshmallow needs to cool from “lava” to “divinely gooey.” Once they’ve settled, gently run a small offset spatula or butter knife around the edges to loosen and pop them out.
How to Serve & Savor Your Creation
Presentation is part of the fun! For that ultimate “viral” look, arrange your Strawberry S’mores Cups on a simple white or rustic wooden board. The contrast makes the golden marshmallows and red berries pop. Dust the whole platter with a tiny bit of powdered sugar or graham cracker crumbs for a bakery-finished touch.
These are best served slightly warm, when the chocolate is still a bit saucy. Pile them on a plate and let everyone dig in. I love serving them with small spoons for a neater experience, but honestly, just eating them with your hands is the most authentic (and fun) method. For a next-level dessert spread, pair them with a bowl of fresh berries, a dollop of whipped cream for dipping, or even a small glass of cold milk for the full nostalgic effect. They’re the star of the show, so keep it simple and let them shine!
Make It Yours: Creative Twists & Swaps
One of my favorite things about this recipe is how incredibly adaptable it is. Once you’ve mastered the basic formula, the flavor world is your oyster. Here are a few of my favorite twists to spark your creativity:
- Salted Caramel Pretzel: Swap the graham crumbs for crushed pretzels! Add a few mini chocolate chips, then before the marshmallow, add a tiny drop of thick salted caramel sauce. The sweet-salty-crunchy combo is insane.
- Peanut Butter Cup Dream: After the first bake, add a few peanut butter chips or a small dab of natural peanut butter with the chocolate. Top with the strawberry and marshmallow. It’s like a gourmet PB&J s’more.
- Tropical Escape: Replace the strawberry with finely chopped pineapple or mango. Use dark chocolate and add a tiny sprinkle of toasted coconut to the crust mixture. Welcome to paradise.
- Raspberry & White Chocolate: A stunning combo! Use white chocolate chips or chunks and fresh raspberries instead of strawberries. The tart berries and sweet white chocolate are a match made in heaven.
- “Everything But the Kitchen Sink” S’more: Feeling wild? Mix a handful of mini chocolate chips and chopped strawberries RIGHT INTO the graham crust. Then proceed as normal for a double-dose, loaded cup.
Chef Jackson’s Notes from the Kitchen
This recipe has seen a few iterations in my test kitchen. The first batch? I overfilled the strawberry and ended up with delicious but slightly soggy-bottomed cups. Lesson learned: a little berry goes a long way! The other funny fail was trying to use a kitchen torch instead of the oven for the marshmallows. While it *looked* pro, it toasted the top without warming the chocolate and berry underneath. The oven method is truly the best for getting everything perfectly, uniformly warm and gooey.
These cups have become my go-to for last-minute get-togethers. I often pre-make the crusts and keep them in the pan at room temperature for a few hours, then do the layering and final bake right before guests arrive. The smell alone is a welcome they’ll never forget. Remember, cooking is about the joy of it. If a marshmallow gets a little too toasty, call it “artisanal” and keep going. The best recipes, like the best memories, aren’t about perfection—they’re about flavor and fun.
Your Questions, Answered (Let’s Troubleshoot!)
Q: My crusts are crumbling when I try to take them out of the pan. What did I do wrong?
A: This usually means they weren’t packed firmly enough in step 3. Really use some pressure when forming the cups! Also, make sure you’re using the full amount of butter—it’s the essential binder. Letting them cool completely before removal is also crucial.
Q: Can I make these ahead of time?
A: You can prep the crusts in the pan a day ahead, cover tightly, and store at room temp. For best results, assemble and do the final bake within an hour of serving. Leftover fully assembled cups will keep in an airtight container for a day, but the marshmallow will lose its toast and the crust will soften.
Q: My marshmallows exploded/burned really fast! Help!
A> Ovens can have hot spots. Try positioning your rack in the center of the oven. And remember, 2-3 minutes is a guideline. Start checking at 90 seconds. If you have a convection setting, avoid it for this step—the direct fan can brown them unevenly.
Q: Can I use frozen strawberries?
A> I don’t recommend it for this recipe unless you thaw and drain them *extremely* well. Frozen berries release a lot of water, which will make the crust soggy. Fresh is definitely best here for texture and flavor.
Nutritional Information (A Quick Note)
Okay, let’s be real: these are a treat, and they’re meant to be enjoyed as such! That said, I know many of you like to have a general idea of what you’re enjoying. The following is an estimate for one Strawberry S’mores Cup, calculated using standard ingredients. Remember, using different chocolate or butter will change these numbers.
- Calories: ~130
- Total Fat: 6g
- Saturated Fat: 3.5g
- Carbohydrates: 17g
- Fiber: 1g
- Sugars: 11g
- Protein: 1g
This recipe is a fantastic example of how a small, intentional portion of something decadent can be completely satisfying. It’s all about that mindful indulgence!
Final Thoughts: Go Make Some Memories
And there you have it, friends—Strawberry S’mores Cups that pack an entire summer evening into one perfect, gooey bite. These little treats are more than just a recipe; they’re an invitation. An invitation to slow down for a moment, to savor something warm and sweet, to let nostalgia and creativity collide in the best way.
Make them for a backyard hangout. Make them for your kids after school. Make them for a date night, a girls’ night, or just because you want to bring a little spark of joy into an ordinary day. Recipes like this aren’t just about flavor—they’re tiny memory-makers. And the best part? You don’t need a campfire. Just a muffin pan, a handful of ingredients, and a few minutes of fun in the kitchen.
So go on. Turn on the oven. Toast a marshmallow. Build something delicious. And when you take that first bite—chocolate melting, berry bursting, marshmallow stretching—let yourself smile. You just made a moment worth remembering.
Now get out there and create some sweetness. You’ve earned it.


