Warm Up Your Morning: My Cozy Maple Pear Baked Oatmeal Cups
Hey friends, Jackson here from Food Meld. Let’s talk about mornings. Specifically, those chilly, gotta-get-out-the-door-but-still-want-something-awesome mornings. You know the ones. You’re staring into the pantry abyss, willing a delicious breakfast to magically appear. You want something warm, something comforting, something that tastes like a hug in food form, but you also don’t have time for a big production. Sound familiar?
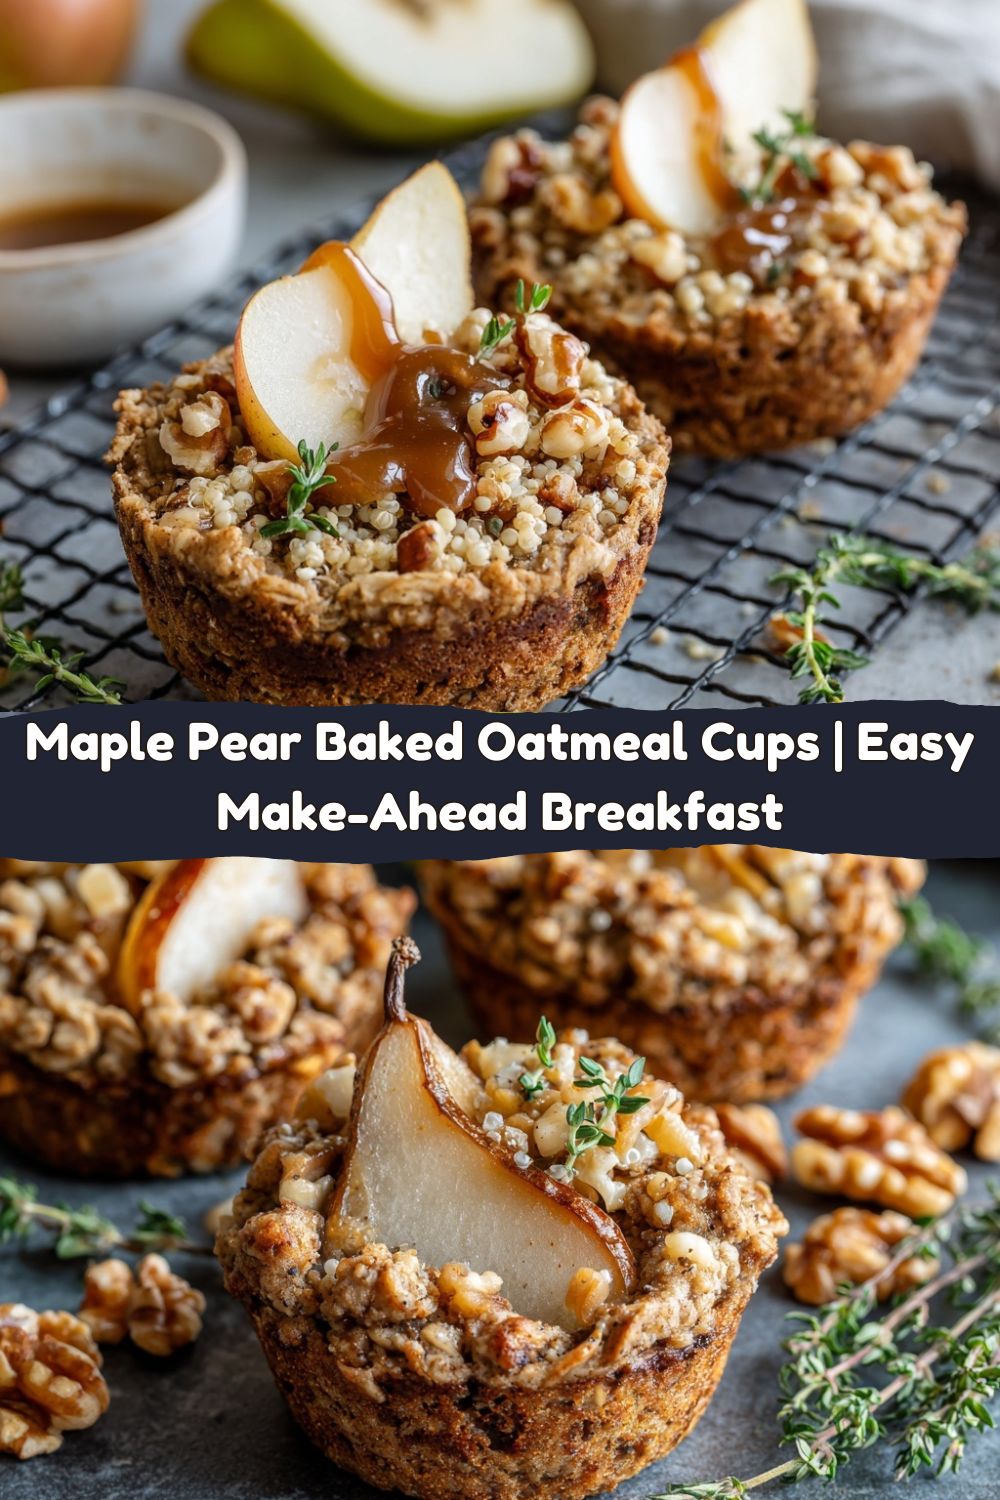
Well, pull up a chair, because I’m about to change your breakfast game forever. Forget the sad, soggy bowl of microwaved oats. We’re leveling up. We’re making Maple Pear Baked Oatmeal Cups.
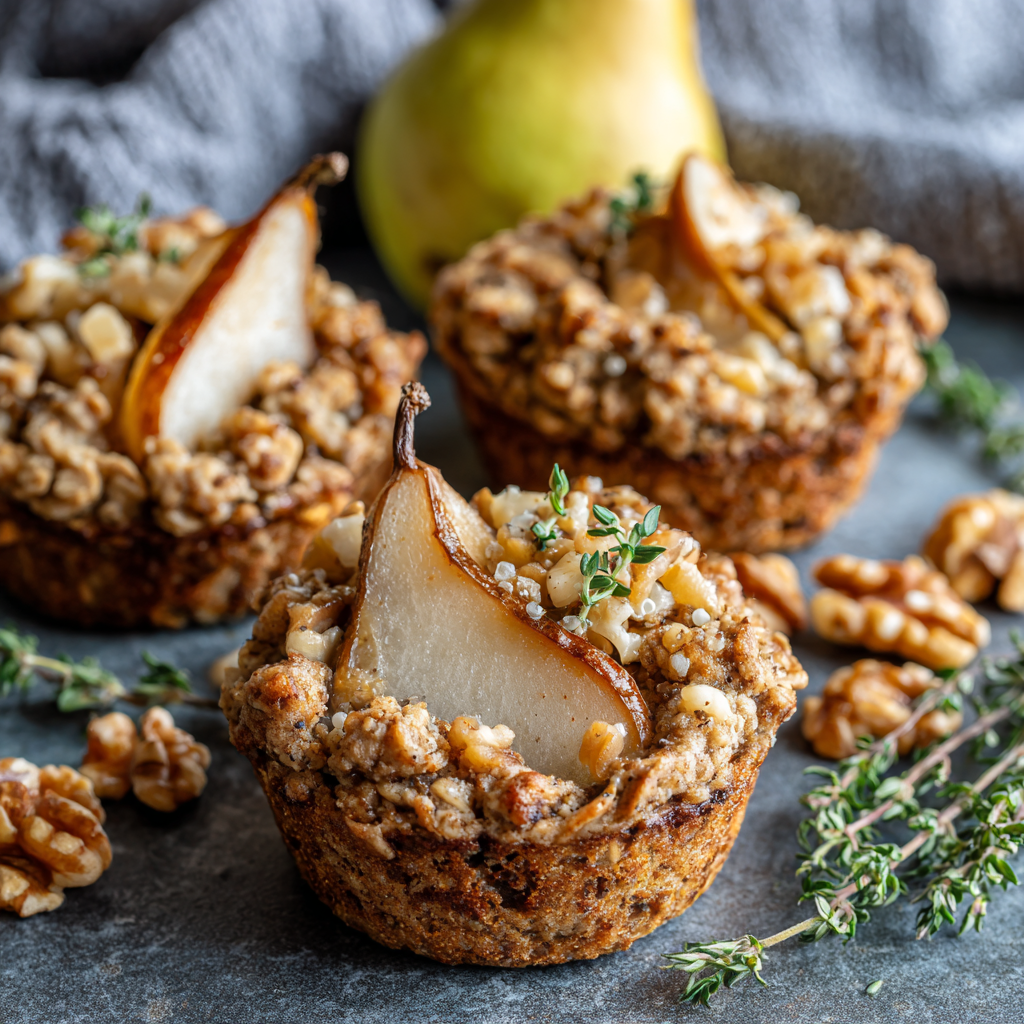
Imagine this: tender, spiced oatmeal baked into perfect little portable cups. They’re packed with juicy, roasted pear slices and sweetened with just the right amount of real maple syrup. And the crowning glory? A seriously addictive crunchy topping of toasted walnuts and quinoa puffs that gives you that perfect contrast in every single bite. These little guys are the ultimate fusion of nourishing and nostalgic. They’re your new best friend for meal prep, they freeze like a dream, and they make your whole kitchen smell like a cozy autumn morning. This is the kind of “you’ve gotta try this” moment I live for. So, preheat that oven, and let’s cook something awesome together.
The Story Behind the Bite: A Happy Little Kitchen Accident
This recipe has its roots in one of my favorite kitchen memories. A few years back, I was visiting my grandma down South, and she was determined to teach me her “famous” apple crisp. Well, yours truly, in a moment of enthusiastic distraction, may have grabbed the pear basket instead of the apple one. We didn’t realize it until we were already layering the sliced fruit with brown sugar and cinnamon.
Instead of starting over, Grandma just winked and said, “Well, Jackson, let’s see what this ‘Pear Crisp’ is all about.” The result was a revelation! The pears became incredibly soft and almost caramelized, a little sweeter and more floral than apples. It was a happy little accident that stuck with me. When I started playing with baked oatmeal, that memory came flooding back. I knew I had to capture that same magic—the tender, roasted pear, the warm spice, the crunchy nut topping—but in a form you could hold in your hand with your morning coffee. And just like that, these Maple Pear Baked Oatmeal Cups were born. Thanks, Grandma!
Gathering Your Flavor Crew: The Ingredients
This is where the fun begins. We’re using simple, real ingredients that work together to create something truly special. Here’s your grocery list and a little chef insight on each one.
- 2 ripe pears, thinly sliced: I love using Bartlett or Anjou pears here because they hold their shape beautifully but get wonderfully soft and sweet when baked. Chef’s Tip: A little trick—if your pears are a bit firm, just pop them in a paper bag for a day or two to ripen up!
- 2 cups rolled oats (old-fashioned): This is our base! Rolled oats give the perfect texture—hearty but not gritty. Substitution: If you’re gluten-free, just make sure your oats are certified GF.
- ½ cup cooked quinoa or quinoa puffs: This is my secret weapon for an extra protein boost and a fantastic, light crunch, especially if you use quinoa puffs. Substitution: No quinoa? No problem! An equal amount of more rolled oats will work just fine.
- ½ cup chopped toasted walnuts: Toasting is non-negotiable here, friends! It unlocks their deep, nutty flavor and makes that topping incredible. Substitution: Pecans or almonds would be a delicious swap.
- 2 tsp cinnamon: The soul-warming spice. Don’t be shy with it.
- 1 tsp baking powder: Our little leavening agent that gives the cups a perfect, cake-like rise.
- ¼ tsp salt: Crucial for making all the other flavors pop. Trust me on this.
- 2 large eggs: These are the binder that holds our delicious creation together.
- 1 ¾ cups milk (dairy or plant-based): This is our liquid gold. I’ve made this with whole milk, almond milk, and oat milk, and they all work wonderfully. Use your favorite!
- ⅓ cup pure maple syrup: Please, for the love of flavor, use the real stuff! The deep, caramel notes are what make this dish sing. Chef’s Insight: This is where you taste the difference between good and unforgettable.
- 2 tsp vanilla extract: The flavor enhancer that makes everything taste richer and more homemade.
- Optional: fresh thyme sprigs for garnish: A little “cheffy” touch! The subtle, herby note pairs surprisingly well with the sweet pear and maple.
Let’s Build These Flavor Cups: Your Step-by-Step Guide
Alright, team, let’s get our hands dirty (figuratively, of course). This process is as easy as mix, pour, and bake. I’ll walk you through every step with my favorite hacks to ensure perfection.
- Preheat and Prep: Fire up your oven to 375°F (190°C). While it’s warming up, grab a standard 12-cup muffin tin. Give it a good spray with non-stick cooking spray or line it with muffin liners. Chef’s Hack: Even if you’re using liners, a quick spritz of spray will prevent any stubborn sticking. You’ll thank me later!
- Mix the Dry Team: In a large mixing bowl, combine your rolled oats, cooked quinoa (or quinoa puffs), chopped toasted walnuts, cinnamon, baking powder, and salt. Use a whisk to blend it all together. This isn’t just about mixing; it’s about getting the baking powder evenly distributed so every cup rises to fluffy perfection.
- Whisk the Wet Team: In a separate, medium-sized bowl, crack in your two eggs and give them a quick whisk. Now, pour in the milk, that glorious maple syrup, and the vanilla extract. Whisk it all until it’s one harmonious, smooth liquid. See how the maple syrup swirls in? That’s the good stuff.
- The Big Meld: This is the magic moment! Pour your wet ingredients into the bowl with the dry ingredients. Grab a sturdy spatula and gently fold everything together until there are no dry spots left. Chef’s Tip: Don’t overmix! A few lumps are totally fine. Overmixing can make the oats gummy. We’re going for tender, not tough.
- Portion and Top: Now, evenly divide the oatmeal batter among your 12 prepared muffin cups. They should be about ¾ of the way full. Next, artfully (or not-so-artfully—this is a no-judgment zone!) place a thin pear slice on top of each cup. As they bake, these pears will roast and caramelize, becoming the star of the show.
- Bake to Golden Perfection: Slide that muffin tin into your preheated oven and bake for 25-30 minutes. You’re looking for the tops to be set, the edges to be a beautiful golden brown, and a toothpick inserted into the center of a cup to come out clean. Your kitchen should smell absolutely incredible right now.
- The Finishing Touch: Carefully remove the tin from the oven and let the cups cool in the pan for about 10 minutes. This rest period is crucial—it lets them set up so they don’t fall apart when you take them out. Once they’re just warm, drizzle a little extra maple syrup over the top for a glossy, professional finish and, if you’re feeling fancy, add a tiny sprig of fresh thyme. It’s all about those little details!
How to Serve & Savor Your Creation
Okay, you’ve baked a masterpiece. Now what? These cups are incredibly versatile.
For the ultimate cozy experience, serve two cups warm, right out of the oven, with an extra drizzle of maple syrup and a pat of melting butter. Pair it with a hot cup of coffee or tea, and you have a weekend-worthy breakfast that took minimal effort.
For meal prep magic, let the cups cool completely on a wire rack before storing. They are perfectly portable! Toss a couple in a container for a grab-and-go breakfast all week. They’re fantastic at room temperature, but if you have a minute, a quick 30-second zap in the microwave brings back that fresh-from-the-oven warmth.
Feeling extra? Crumble one or two of these baked oatmeal cups into a bowl, pour a little warm milk or cream over them, and add some fresh berries. It’s like a deconstructed, super-charged oatmeal parfait. Seriously, don’t knock it ’til you’ve tried it.
Make It Yours: Creative Twists & Swaps
One of my favorite things about a great recipe is how you can make it your own. This base is a blank canvas for your culinary creativity. Here are a few of my favorite twists:
- Apple Cinnamon Swap: Not a pear person? Easy! Swap in a firm, sweet apple like Honeycrisp or Fuji. It’s a classic for a reason.
- Tropical Vibes: Let’s take a vacation! Use diced mango or pineapple chunks instead of pear, swap the walnuts for macadamia nuts, and use coconut milk for the liquid. A little shredded coconut in the topping? Yes, please.
- Berry Bliss: In the summer, fold a cup of fresh or frozen blueberries or raspberries right into the batter along with the dry ingredients. The bursts of berry juice are a fantastic surprise.
- Chocolate Chip Indulgence: For a treat that feels more like dessert, fold in ½ cup of dark chocolate chips into the batter. It’s a guaranteed hit with kids and adults alike.
- Pumpkin Spice Everything: In the fall, replace ¾ cup of the milk with canned pumpkin puree and add a teaspoon of pumpkin pie spice along with the cinnamon. Hello, autumn in a cup!
Jackson’s Chef’s Notes & Kitchen Stories
This recipe has evolved so much since that first batch. I originally made it as one big baked oatmeal in a square dish, but I found that for busy folks (like me!), the individual portions were just way more practical. The quinoa puffs were a later addition, too. I had a half-empty bag left over from making my kids a snack and just tossed it in on a whim. The extra crunch it added was a total game-changer!
A funny story: I once filmed a video for these and was so busy talking to the camera that I completely forgot to add the baking powder. The result was a batch of very dense, very sad-looking oatmeal hockey pucks. We had a good laugh about it, and it was a great reminder that even simple mistakes happen to everyone. So if your first batch isn’t perfect, just shake it off and try again. Cooking is all about the journey!
Your Questions, Answered (FAQs & Troubleshooting)
Q: Can I make these vegan?
A: You absolutely can! My favorite vegan swap is to use a “flax egg.” Mix 1 tablespoon of ground flaxseed with 2.5 tablespoons of water for each egg, let it sit for 5 minutes to gel up, and use that. Pair it with your favorite plant-based milk, and you’re good to go!
Q: My oatmeal cups are too wet in the middle. What happened?
A> This usually means they needed a few more minutes in the oven. Oven temperatures can vary! Next time, trust the toothpick test more than the timer. If it comes out with wet batter, give them another 3-5 minutes. Also, make sure you’re using rolled oats and not “quick oats,” which can absorb liquid differently and get mushy.
Q: How do I store and freeze these?
A> To store, let them cool completely and keep them in an airtight container in the fridge for up to 5 days. To freeze, place the cooled cups in a single layer on a baking sheet until frozen solid, then transfer them to a freezer bag. They’ll keep for up to 3 months. Reheat straight from the freezer in the microwave for 60-90 seconds, or thaw overnight in the fridge.
Q: Can I use quick oats instead of rolled oats?
A> I don’t recommend it. Quick oats are cut smaller and absorb liquid much faster, which can lead to a gummy, mushy texture. Rolled oats give you that perfect, hearty bite we’re looking for.
The Nourishing Breakdown (Because You’re Curious!)
Now, I’m not a nutritionist, but I love knowing what’s fueling my body. These baked oatmeal cups are a powerhouse of good stuff! The rolled oats and quinoa provide complex carbohydrates and fiber for sustained energy, keeping you full and satisfied all morning long. The eggs and milk add a solid punch of protein to help build and repair muscle. The walnuts bring healthy fats (hello, omega-3s!) which are great for your brain and heart. And the real maple syrup and pears give you natural sugars for a quick energy boost without the crash you’d get from refined sugar. It’s comfort food you can genuinely feel good about eating.
Approximate Nutritional Info per Oatmeal Cup: Calories: 190 | Protein: 5g | Carbs: 26g | Fat: 7g | Sugar: 8g
Your New Breakfast Routine Awaits
And there you have it, friends. My go-to recipe for turning an ordinary morning into something a little more special. These Maple Pear Baked Oatmeal Cups are everything I love about cooking: they’re simple, packed with real flavor, and designed to make your life easier and more delicious.
I hope this recipe brings as much joy to your kitchen as it has to mine. Remember, don’t be afraid to make it yours—add your favorite spices, swap the fruit, and find your own perfect combination. That’s what Food Meld is all about.
If you make them (and you totally should!), I’d love to see your creation. Tag me @FoodMeld on social media so I can cheer you on. Now, go forth and conquer your morning, one delicious bite at a time. Talk soon!
— Jackson


