The Quest for the Perfect Crunch
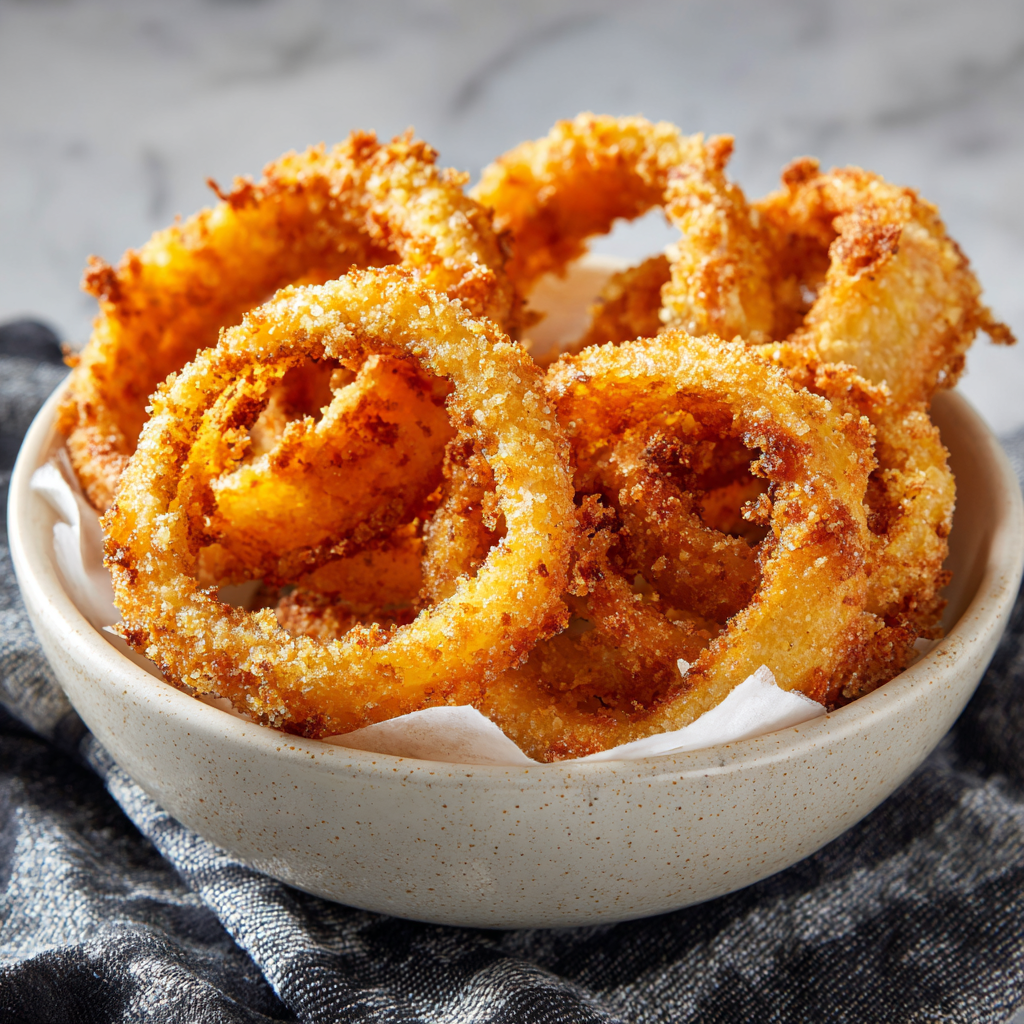
Hey friends, Jackson from Food Meld here. Let’s talk about one of life’s simple, glorious pleasures: the perfect onion ring. You know the one. It’s not just a side dish; it’s an event. That first crackle as you bite through a shatteringly crisp, golden-brown crust, revealing a sweet, tender, and steaming ring of onion inside. It’s a textural masterpiece, and honestly, it’s what snack dreams are made of.
Now, I know what you might be thinking. “Jackson, why make them at home when I can just get a basket at the pub?” And hey, I feel you. But let me tell you, a homemade onion ring is a different beast entirely. It’s fresher, it’s hotter, and you control the flavor from the first sprinkle of seasoning to the last dunk in the oil. We’re saying goodbye to soggy, greasy, cardboard-tasting imposters and hello to a light, craggy, incredibly crunchy coating that STAYS crispy. This recipe is my foolproof method, born from a whole lot of “what if we tried this?” energy in my own kitchen.
We’re using a simple but magical batter that puffs up into the most amazing texture, and I’m sharing all my little chef hacks to ensure success. Whether you’re piling these high for a game day spread, serving them alongside my Juicy Backyard Burgers, or just treating yourself to a seriously awesome snack, this recipe is your new best friend. So, tie on your apron, and let’s create some of that unforgettable, dippable magic together.
A Ring of Fire and Family
This recipe takes me straight back to my grandparents’ house in Georgia. My granddad was the undisputed king of the backyard fryer. Every major family gathering, without fail, he’d set up his station next to the grill. The air would be thick with the smell of charcoal and hot oil, and the sound of sizzling onion rings was our dinner bell.
I was his eager, if slightly messy, sous-chef. My job was to separate the onion rings and carry the finished, golden batches into the house. I’ll never forget the time I tried to carry a huge platter, tripped over the garden hose, and sent a beautiful batch of rings flying. I was devastated, ready for tears, but Granddad just laughed this big, booming laugh, helped me up, and said, “Well, Jackson, the dogs are gonna eat good tonight. Let’s make another batch—double this time.” We went back in, covered in grass stains, and fried up twice as many. That second batch tasted like pure joy. It was a lesson I’ve carried ever since: the best food isn’t about perfection; it’s about the fun, the mess, and the people you share it with.
Gathering Your A-Team: The Ingredients
This is where the magic starts. Simple, quality ingredients come together to create something truly special. Here’s your shopping list and why each one matters.
- 2 large yellow onions: These are our stars! Yellow onions have the perfect balance of sharpness and sweetness that mellows beautifully when cooked. Look for ones that are firm and feel heavy for their size. Chef’s Insight: Don’t go too thin with your slices—a solid 1/4-inch ring gives you that perfect onion-to-crust ratio.
- 2 cups buttermilk: This is our secret weapon for tenderizing and adding a subtle tang. The acidity in the buttermilk works wonders on the onion, making it melt-in-your-mouth soft. Substitution Tip: No buttermilk? No sweat! Mix 2 cups of regular milk with 2 tablespoons of white vinegar or lemon juice. Let it sit for 5 minutes until it curdles, and you’re in business.
- 2 cups all-purpose flour: The base of our batter. It creates the structure for that beautiful, crispy shell.
- 1/2 cup cornstarch: This is the crunch-enhancer! Cornstarch fries up lighter and crispier than flour alone. It’s the key to that shatteringly crisp texture we’re after.
- 1 tsp baking powder: Our leavening agent! It creates tiny bubbles in the batter, making it light, airy, and perfectly puffy as it hits the hot oil.
- 1 tsp paprika: For a touch of warm, sweet flavor and that gorgeous golden color. Smoked paprika would be a fantastic twist here for a hint of smokiness.
- 1/2 tsp garlic powder: Adds a savory, umami depth that complements the sweet onion perfectly.
- 1 tsp salt & 1/2 tsp black pepper: The essential seasonings! Don’t be shy here—this is what makes the crust taste amazing.
- 1 ½ cups cold sparkling water (or club soda): The second secret weapon! The carbonation creates an incredibly light, tempura-like batter that’s never heavy or doughy. Chef’s Hack: The colder it is, the crispier the final result.
- Vegetable oil, for frying: Use a neutral oil with a high smoke point like canola, peanut, or vegetable oil. You’ll need enough to come up about 2-3 inches in your pot or Dutch oven.
Let’s Build Some Crunch: Step-by-Step
Alright, team, this is where we turn those simple ingredients into golden glory. Read through all the steps once before you start, and remember: confidence is your best ingredient!
- Soak Those Rings: First things first, peel your onions and slice them into those perfect 1/4-inch thick rounds. Separate the slices into individual rings. In a large bowl, pour in the buttermilk and add all your onion rings. Give them a good stir to make sure every single ring is coated. Now, walk away. Let them soak for at least 30 minutes. Chef’s Tip: This soak is non-negotiable! It tenderizes the onion and helps the batter stick like glue. I sometimes do this an hour or two ahead of time and just let it hang out in the fridge.
- Whisk the Dry Goods: While the onions are taking their buttermilk bath, let’s make the batter base. In another large bowl, whisk together the flour, cornstarch, baking powder, paprika, garlic powder, salt, and pepper. Get it all combined so every bite is perfectly seasoned.
- Create the Magic Batter: Now, grab your ice-cold sparkling water. Slowly pour it into the flour mixture while whisking constantly. We’re looking for a smooth, thick batter that coats the back of a spoon. It should be like a heavy cream consistency. A few small lumps are totally fine—over-mixing is the enemy of a light batter! Little Chef Hack: Keep that batter cold! If your kitchen is warm, you can even place the bowl of batter inside a larger bowl filled with ice water.
- Heat the Oil Like a Pro: Pour your oil into a heavy-bottomed Dutch oven or a deep, large pot. You want it to be about 2-3 inches deep. Attach a deep-fry or candy thermometer to the side of the pot. This is your best friend here. Heat the oil over medium-high heat until it reaches a steady 375°F (190°C). Chef’s Tip: If you don’t have a thermometer, test the oil by dropping a small cube of bread into it. If it turns golden brown in about 30-45 seconds, you’re good to go!
- The Dip & Drip: Using one hand, take a handful of onion rings out of the buttermilk, letting the excess drip off. Drop them into the batter and use your other hand to coat them completely. Lift them out, letting any extra batter drip back into the bowl. This “one hand wet, one hand dry” method keeps you from becoming a batter-covered mess!
- Fry to Golden Perfection: Carefully lower a few battered rings into the hot oil. Don’t crowd the pot! Frying in batches is crucial. If you add too many at once, the oil temperature will plummet, and you’ll get greasy rings. Fry for 2-3 minutes, flipping once with a spider strainer or tongs, until they are a deep, uniform golden brown and incredibly crispy.
- Drain and Devour: As soon as they’re done, transfer the crispy rings to a wire rack set over a baking sheet or a plate lined with paper towels. Pro Move: The wire rack is better than just paper towels because it allows air to circulate, preventing the bottom from getting steamy and soft. Sprinkle them with a tiny pinch of salt while they’re still piping hot. Repeat with the remaining batches.
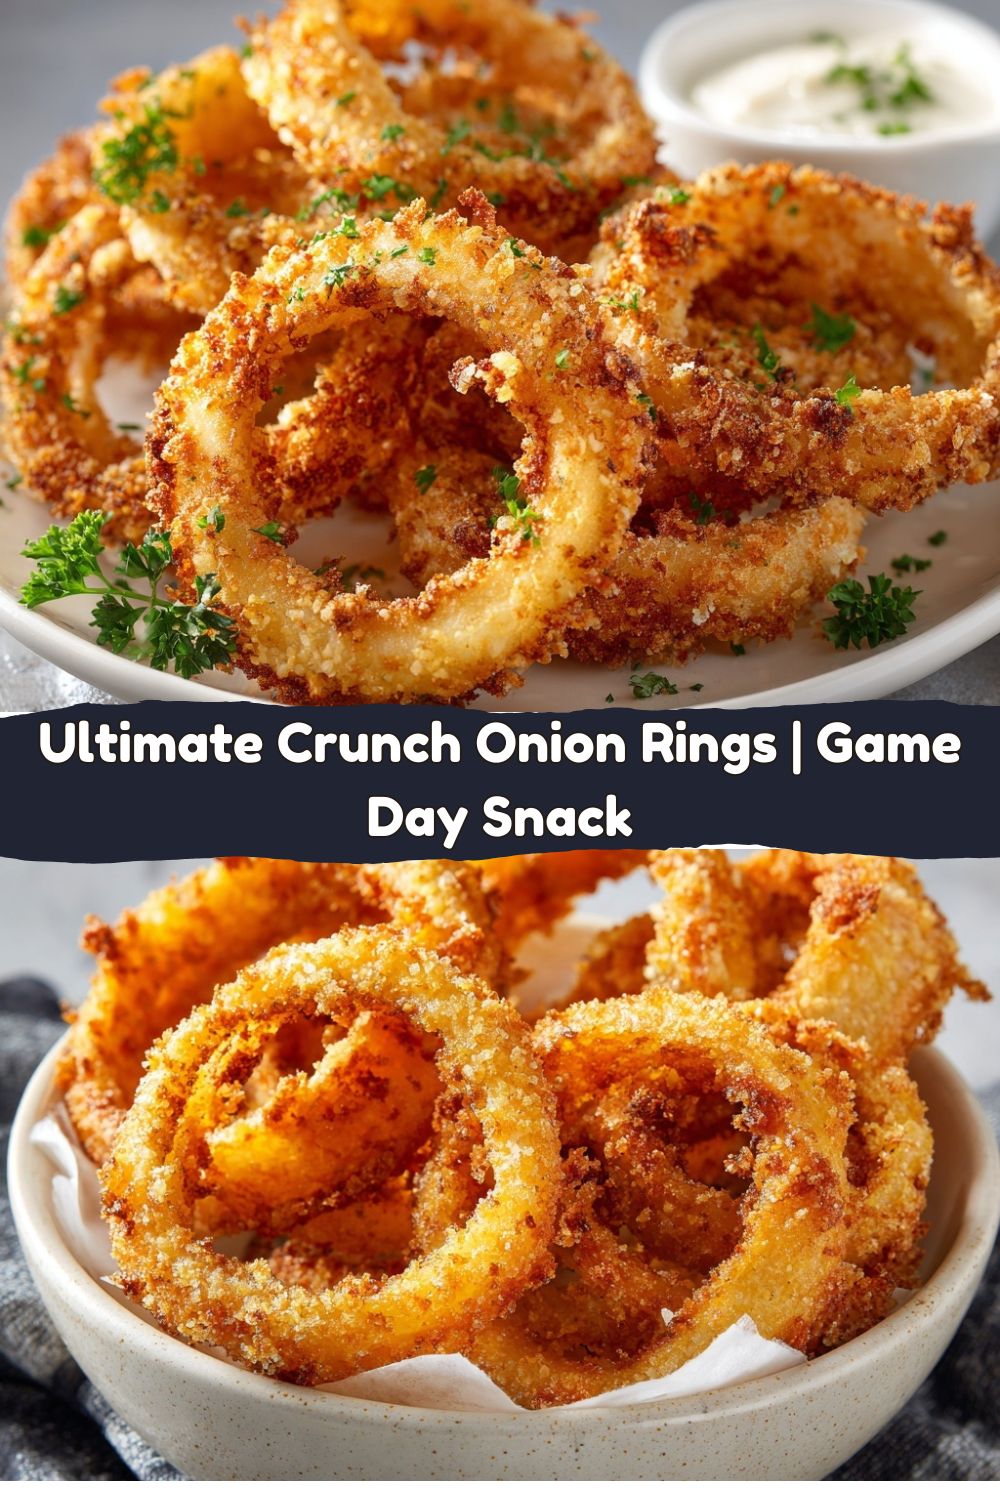
How to Serve These Golden Beauties
You’ve done the hard work, now for the best part—the feast! Presentation is part of the fun. I love piling these crispy onion rings high on a big wooden board or in a rustic basket lined with a checkered napkin. It gives that fun, pub-style vibe right at home.
And the dips! Oh, the dips. You absolutely need a lineup of your favorite sauces. Here are my go-tos:
- The Classic: A big bowl of tangy, creamy Homemade Buttermilk Ranch. It’s a match made in heaven.
- The Zesty: A smoky, spicy chipotle aioli. Just mix mayo with a spoonful of adobo sauce from a can of chipotles, a squeeze of lime, and a pinch of garlic powder.
- The Bold: A simple sriracha-mayo blend for those who like a kick.
- The Sweet & Savory: Don’t sleep on a good, high-quality barbecue sauce for dipping!
Serve them immediately alongside burgers, grilled chicken, or just eat them straight off the rack. I won’t judge!
Mix It Up! Creative Onion Ring Twists
Once you’ve mastered the classic, it’s time to play. This recipe is a fantastic canvas for your own creativity. Here are a few of my favorite ways to mix it up:
- Beer-Battered Bliss: Swap the sparkling water for an equal amount of a light, crisp lager or ale. The beer adds a malty, complex flavor that’s just incredible. The yeast in the beer also helps create an extra-light and airy batter.
- Spicy Kick: Add 1/2 to 1 teaspoon of cayenne pepper (depending on your heat tolerance) or a tablespoon of your favorite hot sauce right into the buttermilk soak. For an extra layer, you can also add a teaspoon of chili powder to the dry flour mixture.
- Savory Parmesan Crust: After frying, while the rings are still hot and glistening, shower them with a generous dusting of finely grated Parmesan cheese. The salty, umami punch is next-level.
- Gluten-Free Goodness: You can easily make this recipe gluten-free! Simply replace the all-purpose flour with your favorite 1:1 gluten-free flour blend. The cornstarch is already naturally gluten-free, so you’re all set for a celiac-friendly crunch.
- Panko Power: For an ultra-craggy, extra-crunchy Japanese-style coating, try a double-dredge. After dipping in the batter, press the rings into a plate of panko breadcrumbs before frying. You get an insane, shaggy crunch that’s seriously satisfying.
Jackson’s Kitchen Notes
This recipe has evolved so much in my kitchen over the years. I started with a simple flour-and-water paste that turned out, frankly, sad and soggy. The real game-changer was discovering the power of carbonation with the sparkling water. It was a total “you’ve gotta try this!” moment that I’m so excited to share with you.
Another funny story: I once tried to make a “healthier” version by baking them. Friends, let me save you the trouble. They were pale, floppy, and just… disappointing. Some things are just meant to be fried, and a perfect onion ring is one of them. It’s a treat, so let’s embrace it and make it the most amazing, crispy, unforgettable treat possible.
FAQs & Troubleshooting
I’ve gotten a lot of questions about this recipe over time. Here are the answers to the most common ones!
Q: Why are my onion rings soggy?
A: The number one culprit is oil temperature! If the oil isn’t hot enough, the batter will absorb the oil instead of sealing quickly. Always let the oil come back up to 375°F between batches. Also, don’t overcrowd the pot, and make sure you’re draining them on a wire rack instead of letting them sit in their own steam on a plate.
Q: Can I make these ahead of time?
A: Onion rings are always best served immediately. However, you can do the prep ahead! Slice the onions and soak them in buttermilk in the fridge for up to 4 hours. You can also whisk the dry ingredients together ahead of time. When you’re ready to fry, just mix the batter and go!
Q: The batter is sliding off my onions! What did I do wrong?
A: This usually means the onions were too wet before they went into the batter. After taking them out of the buttermilk, let the excess drip off thoroughly. You want them coated, but not dripping. That buttermilk layer is the “glue” for the batter, but too much of it can make the batter slide right off.
Q: Can I use a different type of onion?
A: Absolutely! Sweet onions like Vidalia or Walla Walla are fantastic for a milder, sweeter flavor. Red onions will work too, though they can be a bit more pungent. Yellow onions are my go-to for the best all-around flavor and structure.
Nutritional Information*
Okay, let’s keep it real. This is a fried food, and it’s a treat! But I believe in being transparent. Here’s a rough breakdown per serving (based on 8 servings). Remember, the values can vary based on the exact ingredients you use and how much oil is absorbed.
- Calories: 240
- Fat: 10g
- Saturated Fat: 1g
- Carbohydrates: 33g
- Fiber: 2g
- Sugar: 3g
- Protein: 4g
- Sodium: 350mg
*This information is an estimate provided by an online nutrition calculator and should be used for informational purposes only.
Your New Go-To Snack
And there you have it! Your complete guide to making seriously crispy, incredibly delicious homemade onion rings. This isn’t just a recipe; it’s a technique you can use forever. It’s about embracing a little mess, having fun in the kitchen, and creating a dish that’s guaranteed to bring smiles.


