Your New Go-To Party Appetizer is Here!
Hey friends, Jackson from Food Meld here! Let me paint you a picture: it’s game day, the holidays, or just a casual Friday night with your favorite people. The air is buzzing with laughter and conversation, and you’re looking for that one snack that’s guaranteed to bring everyone together in the kitchen. You know the one—the plate that empties in minutes, leaving behind a trail of happy sighs and requests for the recipe.
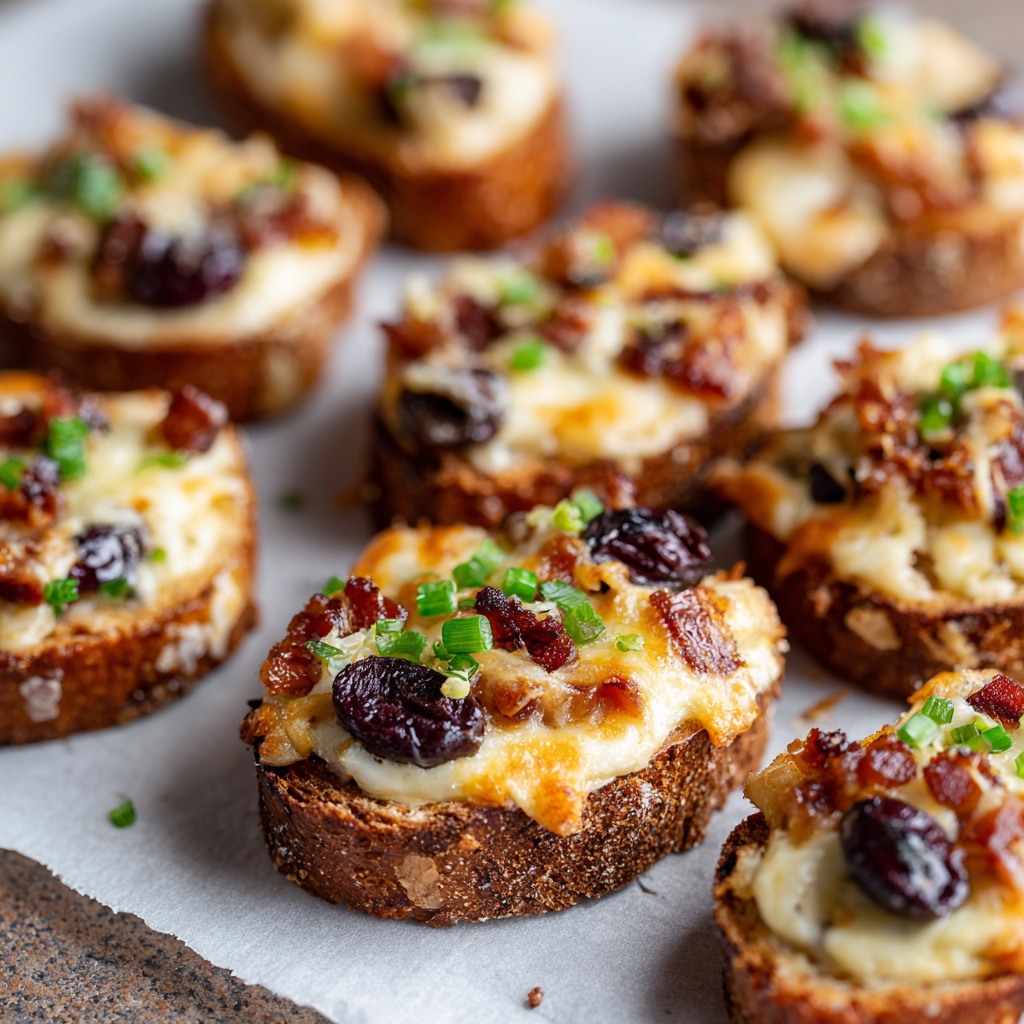
Well, my friends, you’ve just found it. These Cheesy Swiss & Olive Rye Bites are a certified legend in my world, and they’re about to become one in yours. Imagine this: a crisp, sturdy slice of rye bread, topped with a creamy, savory mixture that bakes into a golden, bubbly masterpiece. We’re talking nutty, melty Swiss cheese, salty bites of crispy bacon, and the briny, tangy punch of ripe olives. It’s a flavor combination that just works, hitting every single note on your taste buds.
The best part? This isn’t some fussy, complicated chef-y recipe. This is the kind of bold, comforting food I built Food Meld on. It’s a “dump and stir” situation that comes together in under 30 minutes, but tastes like you spent hours in the kitchen. It’s the ultimate “you’ve gotta try this” moment, and I’m so excited to share it with you. So, preheat that oven, grab your favorite mixing bowl, and let’s turn a few simple ingredients into your new party classic.

A Story in Every Bite: My First Taste of These Legendary Bites
I’ll never forget the first time I tried one of these bites. I was maybe ten years old, hovering around the snack table at my Aunt Carol’s annual Christmas Eve open house. The spread was always epic, but my eyes were locked on a platter of these warm, cheesy, toasty things. They looked like little flavor volcanoes.
I grabbed one, still almost too hot to handle, and took a bite. The roof of my mouth paid the price, but it was totally worth it. That immediate crunch of the rye gave way to an impossibly creamy, cheesy center, and then—BAM—the salty bacon and that surprising, briny pop from the olives. My little kid brain, which mostly lived on chicken nuggets and mac ‘n’ cheese, was completely blown. I spent the rest of the night strategically circling back to that platter, “helping” by making sure none were left behind. It was my first real lesson in how a single, simple bite could be an entire experience. I’ve been chasing that feeling ever since, and this recipe is my tribute to it.
Gathering Your Flavor All-Stars
This is where the magic starts! The ingredient list is short and sweet, but each player brings something special to the team. Here’s the rundown:
- 4 cups shredded Swiss cheese: The star of the show! Swiss melts beautifully and has a mild, nutty flavor that doesn’t overpower. Chef’s Insight: Buy a block and shred it yourself! Pre-shredded cheese is coated to prevent clumping, which can make your mixture less creamy. A little extra arm work is worth it for that ultra-smooth melt.
- 2 cups mayonnaise: This is our secret weapon for creaminess and richness. It binds everything together and bakes up into a dreamy texture. Substitution Tip: If you’re not a mayo fan, you can swap in full-fat sour cream. The flavor will be a touch tangier, but just as delicious.
- 2 cans (4.25 ounces each) chopped ripe olives: Don’t you dare skip these! They provide that essential briny, salty punch that cuts through the richness. Flavor Twist: Feel free to use sliced black olives for a milder flavor, or get adventurous with chopped kalamata olives for a deeper, fruitier tang.
- 8 strips bacon, cooked crisp and crumbled: Because bacon makes everything better. It adds a smoky, salty crunch. Pro Hack: Bake your bacon on a sheet pan at 400°F (200°C) for about 15-20 minutes. It cooks evenly, and clean-up is a breeze!
- ½ cup chopped green onions: A fresh, sharp bite that brightens up the whole dish. We’re using both the white and green parts for maximum flavor.
- 1 tablespoon minced fresh parsley (or 1 teaspoon dried): A little herbal freshness to round everything out. Fresh is always great, but dried works perfectly here too.
- ½ teaspoon garlic powder & ¼ teaspoon black pepper: Our trusty seasoning squad. Garlic powder distributes flavor more evenly than fresh garlic in this mix, and the pepper adds a gentle warmth.
- 60 slices snack-sized rye bread: The perfect, sturdy vessel. Its distinct, slightly sour flavor is the ideal base for all this richness. Can’t find snack-sized? Just use regular-sized rye bread and cut each slice into quarters!
- Optional: crushed red pepper flakes or smoked paprika: My “what if we tried this?” energy in action! A sprinkle of either one before baking adds a nice kick or a touch of smoky depth.
Let’s Build These Flavor Bombs! (Step-by-Step)
Ready to make some magic? This is the fun, messy part. Put on some tunes, and let’s get to it.
- Preheat your oven to 375°F (190°C). I like to do this first thing so it’s perfectly heated and ready to go when my bites are assembled. Chef’s Tip: If you have a convection oven, feel free to use the convection bake setting—it’ll make the bread even crispier!
- In a large bowl, mix together the Swiss cheese, mayonnaise, olives, bacon, green onions, parsley, garlic powder, and black pepper. Get in there with a big spoon or (my personal favorite) clean hands, and mix until everything is thoroughly combined. Don’t be shy! You want every ingredient to be cozy with its neighbors. The mixture will be thick, creamy, and speckled with all those goodies.
- Arrange your rye bread slices on baking sheets. I always line my sheets with parchment paper or a silicone baking mat. This is a non-negotiable life hack, people! It prevents any cheesy overflow from sticking and makes cleanup an absolute dream.
- Spoon a generous tablespoon of the cheese mixture onto each slice. Now, here’s a little chef wisdom: don’t just plop it in the middle. Use the back of your spoon to spread the mixture almost to the edges of the bread. This gives you the perfect cheese-to-bread ratio in every single bite and helps create those delightfully crispy, lacy edges as it bakes.
- Bake for 10–12 minutes, or until the cheese is bubbly and the edges of the bread are crisp. I always start checking at the 10-minute mark. You’re looking for a gorgeous, light golden brown color on top and those bread edges turning a deep, toasty brown. Your kitchen is going to smell absolutely incredible right about now.
- Optional: Sprinkle with red pepper flakes or smoked paprika before serving for added flavor and color. This is the final flourish! A little sprinkle of red pepper flakes adds a beautiful pop of color and a subtle heat, while smoked paprika gives it that “what’s in this?!” smoky mystery.
How to Serve These Show-Stopping Bites
You’ve pulled these golden beauties out of the oven. Now what? Presentation is part of the fun!
First, let them cool for just a minute or two on the baking sheet. This allows the cheesy topping to set slightly so it doesn’t slide off when you pick one up. Then, transfer them to a serving platter. I love using a simple wooden board or a vibrant ceramic plate to make those colors pop.
For a little extra flair, scatter a few extra chopped green onions or a sprinkle of parsley over the top of the whole platter. It looks professional and adds a fresh touch. Serve them warm—that’s when they’re at their absolute peak of melty, gooey perfection.
What to serve them with? They are a powerhouse appetizer all on their own, but they pair wonderfully with a crisp, cold beer, a dry white wine like Sauvignon Blanc, or even a festive cocktail. If you’re building a bigger spread, they’re best friends with other finger foods like spicy wings, a fresh veggie platter, or a big, leafy green salad to balance out the richness.
Make It Your Own! Creative Twists & Swaps
One of my favorite things about this recipe is how adaptable it is. Got a different cheese in the fridge? Want to make it veggie-friendly? Let’s play!
- The “Everything But The Bagel” Twist: Swap the Swiss for sharp cheddar cheese and add a teaspoon of everything bagel seasoning to the mix. It’s a whole new savory dimension!
- Spicy “Kickin’ Jalapeño” Version: Add 1-2 finely diced jalapeños (seeds removed for less heat, kept for more!) to the cheese mixture. The spicy kick against the cool, creamy base is unbelievable.
- Mediterranean Makeover: Swap the black olives for chopped kalamata olives, the bacon for ½ cup of chopped sun-dried tomatoes (packed in oil), and add a teaspoon of dried oregano. It’s like a vacation for your taste buds.
- Vegetarian-Friendly: Easy! Just leave out the bacon. To make up for the smoky flavor, add ¼ teaspoon of smoked paprika directly to the cheese mixture before baking.
- Gluten-Free Fix: No problem! Use your favorite gluten-free bread, sliced into small, sturdy rounds. The flavor of the topping is so bold, you won’t miss a thing.
Jackson’s Chef’s Notes & Kitchen Stories
This recipe has been a part of my life for so long, it’s practically family. Over the years, I’ve learned a few things. One time, I was in a huge rush and used pre-shredded cheese. The bites were still delicious, but they were a little grainy and didn’t melt into that perfect, smooth pool I love. That’s when I became a shred-your-own-cheese evangelist!
I’ve also found that you can make the cheese mixture up to a day ahead of time. Just keep it covered in the fridge, and when you’re ready to party, all you have to do is assemble and bake. It’s a total game-changer for stress-free entertaining. The recipe has evolved from my Aunt Carol’s classic version to my slightly more peppery, green-onion-heavy take, but the soul of it—that unbeatable combination of creamy, salty, briny, and crisp—remains the same.
FAQs & Troubleshooting: Your Questions, Answered!
Over the years, I’ve gotten a lot of great questions about this recipe. Here are the most common ones:
- Can I make these ahead of time and reheat them? You can, but they are truly best fresh from the oven. The bread can get a bit soggy if they sit too long. If you must, assemble them on the baking sheet (unbaked), cover tightly with plastic wrap, and refrigerate for a few hours. Bake straight from the fridge, adding a minute or two to the cooking time. For reheating leftovers, a quick 5-minute stint in a 350°F (175°C) oven or a minute under the broiler will help re-crisp them.
- My mixture seems really wet. Did I do something wrong? Not necessarily! Different brands of mayonnaise and cheese can have varying moisture levels. If it seems too loose, you can add an extra ½ cup of shredded cheese to help thicken it up. It will firm up as it bakes!
- I can’t find snack-sized rye bread. What are my options? This is a super common issue! Just grab a loaf of regular rye or pumpernickel bread from the bakery section. Use a serrated knife to cut each slice into quarters. It works exactly the same way, and you might even get more rustic, interesting shapes!
- Can I freeze these? I don’t recommend freezing them after they’re baked, as the texture of the bread and topping can suffer. However, you can freeze the unbaked, assembled bites on the baking sheet until solid, then transfer them to a freezer bag. Bake from frozen, adding 3-5 minutes to the baking time.

Cheesy Swiss & Olive Rye Bites : A Toasty, Savory Party Classic
- Total Time: 30 minutes
- Yield: 60 bites 1x
Description
These Cheesy Swiss & Olive Rye Bites are everything you want in a warm appetizer—melty, tangy, and full of bold flavor. Creamy Swiss cheese, smoky bacon, and briny olives come together on crisp rye rounds for an irresistibly toasty bite. Perfect for game days, holidays, or anytime you need a snack that disappears fast.
Ingredients
4 cups shredded Swiss cheese
2 cups mayonnaise
2 cans (4.25 ounces each) chopped ripe olives
8 strips bacon, cooked crisp and crumbled
½ cup chopped green onions
1 tablespoon minced fresh parsley (or 1 teaspoon dried)
½ teaspoon garlic powder
¼ teaspoon black pepper
60 slices snack-sized rye bread
Optional: crushed red pepper flakes or smoked paprika for extra kick
Instructions
Preheat your oven to 375°F (190°C).
In a large bowl, mix together the Swiss cheese, mayonnaise, olives, bacon, green onions, parsley, garlic powder, and black pepper until well combined.
Arrange rye bread slices on baking sheets. Spoon a generous tablespoon of the cheese mixture onto each slice.
Bake for 10–12 minutes, or until the cheese is bubbly and the edges of the bread are crisp.
Optional: Sprinkle with red pepper flakes or smoked paprika before serving for added flavor and color.
- Prep Time: 15 minutes
- Cook Time: 15 minutes
Nutrition
- Calories: 210 / Bite
- Sugar: 1g / Bite
- Fat: 16g / Bite
- Carbohydrates: 10g / Bite
- Fiber: 1g / Bite
- Protein: 7g / Bite
Let’s Talk Nutrition (The Real Talk)
Alright, let’s be real here. These are a party appetizer, a treat, a celebration in a bite. They’re not a salad, and that’s perfectly okay! Life is all about balance. I believe in enjoying food that makes you happy, and these bites are 100% in that category.
That said, here’s the nutritional breakdown per 2 bites (approx.), so you can make informed choices:
Calories: 210 | Fat: 16g | Protein: 7g | Carbohydrates: 10g | Sugar: 1g | Fiber: 1g
The protein comes from the cheese and bacon, and the carbs from the rye bread. If you’re looking for ways to lighten it up slightly, you can use a light mayonnaise and reduced-fat Swiss cheese, though the texture and meltability might change a bit. My philosophy? Enjoy a few of these delicious bites mindfully, savor every single flavor, and balance it out with other nutritious foods throughout your day. No guilt, just good food.
Your Next “You’ve Gotta Try This!” Moment Awaits
And there you have it! From my Aunt Carol’s holiday table to your kitchen, these Cheesy Swiss & Olive Rye Bites are more than just a recipe—they’re a ticket to creating those warm, fun, food-filled memories with the people you love.
This is what Food Meld is all about: taking simple, bold flavors, giving them a little creative twist, and sharing them in a way that makes cooking feel fun and accessible, not intimidating. I hope you feel empowered to make this recipe, to put your own spin on it, and to watch it disappear from the platter with a huge smile on your face.
So, did you make them? Did you add jalapeños? Go the Mediterranean route? I want to hear all about it! Tag me on social @FoodMeld or shoot me an email. Sharing our kitchen wins (and even our funny failures) is how we all get better and have more fun along the way.
Now go forth and cook something awesome. Talk soon!
— Jackson


