
Enchilada-Stuffed Bell Peppers: Your New Low-Carb Best Friend
Hey friends, Jackson from Food Meld here. Let’s get real for a second. We all have those cravings, right? That deep, undeniable need for a big, cheesy, saucy plate of Tex-Mex comfort. For me, it’s always been enchiladas. That rich, spiced sauce, the melty cheese, the hearty filling… it’s a hug in food form.
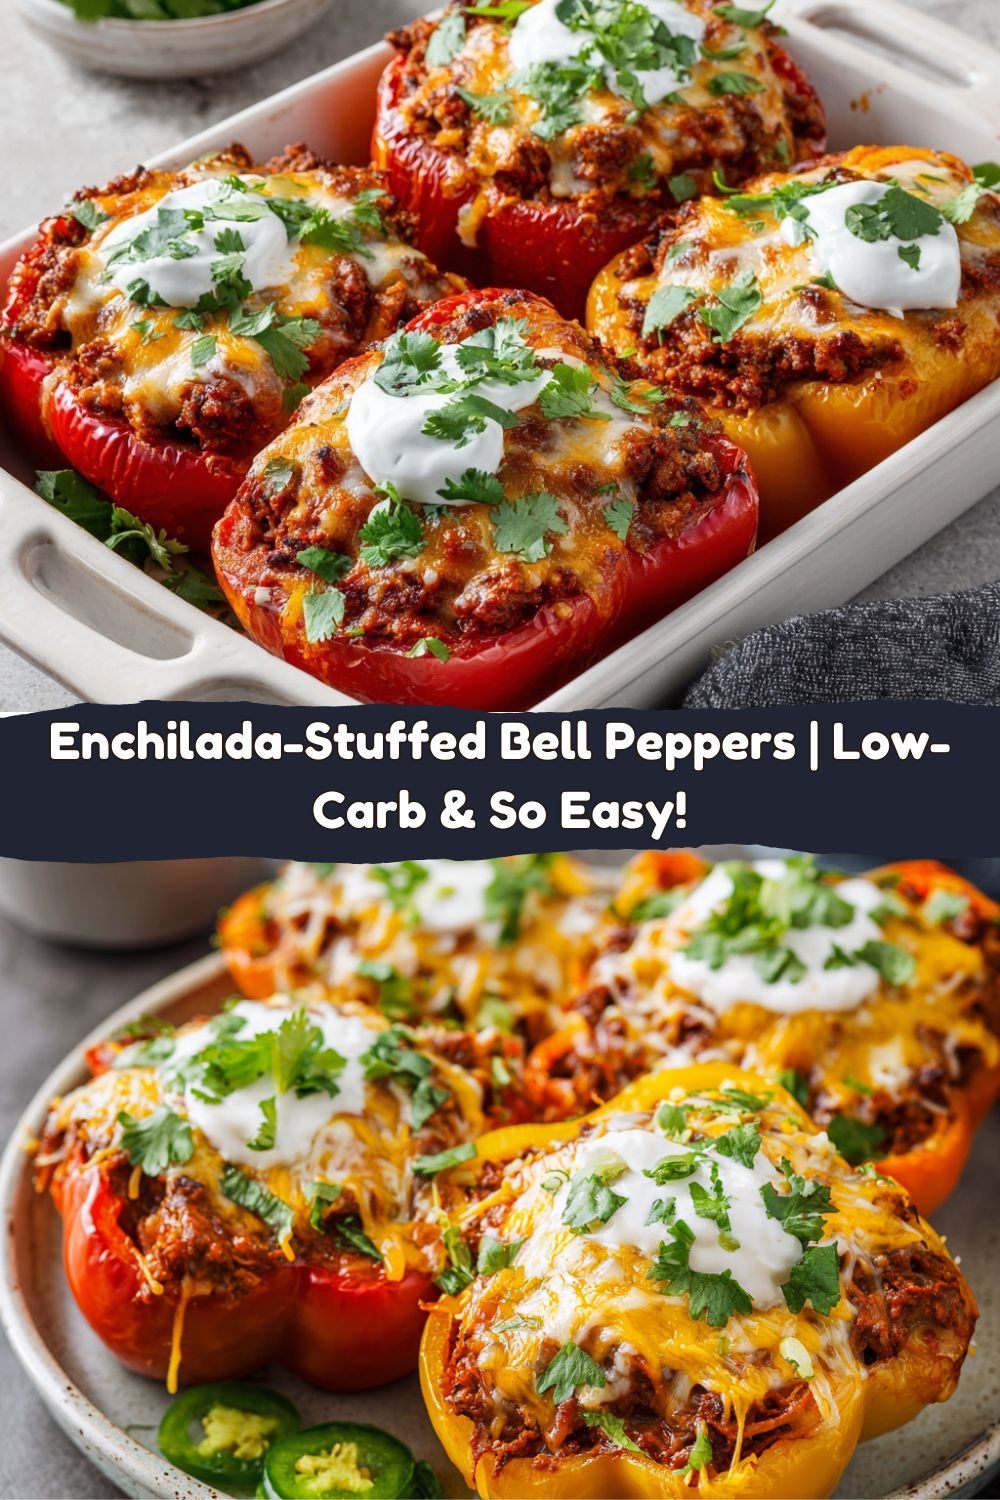
But sometimes, you want that hug to feel a little less… heavy. Maybe you’re watching the carbs, maybe you just want to pack in more veggies, or maybe you’re simply tired of rolling tortillas (we’ve all been there). That’s where this beautiful kitchen creation comes in: Enchilada-Stuffed Bell Peppers.
We’re taking everything we adore about classic enchiladas—the savory ground beef, the smoky spices, the gooey cheese—and packing it all into a sweet, tender bell pepper shell. The result? A dinner that’s somehow both lighter and even more satisfying. It’s a one-pan wonder that’s incredibly easy to make, totally customizable, and guaranteed to become a regular in your dinner rotation. So, let’s ditch the rolling pin, grab a skillet, and cook up something truly awesome together.
A Tale of Two Enchiladas: My Texas Kitchen Epiphany
This recipe was born out of a classic “kitchen sink” night. Picture this: It’s a sweltering summer evening in Texas, and my buddies are coming over for our weekly game night. The plan was my famous beef enchiladas, but I’d completely blanked on buying tortillas. A classic Jackson move.
Staring into the fridge, I saw a lineup of colorful bell peppers staring back at me, and a lightbulb went off. What if the pepper was the tortilla? I whipped up my standard enchilada filling, stuffed it into those pepper halves, drowned them in sauce and cheese, and crossed my fingers.
When I pulled that bubbling, cheesy, fragrant dish out of the oven, the guys went silent—then immediately started asking for the recipe. The peppers had softened into the perfect vessel, sweet and sturdy, holding all that incredible flavor without getting soggy. It was a total “you’ve gotta try this” moment, and it’s been a Food Meld staple ever since. Sometimes, the best recipes come from happy little accidents (and a near-empty fridge).
Gathering Your Flavor Arsenal
This is where the magic starts. Simple, bold ingredients that work together to create something unforgettable. Here’s your shopping list, complete with my chef-y insights to make you a pro before you even turn on the stove.
- 4 large bell peppers (any color): These are your edible bowls! I love using a mix of red, yellow, and orange for a pop of color and a slightly sweeter flavor. Green peppers are great too, offering a more classic, slightly bitter note. The key is to pick peppers that have flat bottoms so they don’t tip over in the baking dish.
- 1 lb ground beef (80/20 blend is perfect): This is our flavor foundation. The little bit of fat in an 80/20 blend keeps the filling moist and juicy. For a leaner option, ground turkey or chicken works beautifully, just add a tablespoon of olive oil to the skillet when you cook it.
- 1/2 cup diced yellow onion: The aromatic base that builds sweetness and depth. No yellow onion? A white or red onion will do the trick in a pinch.
- 1 tsp chili powder & 1/2 tsp cumin: The dynamic duo of Tex-Mex flavor! Toasting these spices in the skillet with the beef for just 30 seconds before adding the sauce will unlock their essential oils and make your whole kitchen smell incredible.
- Salt & pepper to taste: Don’t forget to season every layer! I always add a pinch of salt and pepper to the beef as it browns.
- 1 cup red enchilada sauce: This is the soul of the dish. You can use your favorite store-bought brand (I’m not judging!) or go all-out with a homemade enchilada sauce for next-level flavor. For a milder kick, use a green enchilada sauce.
- 1 1/2 cups shredded cheese: The glorious, melty blanket. I’m a huge fan of a Monterey Jack and sharp cheddar blend. Jack brings the epic melt, and cheddar brings the tang. Pro tip: shred your own cheese from a block! It melts smoother and doesn’t have the anti-caking agents that pre-shredded bags do.
- Toppings: Sour cream (or crema), chopped cilantro, sliced jalapeños: This is where you make it yours! The cool, creamy sour cream cuts through the richness, the cilantro adds a fresh burst, and the jalapeños bring the heat. Don’t skip the toppings!
Let’s Build Some Flavor: Your Step-by-Step Guide
Ready to get your hands dirty? Follow these steps, and you’ll have a restaurant-quality meal on the table in no time. I’ve packed in my favorite chef hacks to ensure your success.
- Preheat and Prep: Fire up your oven to 375°F (190°C). While it’s heating, grab a 9×13 inch baking dish and give it a light coating of cooking spray or a quick wipe with olive oil. This prevents any cheesy drips from becoming a permanent part of your dish. Now, take your bell peppers, slice them in half from top to bottom, and scoop out the seeds and white membranes. I like to use a small paring knife or even a melon baller for a super clean scoop. Rinse them out, pat them dry, and stand them up proudly in your baking dish.
- Brown the Beef: Place a large skillet over medium-high heat. Add your ground beef and diced onion. Cook, breaking it up with a wooden spoon, until the beef is no longer pink and the onions have turned soft and translucent. This usually takes about 7-8 minutes. Here’s a pro tip: if there’s a lot of excess grease, drain it off. We want flavor, not grease!
- Spice It Up & Simmer: This is the flavor-building step! Sprinkle the chili powder, cumin, salt, and pepper over the beef and onion mixture. Stir constantly for about 30 seconds—you’ll smell the spices waking up. Now, pour in that glorious red enchilada sauce. Bring everything to a simmer, then reduce the heat and let it bubble gently for 2-3 minutes. This allows the flavors to marry and the sauce to thicken slightly so it doesn’t make our pepper shells watery.
- Stuff ‘Em! Take your saucy beef mixture and generously spoon it into each pepper half. Don’t be shy—pack it in there! You should use up all the filling. Then, crown each pepper with a mountain of that shredded cheese. The cheese acts as a delicious lid, sealing in all the moisture and flavor as it bakes.
- The Two-Stage Bake: Cover the entire baking dish tightly with aluminum foil. This creates a little steam oven that gently cooks and tenderizes the peppers without burning the cheese. Bake for 25 minutes. Then, carefully remove the foil (watch out for the steam!), and bake for another 10 minutes, uncovered. This final blast gives the cheese that perfect, golden, bubbly finish and ensures the peppers are tender-crisp, not mushy.
Plating Up the Perfect Bite
You’ve done the hard work, now for the fun part! I like to serve these right in the baking dish for a family-style “dig in” moment, but for a prettier plate, use a wide spatula to carefully transfer one or two pepper halves to a dinner plate.
The toppings are non-negotiable for the full experience. A generous drizzle of cool sour cream or Mexican crema is a must. Then, a vibrant shower of fresh, chopped cilantro. If you’re like me and love a little heat, a few slices of pickled or fresh jalapeño are the perfect finish. For a complete meal, I love serving these with a simple side of:
- A crisp romaine lettuce salad with a lime vinaigrette.
- A quick black bean and corn salad.
- For those not watching carbs, a big scoop of cilantro-lime rice is absolutely divine for soaking up any extra sauce.
Make It Your Own: Creative Twists & Swaps
The beauty of this recipe is its flexibility. Don’t be afraid to play with it and make it yours! Here are a few of my favorite variations:
- Spicy Fiesta: Kick up the heat by using a spicy enchilada sauce and adding a diced jalapeño or a teaspoon of chipotle powder to the beef mixture along with the other spices.
- Turkey Taco Twist: Swap the ground beef for lean ground turkey and use your favorite taco seasoning packet instead of the individual spices. It’s a flavor shortcut everyone loves.
- Fiesta Black Bean (Vegetarian): For a meatless marvel, replace the beef with one can of black beans (rinsed and drained) and a cup of frozen corn. You might need a splash more enchilada sauce to keep it saucy.
- Cheesier than a Rom-Com: Mix things up with your cheese blend! Try a pepper jack for heat, a smoky gouda for depth, or even crumble a little cotija cheese on top right before serving for a salty, crumbly finish.
- “Taco Salad” Style: After baking, chop up the stuffed pepper and serve it over a bed of crunchy shredded lettuce with diced tomatoes and avocado for a deconstructed taco salad in a bowl.
Jackson’s Kitchen Notes & Stories
This recipe has seen a lot of iterations in my kitchen. I’ve learned that the type of pepper really does matter—the thinner-walled red and yellow peppers tend to get a bit softer, while the sturdier green peppers hold more of a bite, which some people prefer. It’s all about your texture love language!
One time, I was filming a video for the blog and got so caught up in chatting that I completely forgot to cover the dish with foil for the first half of baking. A happy accident! The peppers had a firmer texture and the cheese got extra crispy on top. It was a different, but equally delicious, vibe. So don’t stress if you forget a step—cooking is an adventure, not a perfect science.
Your Questions, Answered!
Over the years, I’ve gotten a lot of great questions about this recipe. Here are the answers to the most common ones.
Q: My peppers are still a bit firm. What did I do wrong?
A: No worries! Pepper size and thickness can vary. If they’re still too crisp for your liking after baking, just re-cover them with foil and pop them back in the oven for another 5-10 minutes. You can also try parboiling the pepper halves for 3-4 minutes before stuffing them to give them a head start.
Q: Can I make these ahead of time?
A: Absolutely! You can assemble the peppers completely (stuff and cheese them), cover the dish tightly, and refrigerate for up to 24 hours. When you’re ready, just bake them straight from the fridge. You might need to add 5-10 minutes to the covered baking time since everything is starting off cold.
Q: The filling is a little watery. How can I fix that?
A> This usually happens if the beef filling wasn’t simmered long enough to thicken, or if there was too much grease left in the pan. Next time, make sure to drain the beef well and let the sauce simmer. To fix it now, you can carefully tilt the baking dish and use a baster or a spoon to remove any excess liquid pooling at the bottom.
Q: Can I freeze the leftovers?
A> You can! Let them cool completely, then store them in an airtight container for up to 3 months. The texture of the peppers will be much softer upon reheating, but the flavor will still be fantastic. Thaw in the fridge overnight and reheat in the oven or microwave.
The Healthy Lowdown (Because We Care!)
I’m all about flavor first, but I also love knowing that what I’m eating is fueling my body well. By swapping the tortillas for bell peppers, we make a pretty awesome nutritional trade.
Bell peppers are packed with Vitamin C (one red bell pepper has *more than* your daily requirement!) and are a great source of Vitamin A and fiber. Using lean ground beef keeps the protein high and the fat in check. This dish naturally becomes a fantastic low-carb, high-protein meal that fits into a variety of eating styles, from keto to gluten-free.
Estimated Nutrition (per stuffed pepper half):
Calories: ~290 | Protein: 22g | Fat: 18g | Net Carbohydrates: 9g | Fiber: 2g
Please note: Nutritional information is an estimate and can vary based on the specific ingredients and brands you use.
Your New Go-To Comfort Food
And there you have it! Enchilada-Stuffed Bell Peppers are proof that you don’t have to sacrifice flavor for a healthier twist. They’re fun to make, incredibly satisfying to eat, and they bring that same “wow” factor to the table as their tortilla-wrapped cousins.
This recipe is a testament to what Food Meld is all about: taking bold, comforting flavors, giving them a creative twist, and showing you just how easy it can be. I hope this dish brings as much joy and flavor to your kitchen as it has to mine. Now, I’d love to hear from you! Tag me on social @FoodMeld when you make them and tell me—what’s your favorite topping? Did you try any wild variations? Let’s keep the conversation going.
Until next time, keep cooking with curiosity and eating with joy.
– Jackson


