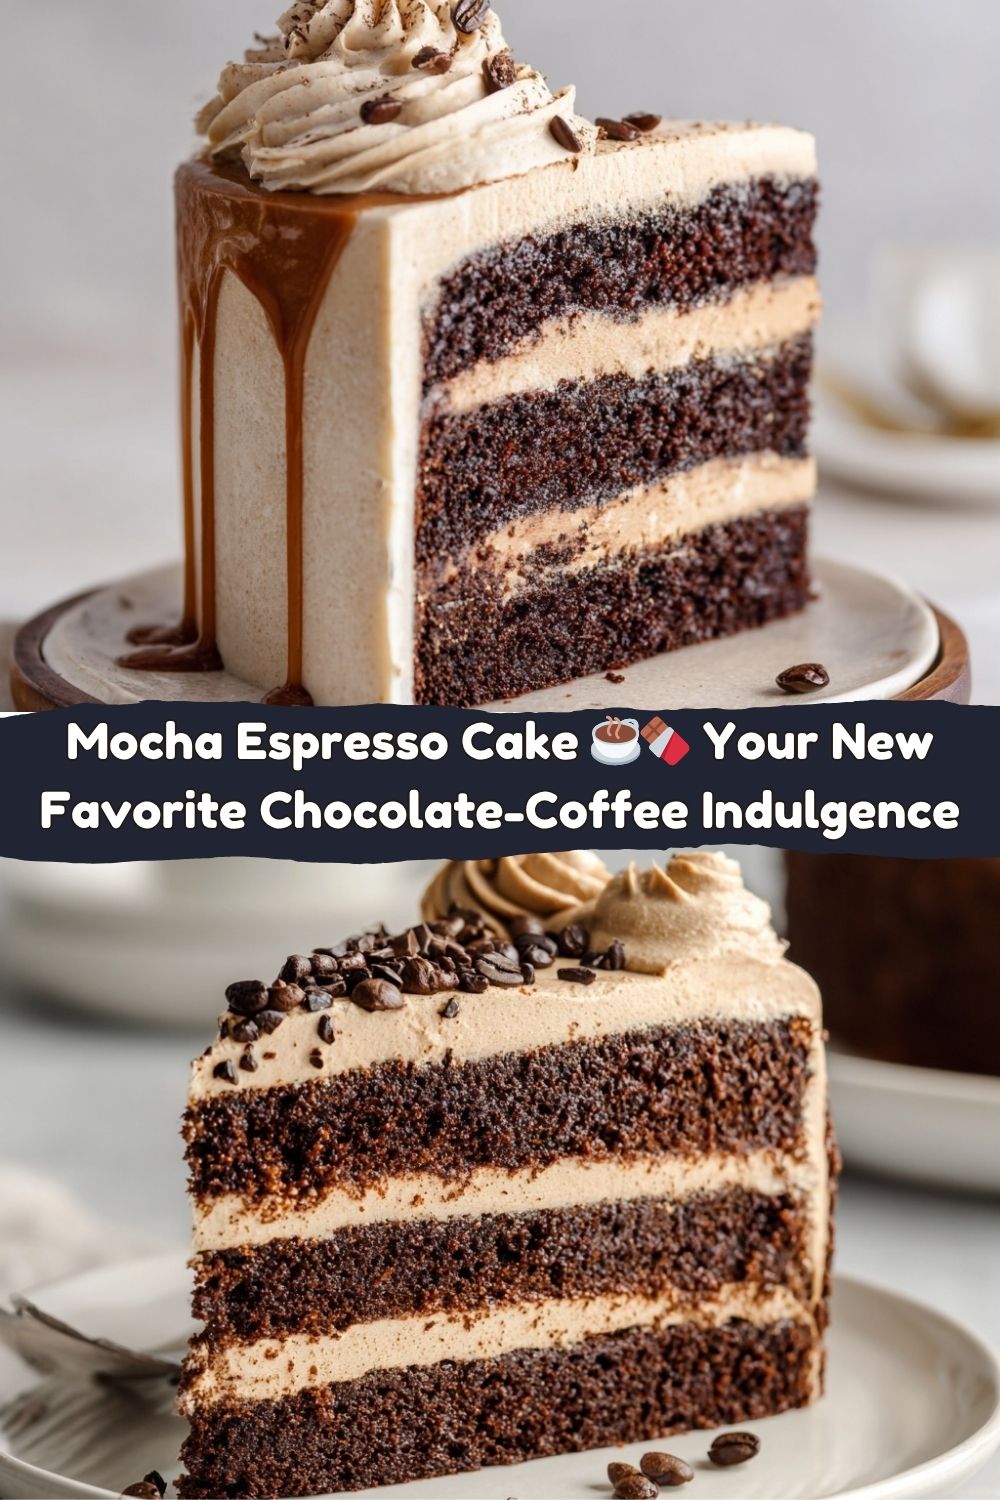
Your New Favorite Cake is Calling
Hey friends, Jackson here from Food Meld. Let’s get right to it: if you’ve ever wondered what would happen if your favorite rich, dark chocolate cake and a shot of bold, aromatic espresso had a party in your mouth… well, wonder no more. This Mocha Espresso Cake is that party, and you’re definitely invited.
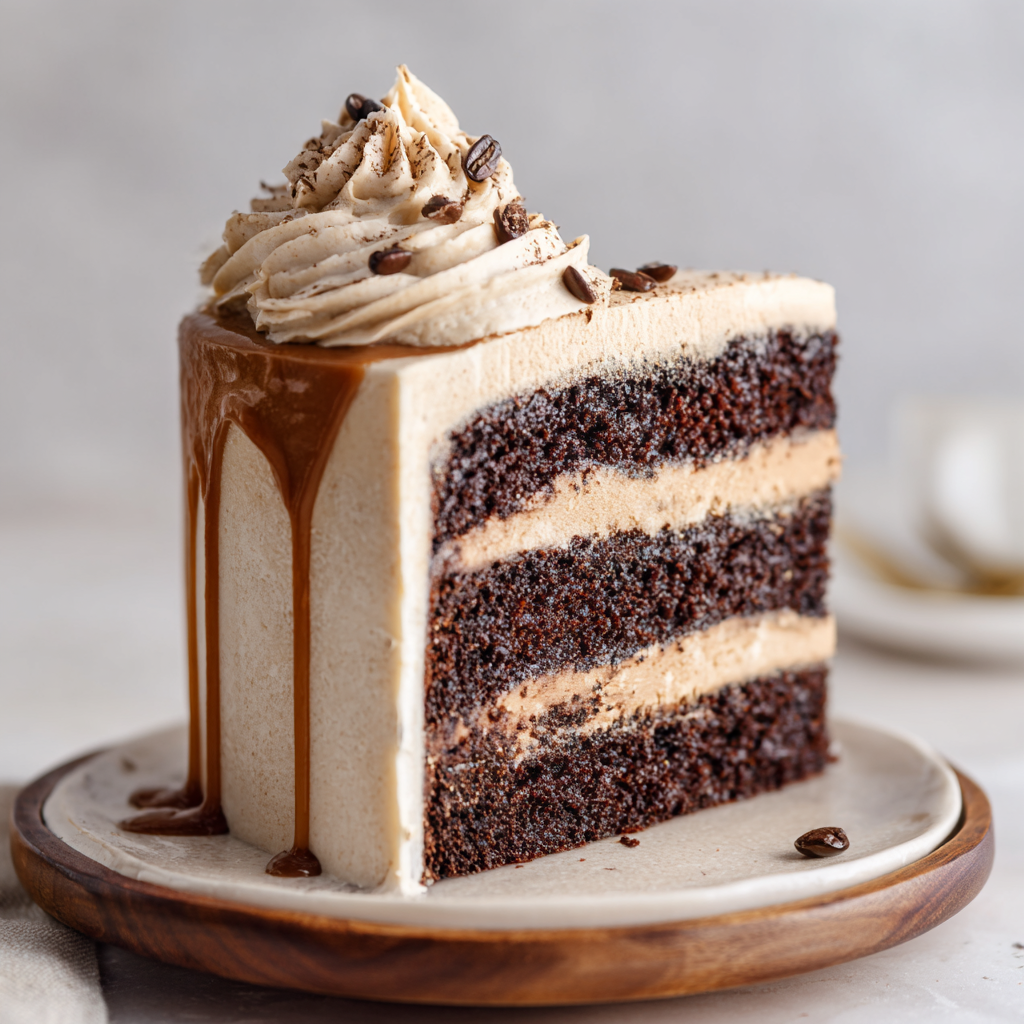
I’m talking about unbelievably moist chocolate layers that just melt on your tongue, paired with a silky, sophisticated espresso buttercream that’s smooth, slightly bitter, and perfectly sweet. This isn’t just a cake; it’s an experience. It’s the kind of dessert that feels fancy enough for a dinner party centerpiece but comforting enough for a Tuesday night when you deserve a serious treat. It’s your local coffeehouse’s most indulgent pastry, but better, because you made it with your own two hands.
Now, I know layered cakes can sometimes feel a little intimidating, but I promise you, we’re keeping this simple, real, and packed with flavor—just like we do here at Food Meld. I’ve tested every step to make sure it’s foolproof. So, whether you’re a baking newbie or a seasoned pro looking for your new go-to recipe, preheat that oven, grab your favorite mug of coffee, and let’s cook something awesome together. Your taste buds are in for a wake-up call they won’t forget.
The Day I Fell for Coffee & Cake
This cake takes me right back to my grandma’s kitchen. She was a force of nature, the kind of woman who always had a pot of strong, black coffee brewing and a tin of something homemade on the counter. I was probably too young for coffee, but she’d always let me have a sip from her saucer (yes, she drank from a saucer—it was her thing).
One afternoon, she was baking her famous devil’s food cake, and on a whim, she poured the last of her morning coffee right into the batter. I remember looking at her like she’d lost her mind. “Coffee in a chocolate cake, Grandma?” She just winked and said, “Just wait, Jack. It makes the chocolate taste more like chocolate.”
She was, of course, absolutely right. That first bite was a revelation. The coffee didn’t scream “I’M IN HERE!”—it just deepened the chocolate flavor, giving it a rich, complex backbone that was pure magic. That “what if we tried this?” moment from my grandma is the exact energy I bring to Food Meld, and it’s the soul of this recipe. It’s a nostalgic hug and a sophisticated kick, all in one beautiful slice.
Gathering Your Flavor Arsenal
Here’s everything you’ll need to build this masterpiece. Don’t just think of these as ingredients; think of them as your flavor-building blocks. I’ve included some of my favorite chef insights and swaps to make this cake your own.
For the Mocha Cake Layers:
- 2 cups all-purpose flour: The structure-builder of our cake. For a slightly lighter crumb, you can swap in cake flour, but all-purpose works beautifully here.
- ¾ cup unsweetened cocoa powder: Use a good-quality, natural cocoa powder for that classic, robust chocolate flavor. This isn’t the time for Dutch-processed—we want that acidity to react with our leaveners!
- 1 ½ tsp baking powder & 1 ½ tsp baking soda: Our dynamic rising duo. The baking soda reacts with the acidic buttermilk and cocoa for a good rise, and the baking powder gives it an extra lift in the oven.
- ½ tsp salt: The ultimate flavor enhancer. It makes the chocolate and coffee notes pop, so don’t you dare skip it.
- 1 ¾ cups sugar: For sweetness and that beautifully tender, moist crumb we’re after.
- 2 large eggs, at room temperature: They bind everything together and add richness. Pro-tip: if you forget to take them out, place them in a bowl of warm water for 5-10 minutes.
- 1 cup buttermilk, at room temperature: The secret weapon for ultimate moisture and a subtle tang. No buttermilk? No problem! Make a quick “sour milk” by adding 1 tbsp of white vinegar or lemon juice to a cup of regular milk and let it sit for 5 minutes.
- ½ cup vegetable oil: Oil keeps this cake incredibly moist for days, much more so than butter. I use a neutral oil like canola or grapeseed.
- 1 tsp vanilla extract: The classic flavor backbone that makes everything taste more like itself.
- 1 cup hot brewed espresso (or strong coffee): This is the magic! The hot liquid “blooms” the cocoa powder, intensifying the chocolate flavor. Using strong coffee is totally fine if you don’t have an espresso machine.
For the Espresso Buttercream:
- 1 cup (2 sticks) unsalted butter, softened: The base of our frosting. Unsalted lets us control the salt level. It MUST be softened to room temp for a silky, non-greasy texture.
- 3 cups powdered sugar: It dissolves easily for that smooth frosting feel. Sift it if it’s lumpy!
- 2 tbsp instant espresso powder dissolved in 1 tbsp hot water: This is our flavor powerhouse. Dissolving it first prevents any gritty bits in the buttercream and gives us a super-concentrated coffee kick.
- 1–2 tbsp heavy cream or milk: This is our texture tuner. Start with one tablespoon and add the second only if you want a slightly softer, more spreadable frosting.
- Pinch of salt: Again, this cuts the sweetness and makes the espresso flavor sing. Trust me.
Let’s Build This Beauty: A Step-by-Step Guide
Alright, team, let’s get our hands dirty (figuratively, mostly). Follow these steps, and you’ll have a show-stopping cake in no time. I’m walking you through every bit with my favorite kitchen hacks.
- Preheat and Prep. Fire up your oven to 350°F (175°C). Now, take your two 8-inch round pans and give them a good coating of butter or non-stick spray. Line the bottoms with a circle of parchment paper—this is my number one tip for guaranteeing your cakes will release perfectly. No one wants a cake tragedy! Dust the sides with a little flour or cocoa powder and tap out the excess.
- Combine the Dry Team. In a good-sized bowl, grab your whisk and thoroughly combine the all-purpose flour, cocoa powder, baking powder, baking soda, and salt. Whisking instead of sifting is my little shortcut here—it aerates the dry ingredients just enough and makes sure all those leaveners are evenly distributed. No one wants a bite of just baking soda! Set this bowl aside.
- Mix the Wet Team. In the bowl of your stand mixer (or a large bowl with a hand mixer), combine the sugar, eggs, buttermilk, vegetable oil, and vanilla extract. Beat them on medium speed for a good 2-3 minutes until the mixture is well-blended, slightly pale, and a little frothy. This step is key for incorporating air and ensuring a uniform texture.
- The Magic Moment: Add the Hot Espresso. With the mixer on low, carefully and slowly stream in that cup of hot brewed espresso. The batter will be thin—this is totally normal and exactly what we want! Don’t panic. This liquid is going to give us an incredibly moist cake.
- Bringing It All Together. Keeping the mixer on low, gradually add the dry ingredients to the wet. Mix only until just combined. I’ll say it again: DO NOT OVERMIX! A few streaks of flour are fine. Overmixing is the enemy of a tender, soft cake. You can finish folding it by hand with a spatula to be safe.
- Pan and Bake. Divide the batter evenly between your two prepared pans. I like to use a kitchen scale for perfect layers, but eyeballing it works too. Give the pans a gentle tap on the counter to release any large air bubbles. Slide them into the preheated oven and bake for 30-35 minutes. You’ll know they’re done when the tops are springy to the touch and a toothpick inserted into the center comes out with a few moist crumbs attached, not wet batter.
- The Most Important Step: Cool Completely. Let the cakes cool in their pans on a wire rack for about 15 minutes. Then, run a knife around the edge, invert them onto the rack, peel off the parchment paper, and let them cool completely. I mean it—completely! Frosting a warm cake is a recipe for a melted, slidey mess. Patience is a virtue here.
- Whip Up the Espresso Buttercream. While the cakes are cooling, let’s make that glorious frosting. In your mixer bowl, beat the softened butter on medium-high speed for a full 3-5 minutes until it’s super pale, fluffy, and whipped. Scrape down the bowl. Gradually add the powdered sugar with the mixer on low (unless you want a sugar-dust cloud in your kitchen), then increase the speed to combine. Add the dissolved espresso concentrate, 1 tbsp of heavy cream, and that pinch of salt. Whip it on medium-high for another 2-3 minutes until it’s incredibly smooth, light, and spreadable. Taste it! Need more coffee kick? You can add a bit more dissolved espresso. Want it softer? Add the second tbsp of cream.
- Frost and Feast! Once the cakes are totally cool, it’s assembly time! Place one layer on your cake stand or plate. Spread a generous amount of buttercream over the top. Gently place the second layer on top. Now, frost the top and sides with the remaining buttercream. You can go for a smooth, elegant finish or a rustic, swoopy one—it’s your cake! For a final touch, I love dusting the top with a little extra cocoa powder or espresso powder.
How to Serve This Slice of Heaven
Presentation is part of the fun! Here’s how I like to serve this Mocha Espresso Cake to really make it shine.
For a super-elegant look, use an offset spatula to create a beautiful, smooth “naked cake” effect, where you can just barely see the cake layers through a thin coat of frosting. Then, pile some fresh raspberries or chocolate-covered espresso beans in the center of the top layer. It’s simple, stunning, and gives a little textural surprise.
If you’re going for pure comfort, just slather that frosting on thick and rustic. No fuss, all flavor. When it’s time to slice, use a sharp knife dipped in hot water and wiped dry for the cleanest cuts.
And what to serve with it? A tall glass of cold milk is a classic for a reason. But to really lean into the theme, a small cup of freshly brewed coffee or even an espresso shot on the side is absolute perfection. The bitterness of the drink alongside the sweet, rich cake is a match made in flavor heaven.
Make It Your Own: Creative Twists
This recipe is a fantastic canvas. Don’t be afraid to play with it! Here are a few of my favorite twists:
- Mocha-Chocolate Chip: Fold ¾ cup of semi-sweet or dark chocolate chips into the cake batter right before dividing it into the pans. The melty little pockets of chocolate are a game-changer.
- Salted Caramel Swirl: Add a layer of homemade or good-quality store-bought salted caramel sauce between the cake layers along with the buttercream. Then, drizzle more on top. The sweet-salty-coffee combo is unreal.
- Espresso Martini Cake: For an adults-only version, add 1-2 tablespoons of coffee liqueur (like Kahlúa) to the buttercream. You can also brush the cooled cake layers with a little liqueur before frosting for an extra kick.
- Dairy-Free Delight: Easily make this dairy-free! Use your favorite plant-based milk with a tablespoon of vinegar for the buttermilk, and use vegan butter sticks and heavy cream alternatives for the frosting. It works like a charm.
- Mocha Cupcakes: Turn this into about 18-20 fabulous cupcakes! Just line your muffin tins, fill the cups ⅔ full, and bake for 18-22 minutes. Frost when completely cool.
Jackson’s Kitchen Notes
This recipe has evolved in my kitchen more times than I can count. The first time I made it, I was so eager I tried to frost the layers when they were still slightly warm. Let’s just say it turned into more of a “mocha espresso trifle” situation—still delicious, but not the elegant cake I was going for! Lesson learned: patience is a key ingredient.
I’ve also found that this cake actually gets better the next day. The flavors have more time to meld and settle, making it even more moist and flavorful. So if you have the willpower, bake it a day ahead, wrap the cooled layers tightly in plastic wrap, and frost it the day you plan to serve it. It’s a fantastic make-ahead dessert for stress-free entertaining.
Your Questions, Answered
I’ve gotten a lot of questions about this cake over the years! Here are the most common ones to help you out.
Q: My cake layers sunk in the middle. What happened?
A: This usually means the cake needed a little more baking time, or the leaveners (baking powder/soda) were old. Always test for doneness with a toothpick—it should come out clean or with a few moist crumbs, not wet batter. And check the expiration date on your baking supplies!
Q: Can I make this without espresso? I just have regular coffee.
A> Absolutely! Just make sure it’s strong. Brew your regular coffee at about 1.5 times the strength you normally would. The flavor will be slightly less intense than with espresso, but it will still be a fantastic mocha cake.
Q: My buttercream is too runny/grainy. How can I fix it?
A> Runny buttercream usually means your butter was too soft, or the cake layers were still warm. Pop the whole bowl of frosting in the fridge for 15-20 minutes to firm up, then re-whip. Grainy frosting means the powdered sugar didn’t fully dissolve. The best fix is to keep beating! The friction and time will help melt the sugar. If it’s really stubborn, you can try gently warming the bowl over a pot of simmering water for a few seconds while whisking, then re-whipping.
Q: How should I store this cake?
A> Because of the buttercream, it’s best stored in an airtight container in the refrigerator. Let it sit at room temperature for about 30-60 minutes before serving to let the frosting soften up for the best texture and flavor. It will keep beautifully for up to 5 days.
Nutritional Info (Because We’re Curious!)
Okay, let’s be real—we’re not eating cake for its health benefits. But I know many of you like to keep track, so here’s a quick estimate per slice (based on 12 servings):
Calories: ~460
Carbohydrates: ~52g
Fat: ~25g
Saturated Fat: ~10g
Protein: ~6g
Sugar: ~38g
It’s indulgent, yes—but it’s also balanced in flavor. The coffee’s natural bitterness keeps the sweetness in check, and that smooth buttercream makes every bite feel like a little espresso-laced hug.
Final Thoughts
And there you have it — your Mocha Espresso Cake, the perfect marriage of chocolate decadence and coffeehouse sophistication. ☕🍫 This cake isn’t just dessert; it’s an experience, a little ritual of joy and aroma that fills your kitchen with warmth and your heart with satisfaction.
What I love most about this recipe is how it bridges nostalgia and elegance. It’s my grandma’s “coffee in chocolate cake” wisdom, dressed up for the modern table. Every bite tells a story — one of patience, curiosity, and that spark of creativity that turns simple ingredients into something extraordinary.
So, the next time you need a pick-me-up or want to impress the crowd, skip the bakery. Brew a fresh pot, preheat your oven, and bake your way to the best mocha moment of your life. Because when chocolate and espresso team up, good things happen. 💛


