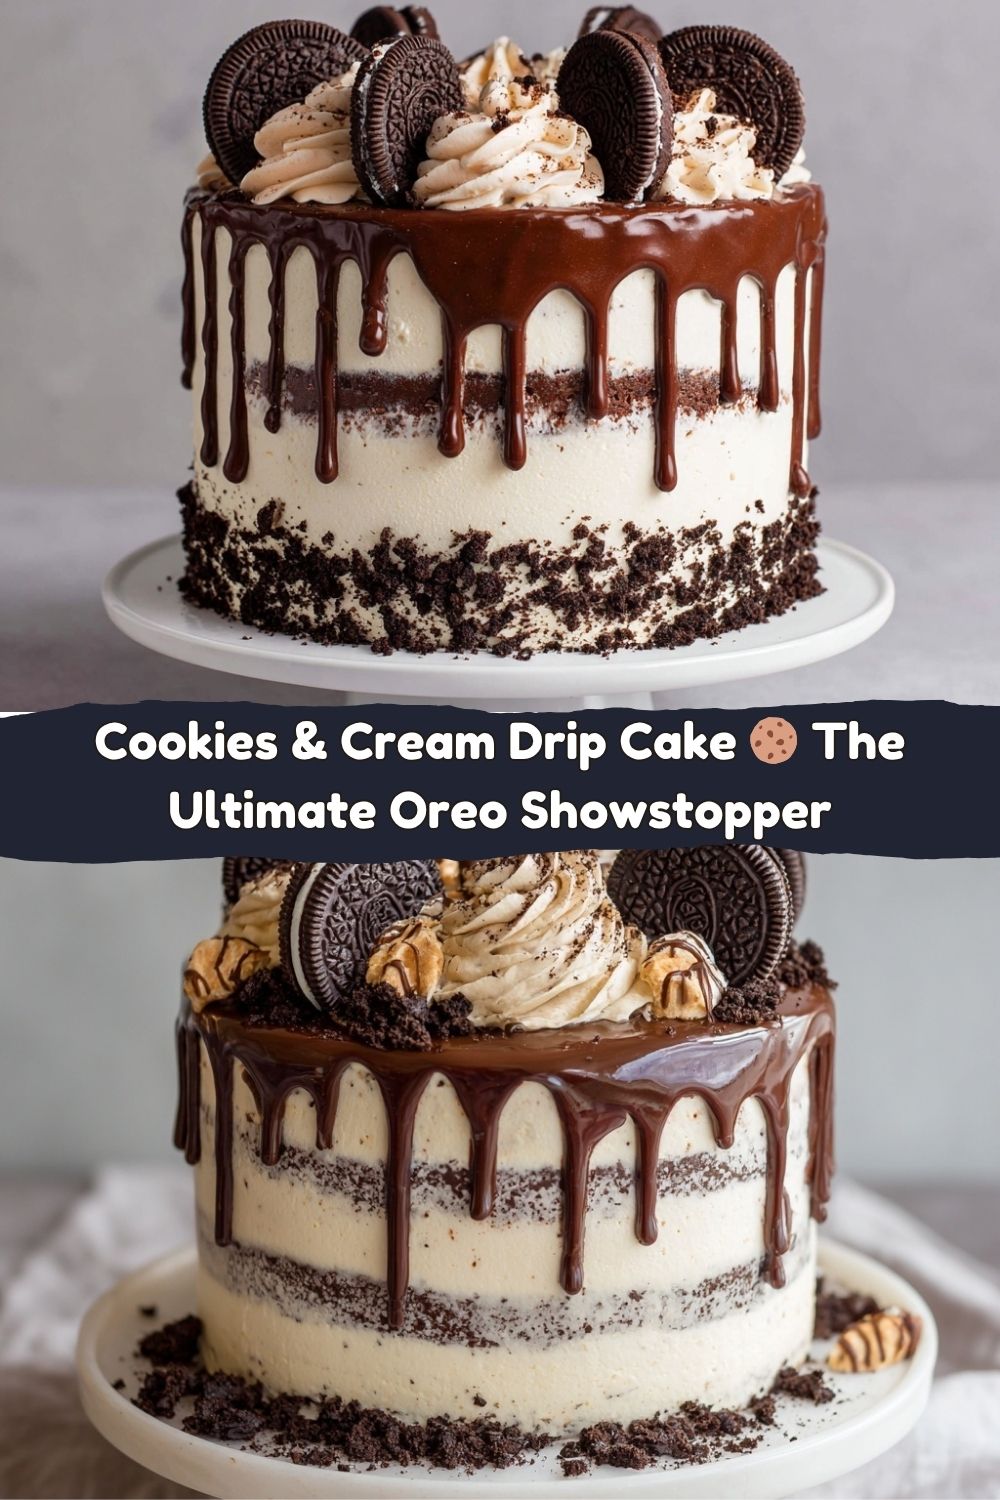
Cookies and Cream Drip Cake: The Ultimate Oreo Showstopper
Hey friends, Jackson from Food Meld here! Let’s be real: some cakes are for quiet afternoons with a cup of tea, and some cakes are for throwing a full-blown party, even if that party is just you and your favorite people standing around the kitchen island making “ooh” and “aah” sounds. This Cookies and Cream Drip Cake? It’s 100% the latter.
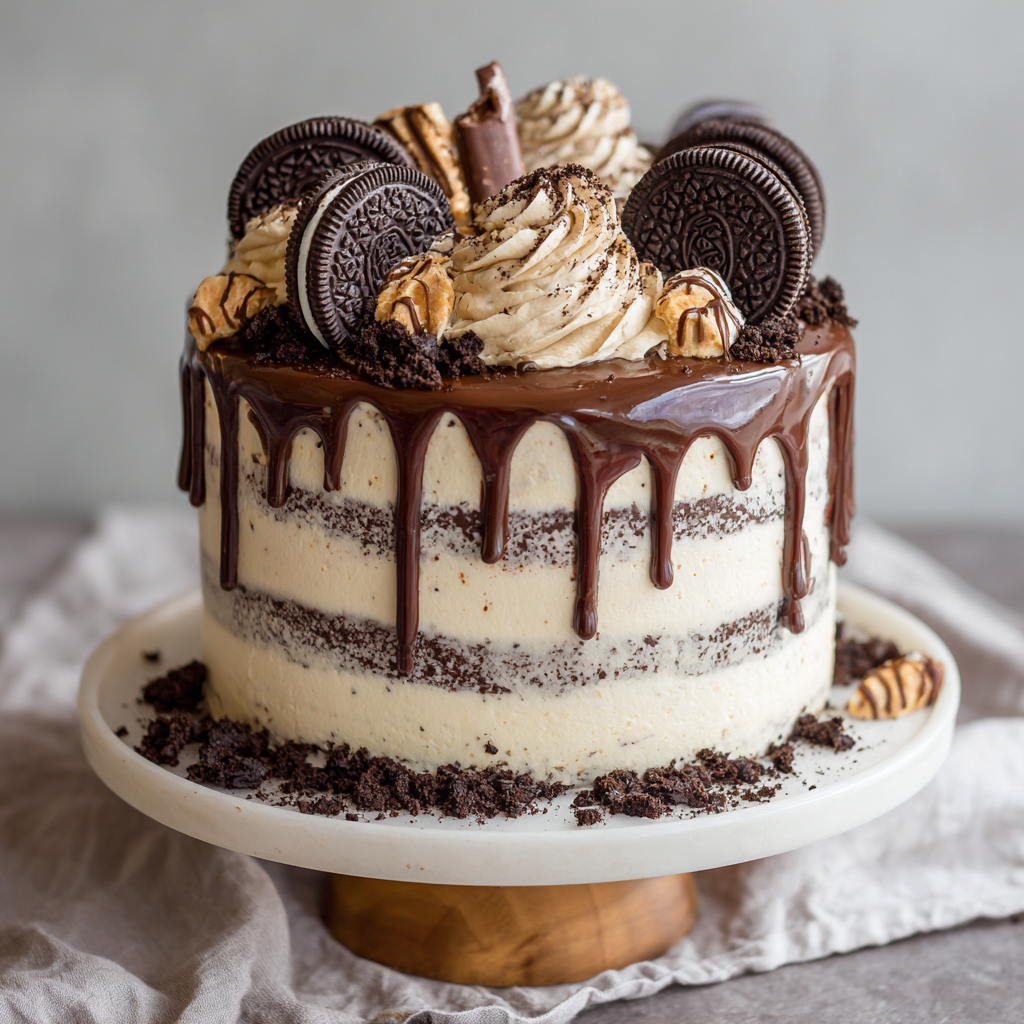
We’re talking soft, fluffy cake layers hugged by a cloud of the creamiest, dreamiest Oreo frosting you’ve ever tasted. And just when you think it can’t get any better, we’re pouring a river of rich, glossy chocolate ganache right over the top, letting it cascade down the sides in the most delicious, dramatic way. It’s a masterpiece that looks like it came from a fancy bakery, but I’m going to show you, step-by-step, how to make it happen right in your own kitchen. No intimidation allowed here—just bold flavors, a little bit of fun, and a whole lot of “you’ve gotta try this!” energy. So, tie on your apron, and let’s cook something awesome together.
That One Cake That Started It All
I’ll never forget the first time I truly fell in love with the magic of a homemade cake. I was about ten years old, “helping” my grandma in her sun-drenched kitchen. She was making my cousin’s birthday cake, and it was a classic yellow cake with chocolate frosting. But then, she did something that blew my little mind. She took a sleeve of Oreos, crushed them up with a rolling pin right there on the counter (a wonderfully messy and loud affair), and folded them right into the buttercream.
It wasn’t a drip cake—this was long before that trend—but the sheer audacity of putting cookies *in* the frosting felt like the most creative, rule-breaking thing I’d ever seen. The joy on everyone’s faces when they bit into that crunchy, creamy, sweet-and-salty frosting… it was a core memory. This Cookies and Cream Drip Cake is my homage to that moment. It’s my grandma’s spirit of “why not?” mixed with my own love for a little modern flair. It’s a celebration in cake form, and every slice is packed with that same feeling of pure, unadulterated joy.
Gathering Your Flavor Arsenal
Here’s everything you’ll need to build this epic cake. I’ve included some of my favorite chef insights and substitutions so you can make it your own. Remember, baking is a science, but it should still feel like play!
For the Cake (Your Choice!):
- 2 ½ cups all-purpose flour: The trusty foundation of our cake. If you’re going for a chocolate version, swap out ¾ cup of this for unsweetened cocoa powder for a deep, rich flavor.
- 2 tsp baking powder & ½ tsp baking soda: Our leavening dream team. They work together to give us that perfect, fluffy rise. Make sure they’re fresh for the best lift!
- ½ tsp salt: Crucial for balancing all the sweetness and making the chocolate and vanilla flavors really pop. Don’t skip it!
- 1 cup (226g) unsalted butter, softened: “Softened” is key here! It should give slightly when you press it. This creams up with the sugar to create a light, airy base for the cake.
- 1 ¾ cups (350g) sugar: For sweetness and that beautiful, tender crumb.
- 4 large eggs: Bring them to room temperature! They’ll incorporate into the batter much more smoothly, giving you a uniform texture.
- 1 tbsp vanilla extract: Yes, a full tablespoon! This is where we get that warm, beautiful vanilla aroma. Go for the good stuff if you can.
- 1 cup (240ml) buttermilk: The secret weapon for a supremely moist and tender cake. No buttermilk? No problem! Make a DIY version by adding 1 tablespoon of white vinegar or lemon juice to a cup of regular milk and let it sit for 5 minutes.
For the Cookies & Cream Frosting:
- 1 cup (226g) butter, softened: Again, softened butter is non-negotiable for a fluffy, spreadable frosting.
- 3 ½ cups (420g) powdered sugar: We’re sifting this, friends! It prevents any lumps and makes the frosting silky smooth.
- 2–3 tbsp heavy cream: This gives the frosting its lush, creamy texture. Start with 2 and add the third if you need it a bit softer.
- 1 tsp vanilla extract: A little extra flavor boost to complement the Oreos.
- 12 Oreo cookies, crushed (filling removed): Here’s a pro-tip: for a super smooth frosting that won’t clog your piping tip, scrape the filling out of the Oreos before you crush them. For a more rustic, crunchy texture, you can leave it in!
For the Chocolate Ganache Drip & Decoration:
- ½ cup heavy cream: The hot liquid that will melt our chocolate into a pourable, glossy dream.
- 4 oz (113g) dark or semi-sweet chocolate, finely chopped: Use a bar of baking chocolate, not chocolate chips. Chips have stabilizers that can prevent a smooth, clean drip.
- Extra crushed Oreos & whole Oreos: For that final “wow” factor on top. We’re going for texture, crunch, and pure Oreo glory.
Let’s Build This Masterpiece: Step-by-Step
Alright, team, this is where the fun begins. Follow these steps, and you’ll have a showstopping cake in no time. I’m talking you through it like you’re right here in the kitchen with me.
- Preheat and Prep. Fire up your oven to 350°F (175°C). Now, let’s get those pans ready. Grease three 8-inch round cake pans with a little butter or baking spray, then line the bottoms with a circle of parchment paper. This is my number-one hack for guaranteeing your cakes will release perfectly. No more cake casualties!
- Whisk the Dry Goods. In a medium bowl, whisk together your flour (or flour/cocoa mix), baking powder, baking soda, and salt. Giving these a good whisk ensures all those leaveners are evenly distributed, so every bite rises to the occasion.
- Cream the Butter and Sugar. In your stand mixer or a large bowl with a hand mixer, beat the softened butter and sugar together on medium-high speed for a good 2-3 minutes. We’re not just mixing here; we’re creaming. You want it to become pale, fluffy, and beautiful. This step incorporates air, which is the first secret to a light cake.
- Add Eggs and Vanilla. Add the eggs one at a time, beating well after each one so it’s fully incorporated before adding the next. Then, beat in that glorious tablespoon of vanilla. Your kitchen should already be smelling incredible.
- Combine Wet and Dry. With the mixer on low, add about a third of your dry ingredients, followed by half of the buttermilk. Repeat, ending with the final third of the dry ingredients. Mix until just combined. Do not overmix! A few streaks of flour are fine. Overmixing is the enemy of a tender crumb.
- Bake and Cool. Divide the batter evenly between your three prepared pans. I like to use a kitchen scale for precision, but the trusty eyeball method works too. Bake for 25-30 minutes, or until a toothpick inserted into the center comes out clean. Let the cakes cool in their pans for 10 minutes, then turn them out onto a wire rack to cool completely. I repeat: COMPLETELY. Frosting a warm cake is a recipe for a melted, slidey disaster.
- Whip Up the Frosting. While the cakes cool, let’s make that Oreo frosting. Beat the softened butter in a clean bowl until it’s smooth and creamy. Gradually add the sifted powdered sugar on low speed (unless you want a sugar dust storm), then increase the speed and beat for 2 minutes. Add the vanilla and 2 tablespoons of heavy cream, and beat for another minute until it’s light and fluffy. Fold in your crushed Oreos by hand with a spatula. Taste it. Go on, you know you want to. It’s incredible, right?
- Stack and Frost. Place your first cake layer on a cake stand or plate. Spread a generous amount of frosting over the top. Add the second layer, more frosting, then the third layer. Now, apply a thin layer of frosting all over the cake—this is called a “crumb coat.” It traps any loose crumbs. Pop the whole cake in the fridge for 15 minutes to set. Then, slather on the final, thick, beautiful layer of frosting and smooth the sides. Don’t stress about it being perfect—we’re covering the top with ganache and cookies!
- Create the Ganache Drip. Place your chopped chocolate in a heatproof bowl. Heat the heavy cream in a small saucepan until it’s just simmering—you’ll see little bubbles around the edges. Pour the hot cream over the chocolate, let it sit for 2 minutes (this is the patience part!), then whisk slowly until it’s completely smooth and glossy. Let it cool for about 5-10 minutes. It should be warm and slightly thickened, but still pourable.
- The Drip Moment! This is the fun part! Spoon your slightly cooled ganache around the top edge of the cake, encouraging it to drip down the sides. Don’t pour it all in the center. Use a spoon or offset spatula to gently push it over the edge. Once you’ve got your drips, pour the remaining ganache in the center and spread it smoothly. Immediately, pile on the extra crushed Oreos and place a few whole ones on top for drama. Chill the cake for at least 30 minutes to set everything.
How to Serve This Beauty
Okay, the cake is set, it’s gorgeous, and you’re ready to serve. Here’s how to make it an experience. First, use a sharp, thin-bladed knife. For the cleanest slices, run the knife under hot water, wipe it dry, and then make your cut. The warm knife will glide right through the ganache and frosting. Wipe the blade and reheat it between slices for a picture-perfect presentation every time.
I love serving this on simple, white plates to let the dark chocolate and black-and-white Oreos really stand out. A cold glass of milk is the classic, non-negotiable pairing, but for the adults, a cup of strong black coffee or even a glass of red wine (trust me, the combo is divine) turns this into a truly sophisticated dessert. This cake is rich, so don’t feel like you need to serve massive wedges. Smaller slices mean everyone can happily come back for seconds!
Mix It Up: Creative Twists on the Classic
Feel like playing with your food? Here are a few of my favorite ways to riff on this recipe and make it uniquely yours.
- Mint Cookies & Cream: Use Mint Oreos instead of the classic ones in the frosting and for decoration. It’s like a cool, refreshing breeze in every bite.
- Peanut Butter Lover’s Dream: Add a ½ cup of smooth peanut butter to your frosting along with the butter. Use Peanut Butter Oreos if you can find them, and consider adding a drizzle of peanut butter to the top along with the ganache.
- Cookies & Cream Cheesecake Fusion: Feeling extra? Add a layer of no-bake Oreo cheesecake filling between the cake layers. Just mix crushed Oreos into a simple cheesecake filling (cream cheese, sugar, vanilla, a little cream) and spread it on top of each cake layer before stacking.
- Dairy-Free Delight: You can absolutely make this! Use your favorite dairy-free butter and milk alternatives. For the buttermilk, use dairy-free milk with a splash of vinegar. Use dairy-free chocolate for the ganache and, believe it or not, most classic Oreos are actually vegan! (Always double-check the label.)
- Funfetti Surprise: Keep the vanilla cake base but fold in a half-cup of rainbow sprinkles into the batter. The colorful, festive inside is a fun surprise against the dark Oreo exterior.
Jackson’s Chef Notes & Kitchen Stories
This recipe has seen a lot of iterations in my kitchen. The first time I attempted the drip, I was so nervous I made the ganache way too thin. It ended up looking less like elegant drips and more like a chocolate waterfall that completely drowned the sides of the cake. My friends still called it delicious, but I learned a valuable lesson: the temperature of your ganache is EVERYTHING. Let it cool! It should be the consistency of warm honey.
Another evolution? I used to leave the Oreo filling in when I crushed them for the frosting. It’s delicious, but it can make your frosting a bit greasy and can clog piping tips if you’re doing any fancy borders. Scraping the filling out gives you a purer, whiter, smoother frosting that lets the chocolate cookie pieces really shine through. But hey, if you’re a purist who loves that extra cream, you do you! That’s the beauty of cooking—make it yours.
FAQs & Quick Fixes
Got a question? I’ve probably been there. Here are answers to the most common ones.
Q: My ganache is too thin/runny. Help!
A: No panic! If it’s too runny, just let it sit at room temperature for a bit longer to cool and thicken. You can also pop it in the fridge for 5-minute intervals, stirring each time, until it reaches the right consistency. If it gets too thick, you can gently reheat it in 5-second bursts in the microwave.
Q: Why is my frosting gritty?
A: This almost always means your powdered sugar wasn’t sifted. It can also happen if you add the sugar too quickly. Next time, sift it and add it gradually on low speed. For now, just keep beating—sometimes extra mixing can help dissolve the sugar a bit more.
Q: Can I make the cake layers ahead of time?
A: Absolutely! Bake the cake layers, let them cool completely, then double-wrap them in plastic wrap and freeze for up to 2 months. They are actually easier to frost when they’re slightly frozen! Thaw them in the fridge before assembling.
Q: My cakes domed in the middle. How do I get flat layers?
A: This is a common issue. You can try using cake strips (you soak them in water and wrap them around the pan) which insulate the edges and promote even baking. If you don’t have them, once the cakes are out of the oven, you can gently press the dome down with a clean kitchen towel or use a serrated knife to level them once they’re cool.
Nutritional Info (For Your Inner Food Scientist)
Okay, let’s keep it real. We’re not making a salad here—we’re making a celebration cake! But I believe in being transparent. This info is an estimate per slice (assuming 12 slices).
- Calories: ~530
- Carbohydrates: ~58g
Fat: ~28g
Saturated Fat: ~14g
Protein: ~6g
Sugar: ~45g
This cake is definitely indulgent—but that’s the point! It’s joy on a plate. The balance of textures (soft cake, creamy frosting, crisp cookies, silky ganache) means every bite is a full sensory experience. And hey, sharing it with people you love? That’s the best kind of nourishment there is.
Final Thoughts
There’s a reason this Cookies and Cream Drip Cake gets the “showstopper” title—it’s everything a dessert should be: nostalgic, fun, rich, and just a little over-the-top. 🍪✨ Whether you’re baking it for a birthday, a party, or just a “why not?” weekend, this cake brings that joyful, bakery-window magic straight into your kitchen.
What I love most about this recipe is that it bridges generations. It’s my grandma’s spirit of creativity—crushing Oreos on the countertop for the sheer fun of it—blended with a modern, polished twist. Every drip, every layer, every crumb reminds me that food doesn’t have to be complicated to be unforgettable.
So, go ahead—grab those Oreos, melt that chocolate, and get a little messy. Because sometimes, the best cakes are the ones that make you smile before you even take a bite. And this one? It’s guaranteed to do just that.
Here’s to cookies, cream, and kitchen joy. 💛


