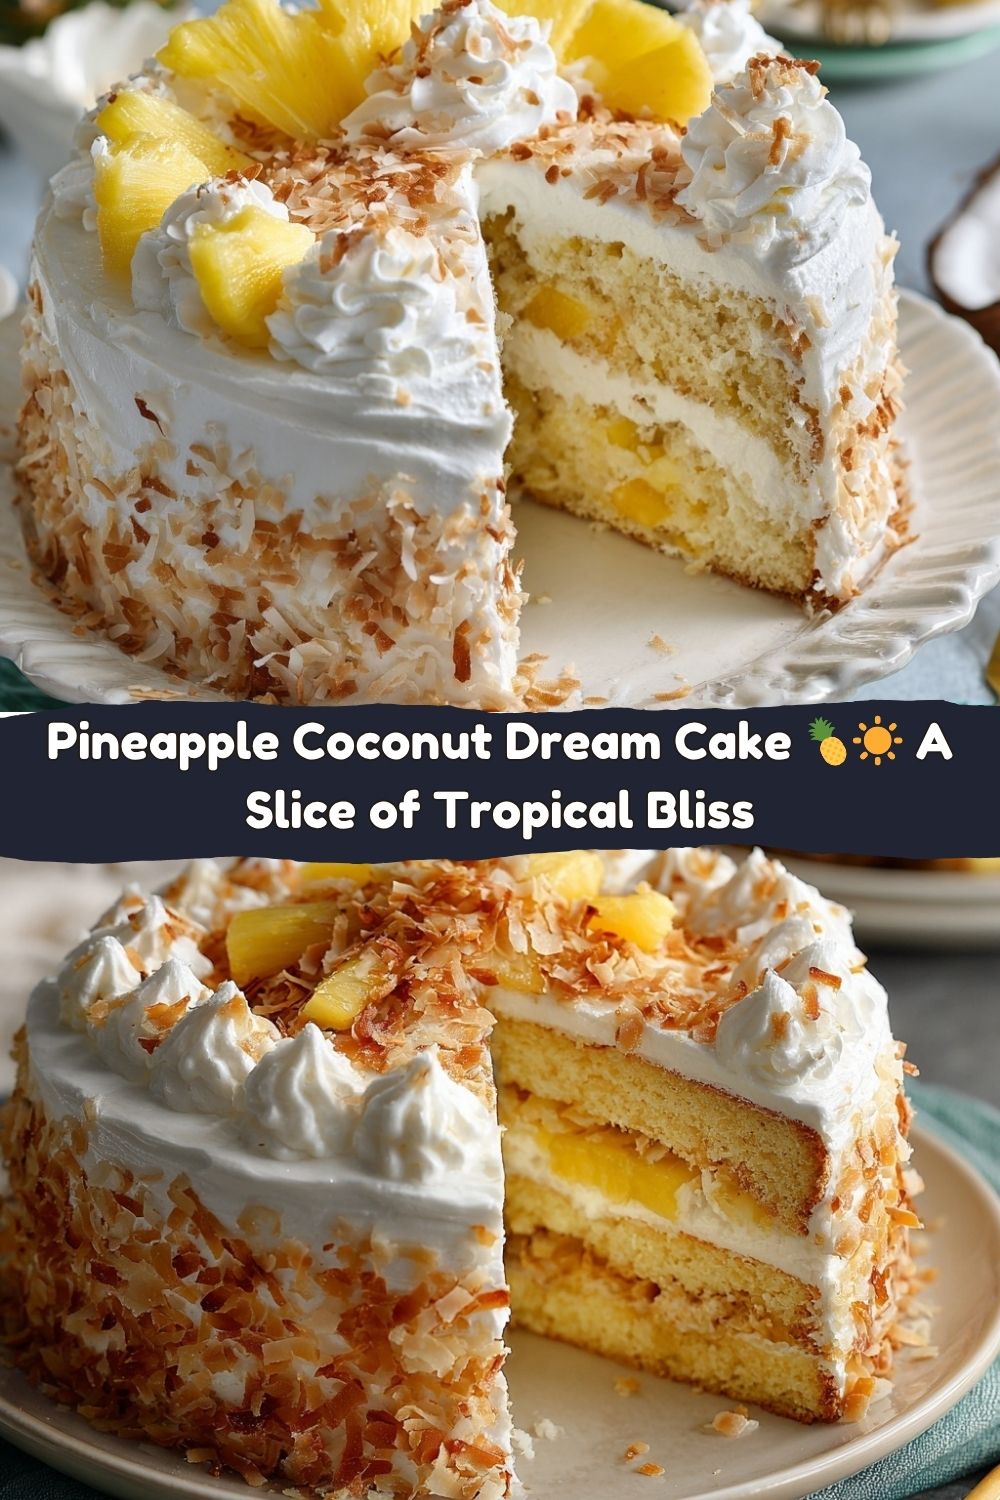
Pineapple Coconut Dream Cake: Your Slice of Tropical Bliss
Hey friends, Jackson from Food Meld here! Let’s be real for a second. Don’t you sometimes just close your eyes and dream of a place where the air is warm, the ocean is turquoise, and someone hands you a frosty drink with a little umbrella in it? I know I do, especially on those long, busy days when the closest I get to a beach is the sandbox at the local park. But what if I told you that you could capture that exact feeling of sun-soaked, carefree paradise without ever leaving your kitchen?
Well, get ready, because we’re about to bake our way to vacation. Today, I’m sharing the recipe for my all-time favorite Pineapple Coconut Dream Cake. This isn’t just any cake. This is a fluffy, moist, sunshiny masterpiece that tastes like a piña colada decided to transform itself into the most incredible dessert you’ve ever had. It’s the kind of cake that makes people stop mid-bite, their eyes get wide, and they immediately ask, “What is *in* this?!”
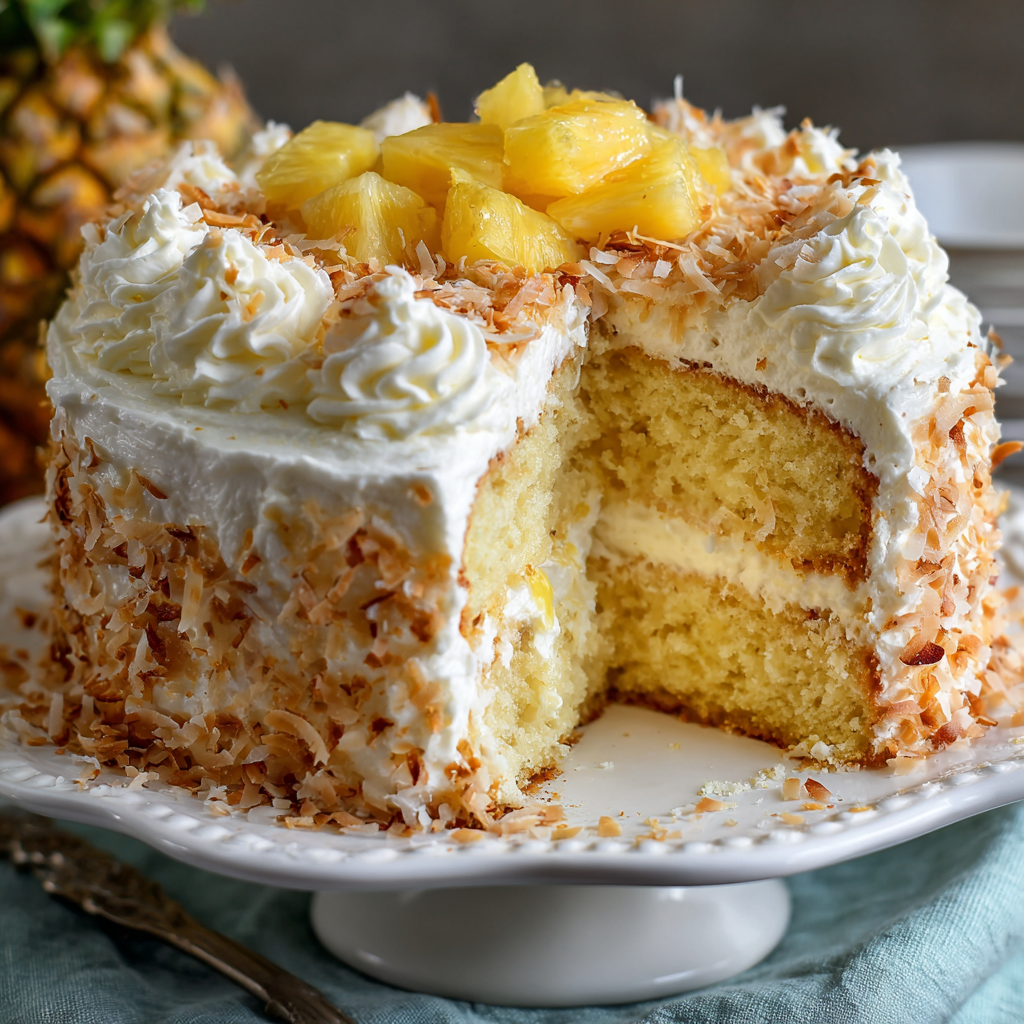
We’re talking tender cake layers bursting with juicy pineapple, a creamy, dreamy frosting that’s tangy and sweet, and a glorious blanket of toasted coconut that adds the perfect crunch. It’s a showstopper for birthdays and potlucks, but honestly, it’s also a Tuesday-night-kind-of-wonderful. My philosophy has always been that cooking should be fun, not intimidating, and this cake is the perfect example. We’re using simple ingredients to create something truly unforgettable. So, tie on your apron, put on some island tunes, and let’s cook something awesome together. Let’s make a cake that’s pure tropical bliss in every single bite.
A Taste of Sunshine: My Grandma’s Porch & A Cake That Stuck
This cake always takes me right back to my grandma’s screened-in porch in Georgia. Summers there were hot and sticky, the kind of heat that makes you move slow. But Grandma? She was always whipping up something magical in her kitchen, a place that smelled like a wild mix of Southern comfort and her sense of culinary adventure.
One particularly sweltering August afternoon, she presented this cake. It wasn’t in her usual rotation of pound cakes and peach cobblers. It was something new, something she called her “Island Escape Cake.” I remember the condensation dripping down the glass of iced tea beside my plate, and that first forkful. It was like a cool breeze had swept through the porch. The tangy pineapple, the creamy frosting, the toasted coconut… it was a revelation. It was my first real taste of “fusion” before I even knew the word. It taught me that food isn’t just about feeding people; it’s about transporting them, even just for a moment. That’s the spirit I try to bring to every recipe here at Food Meld—a little Southern heart, a whole lot of global inspiration, and that “what if we tried this?” energy that starts with a single, unforgettable bite.
Gathering Your Tropical Ingredients
Alright, let’s get our mise en place! That’s just a fancy chef term for getting everything measured and ready to go before we start. It makes the baking process smooth and stress-free. Here’s everything you’ll need to build this dreamy cake.
For the Dreamy Cake:
- 2 ½ cups all-purpose flour: The trusty foundation of our cake. For a slightly lighter crumb, you can swap one cup with cake flour, but all-purpose works perfectly.
- 2 tsp baking powder & ½ tsp baking soda: Our dynamic leavening duo! They work together to give this cake its beautiful, fluffy rise. Make sure they’re not expired for the best lift.
- ½ tsp salt: Never skip the salt! It’s the flavor enhancer that makes all the sweet and tropical notes pop. It balances everything out beautifully.
- 1 cup crushed pineapple, drained slightly: The star of the show! We’re draining it *slightly* because we want to keep some of that amazing juice for moisture and flavor, but we don’t want the batter to get too wet. Chef Hack: Save that juice! We might use a tablespoon or two in the frosting.
- ¾ cup unsalted butter, softened: The key word here is softened. Leave it on the counter for an hour before you start. It should be cool to the touch but yield easily when you press it. This is non-negotiable for a light and creamy batter.
- 1 ½ cups granulated sugar: For that perfect sweetness. The sugar also helps create a tender crumb by creaming with the butter.
- 4 large eggs, at room temperature: Room temp eggs incorporate into the batter much more evenly, giving you a smoother, more uniform texture. Just place them in a bowl of warm water for 5-10 minutes if you forgot to take them out!
- 1 tsp coconut extract: This is our secret weapon for that intense tropical coconut flavor. If you can’t find it, vanilla extract works just fine, but the coconut really sends it over the top.
- 1 cup canned coconut milk OR buttermilk: I love the double coconut hit from the milk, but if you’re out, traditional buttermilk will give you an unbelievably tender and moist crumb with a lovely tang. It’s a win-win!
For the Creamy Dream Frosting:
- 8 oz cream cheese, softened: Again, softened is crucial! This gives our frosting that silky, lump-free texture.
- ½ cup unsalted butter, softened: The perfect partner for cream cheese, creating a frosting that’s stable, spreadable, and ridiculously delicious.
- 3–4 cups powdered sugar: We start with 3 cups and add more until we hit our desired sweetness and thickness. Sift it if you have time to avoid any little lumps.
- 1 tsp vanilla or coconut extract: Your choice! I usually go with vanilla here to complement the coconut in the cake, but doubling down on coconut is never a bad idea.
- 1–2 tbsp reserved pineapple juice (optional): Remember that juice we saved? This is where the magic happens. A tablespoon or two adds a subtle, fruity tang that cuts through the sweetness. Add it slowly so your frosting doesn’t get too thin.
For the Toasty Topping:
- 1 cup sweetened shredded coconut, toasted: Toasting the coconut is a game-changer. It deepens the flavor, adds a gorgeous golden color, and gives the cake an incredible crunch. Don’t skip this step—it makes the whole cake!
Baking the Dream: Your Step-by-Step Guide
Ready to build our tropical masterpiece? Follow these steps, and you’ll have a perfect cake every single time. I’ve packed this section with all my favorite chef hacks to make you feel like a pro.
- Prep Like a Pro: First things first, preheat your oven to 350°F (175°C). This gives the oven time to reach the perfect, steady temperature for an even bake. Now, grab two 8-inch round cake pans. Grease them generously with butter or non-stick spray, then dust them with a little flour, tapping out the excess. For absolute cake-release confidence, I like to line the bottoms with a circle of parchment paper. Chef Hack: A pro tip from my Southern grandma: after greasing, put that parchment circle in the bottom, then grease the parchment too. Your cakes will practically jump out of the pan.
- Combine the Dry Goods: In a medium bowl, grab your whisk and give the all-purpose flour, baking powder, baking soda, and salt a good whisking. We’re not just mixing here; we’re aerating the flour and making sure those leaveners are evenly distributed. This is the secret to a cake that rises uniformly, without any random tunnels or dense spots.
- Cream the Butter & Sugar: In a large mixing bowl, add your softened butter and granulated sugar. Now, beat them together on medium-high speed for a good 2-3 minutes. We’re not just mixing; we’re “creaming.” This process incorporates tiny air bubbles into the batter, which expand in the oven and create a light, fluffy cake. You’ll know it’s ready when the mixture turns pale yellow and looks light and fluffy.
- Incorporate the Eggs & Flavor: With the mixer on medium, add your room-temperature eggs one at a time. Let each egg fully incorporate before adding the next. This prevents the batter from curdling and ensures a smooth, emulsified base. Now, mix in that glorious coconut extract. Your kitchen should already be smelling amazing.
- Bring It All Together: Time to add our star ingredient! Use a spatula to gently fold in the slightly drained crushed pineapple. Now, we’ll alternate the dry and wet ingredients. Add about one-third of the flour mixture, mix on low until just combined, then half of the coconut milk. Repeat, ending with the final third of the flour. Chef Hack: The key here is to mix until *just* combined. Overmixing at this stage develops gluten and can lead to a tough, dense cake. A few streaks of flour are okay; we’ll fold them in by hand.
- Bake to Golden Perfection: Evenly divide the beautiful batter between your two prepared pans. Give the pans a little tap on the counter to release any large air bubbles. Slide them into your preheated oven and bake for 30-35 minutes. You’ll know it’s done when the tops are springy to the touch, the edges are just pulling away from the pan, and a toothpick inserted into the center comes out clean or with a few moist crumbs.
- The Most Important Step: Cool Completely! I know it’s tempting, but resist! Let the cakes cool in their pans on a wire rack for about 15 minutes. Then, run a knife around the edge and carefully invert them onto the rack to cool completely. Chef Hack: Frosting a warm cake is a recipe for a melted, sliding mess. Patience is your best friend here. For a speed-up, you can even pop the cooled layers in the fridge for 30 minutes.
- Whip Up the Dreamy Frosting: While the cakes cool, let’s make that frosting. In a clean bowl, beat the softened cream cheese and butter together until it’s completely smooth and creamy. Gradually add the powdered sugar, one cup at a time, on low speed (unless you want a sugar dust storm!). Once incorporated, add your extract and a tablespoon of pineapple juice if using. Whip it on medium-high for a minute until it’s light and fluffy.
- Toast the Coconut: Spread your shredded coconut in a dry skillet over medium heat. Stir it constantly! It can go from perfectly golden to burnt in seconds. Once it’s fragrant and lightly browned, pour it onto a plate to cool.
- Assemble Your Masterpiece: Place one cooled cake layer on your serving plate. Spread a generous layer of frosting over the top. Carefully place the second layer on top. Now, frost the top and sides with the remaining frosting. Don’t worry about it being perfectly smooth—this is a rustic, dreamy cake! Finally, gently press the toasted coconut all over the top and sides. Take a step back and admire your work. You did it!
How to Serve This Slice of Paradise
Presentation is part of the fun! This cake is a stunner all on its own, but a few little touches can make it feel extra special.
I love serving this on a simple, white cake stand to let that golden toasted coconut really shine. For a true taste of the tropics, garnish the top with a few thin slices of fresh pineapple and maybe even a maraschino cherry for that classic piña colada vibe.
When it’s time to slice, dip your sharp knife in hot water and wipe it dry between each cut. This gives you those pristine, clean slices with perfect layers. This cake is incredible at room temperature, but if it’s a really hot day, a slightly chilled slice is unbelievably refreshing. Pair it with a cup of strong coffee to balance the sweetness or, for the full experience, a frosty mocktail (or cocktail!) with pineapple and coconut flavors.
Make It Your Own: Dreamy Recipe Variations
One of my favorite things about cooking is making a recipe your own. Here are a few fun twists on this tropical dream to get your creative juices flowing:
- Piña Colada Cupcakes: Turn this into a party-friendly treat! Divide the batter into lined muffin tins and bake for 18-22 minutes. Frost, roll the tops in toasted coconut, and add a tiny cocktail umbrella for the cutest dessert ever.
- Tropical Rum Soak: For an adult-only version, mix 2 tablespoons of dark or coconut rum with 1 tablespoon of the reserved pineapple juice. After the cakes cool, use a pastry brush to gently brush the mixture over the layers before frosting. It adds an incredible depth of flavor.
- Dairy-Free Dream: Easily make this dairy-free! Use vegan butter sticks and a plant-based cream cheese for the frosting. The canned coconut milk is already dairy-free, so you’re good to go. Just double-check all your labels.
- Coconut Cream Cheese Whipped Cream: Want a lighter frosting? Fold 1 cup of cold heavy cream into half of the cream cheese frosting mixture until combined. It’ll be fluffier and less sweet, but just as delicious.
- Add Some Crunch: For a fun textural surprise, fold ½ cup of finely chopped macadamia nuts into the cake batter along with the pineapple. The buttery crunch is a perfect match for the tropical flavors.
Jackson’s Chef’s Notes & Kitchen Stories
This recipe has been a labor of love in my kitchen. The first time I made it, I got a little overzealous and didn’t drain the pineapple *at all*. Let’s just say I ended up with a deliciously tasty, but sadly sunken, pancake-cake. It was a mess, but it taught me the importance of that one little step! I’ve also learned that the brand of coconut milk can make a difference. Some are thicker than others, so if your batter seems a little too thick, a splash more milk will fix it right up.
The best part of this cake, besides eating it, is how it makes people smile. It’s a conversation starter. It’s the cake that disappears first from the dessert table. It’s proof that with a few simple ingredients and a bit of “what if” energy, you can create pure joy. Don’t be afraid to get a little messy and make it yours.
Your Questions, Answered!
I’ve made this cake more times than I can count, and I’ve heard all your great questions. Here are the answers to the most common ones!
Q: My cake is dense. What happened?
A: The most common culprit is overmixing the batter once the flour is added. Remember, mix until *just* combined! Other factors could be old baking powder/soda or under-measuring the leaveners. Also, make sure your butter and eggs were truly at room temperature for optimal aeration.


