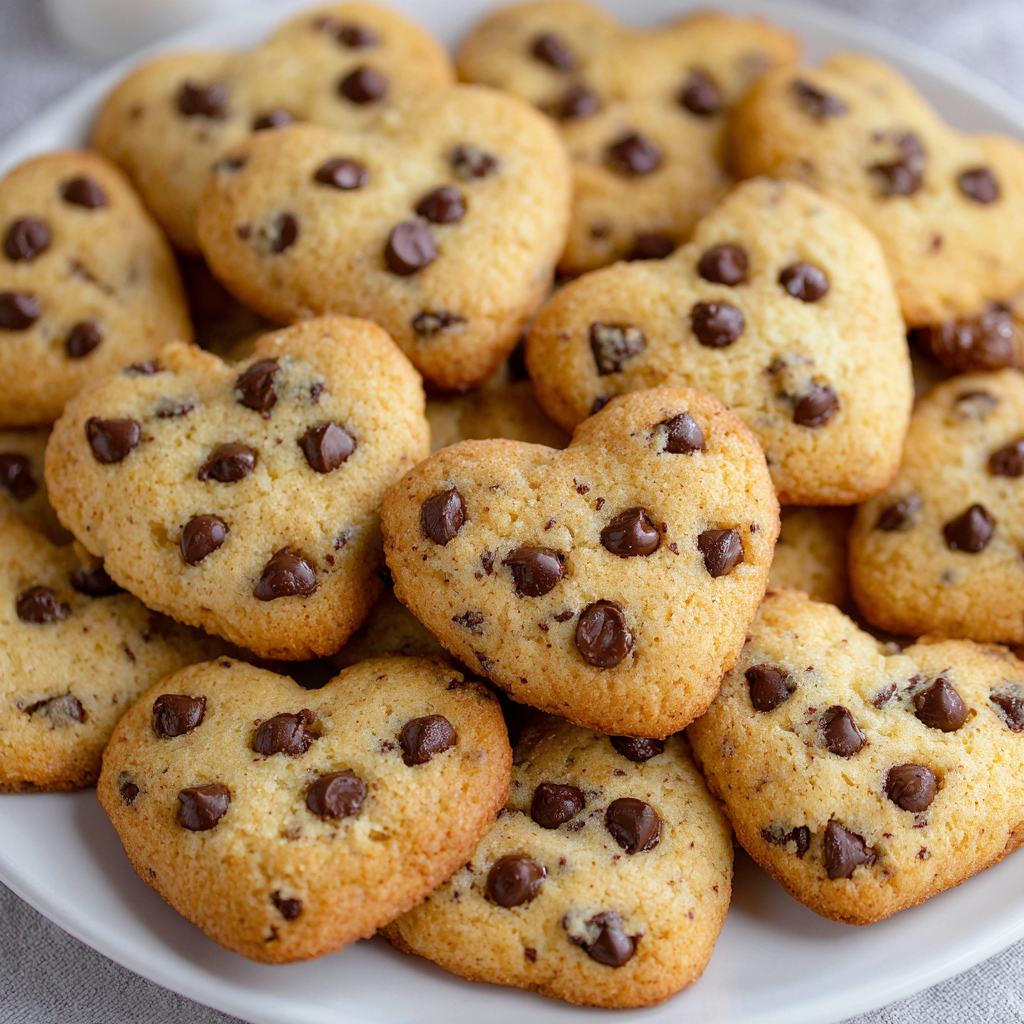
Let’s Bake a Little Love
Hey friends, Jackson here from Food Meld. Let’s be real: is there anything better than the smell of warm chocolate chip cookies filling your kitchen? It’s pure, unfiltered happiness. It’s a hug in a scent. Now, imagine taking that classic, soul-warming feeling and shaping it into something extra special. That’s exactly what we’re doing today with these Heart Shaped Chocolate Chip Cookies.
We’re talking soft-baked centers, perfectly golden edges, and so many melty chocolate chips in every single bite that you’ll think you hit the jackpot. And the best part? We’re skipping the dreaded chill time. That’s right—no waiting around for hours while your dough gets cold. This recipe is all about that “I-want-cookies-now” energy, which, let’s be honest, is the best kind of energy to have in the kitchen.
Whether you’re whipping these up for your Valentine, your Galentine, your kids, or just for your wonderful self, these cookies are a celebration. They’re fun, they’re heartfelt (pun totally intended), and they prove that making something unforgettable doesn’t have to be complicated. So, grab your favorite heart-shaped cutter, and let’s turn simple ingredients into a batch of sweet, shareable joy. Welcome to my kitchen—let’s cook something awesome together.
The Cookie That Started It All
This recipe takes me right back to my grandma’s linoleum-floored kitchen. She was the queen of “a little of this, a little of that” cooking, but her chocolate chip cookies were a sacred, written-in-stone ritual. Every Sunday, without fail, she’d let me cream the butter and sugar with her old wooden spoon, my small hands struggling to keep up. She never used a mixer. “You gotta feel the dough, Jackson,” she’d say. “It tells you when it’s ready.”
One year, for my mom’s birthday, which is just a week before Valentine’s Day, we decided to get fancy. Grandma pulled out this slightly rusted heart-shaped cutter, and we got to work. We pressed and cut, our fingers dusty with flour, laughing as some of the hearts came out lopsided. But when my mom saw that plate of warm, heart-shaped cookies, her face lit up like she’d been given a treasure. It wasn’t about perfection; it was about the intention, the time, and the love baked right in. That’s the spirit I’m bringing to this recipe today—a little bit of nostalgia and a whole lot of heart.
Gathering Your Cookie Crew: The Ingredients
Here’s the lineup for our star players. Using quality ingredients is key, but I’ve also got some easy swaps for you. Remember, baking is a science, but it should never feel like a lab experiment!
- 4½ cups All-Purpose Flour: This is the backbone of our cookie, giving it that perfect structure. If you find your dough is too sticky when rolling, a light dusting of extra flour on your surface and rolling pin is your best friend.
- 2 teaspoons Baking Soda: Our leavening agent! This is what gives the cookies their slight lift and that lovely, tender crumb. Make sure it’s fresh for the best results.
- 1½ teaspoons Salt: Trust me on this. Salt isn’t just for savory dishes; it’s the secret weapon that makes the chocolate and the brown sugar flavors pop. It balances the sweetness perfectly.
- 2 cups Unsalted Butter, at room temperature: The key here is room temp. Your butter should be soft enough that you can press a finger into it easily. This is non-negotiable for creaming it properly with the sugar and creating a light, fluffy cookie base.
- 1 cup Light Brown Sugar, packed & 1 cup Granulated Sugar: This dynamic duo is magic. The molasses in the brown sugar brings moisture, chewiness, and that deep, caramel-like flavor, while the white sugar helps with spread and crispness. Pack that brown sugar firmly into your measuring cup!
- 4 teaspoons Vanilla Extract: Go for the good stuff if you can! This adds a warm, aromatic depth that makes the cookies taste incredibly rich and homemade.
- 4 large Eggs, at room temperature: Like the butter, room-temperature eggs incorporate much more easily into the creamed butter and sugar, creating a smoother, more emulsified dough.
- 3 cups Semisweet Chocolate Chips (mix of mini and regular): This is my pro-tip! The mini chips distribute chocolate throughout the entire cookie, ensuring every bite is a winner, while the regular chips give you those glorious, big pockets of melted chocolate. It’s the best of both worlds!
Let’s Get Baking: The Step-by-Step Magic
Okay, team. Preheat those ovens to 350°F (175°C) and line your baking sheets with parchment paper. This isn’t just to prevent sticking; it also helps the cookies bake evenly. Let’s dive in.
- The Dry Team Assembles: In a medium bowl, take your flour, baking soda, and salt. Grab a whisk and give them a good, thorough whisking. We’re doing this to make sure our leavening agent is evenly distributed, so we don’t get any bitter, soapy-tasting bites. No one wants that. Chef’s Hack: I sometimes add a tiny extra pinch of salt here. You won’t regret it.
- Creaming is Key: In a large bowl, add your room-temperature butter, packed brown sugar, and granulated sugar. Now, break out your electric hand mixer (or stand mixer with the paddle attachment). We’re going to beat this on medium-high speed for a solid 2-3 minutes. You’re looking for the mixture to become noticeably paler in color, fluffy, and beautifully smooth. This step incorporates air, which is essential for the perfect cookie texture. Don’t rush it!
- Incorporate the Wet Ingredients: Crack in your eggs one at a time, mixing well after each addition. This allows the egg to fully emulsify into the butter and sugar mixture, creating a stable base. Once the eggs are in, pour in that glorious vanilla extract and mix just until combined. The smell should already be incredible.
- Bringing It All Together: Now, with your mixer on a low speed, gradually add the dry ingredients to the wet. Mix until the flour streaks have just disappeared. A few dry spots are okay—we’re about to finish it by hand. Chef’s Tip: Overmixing at this stage develops too much gluten and can lead to tough cookies. We want tender, not tough!
- The Chocolate Finale: Dump in all of your chocolate chips—the regular and the mini ones! Put the mixer away and grab a sturdy spatula. Fold the chips in by hand until they’re evenly distributed. This gives you more control and prevents overworking the dough.
- Shape with Heart: Lightly flour your countertop and rolling pin. Turn the dough out onto the surface. Roll it out to about ½-inch thickness—this is the sweet spot for a cookie that’s substantial but still bakes evenly. Dip your heart-shaped cutter in a little flour and start cutting! Press straight down and lift straight up for clean edges. Re-roll the scraps and keep going until you’ve used all the dough.
- Bake to Perfection: Place your beautiful heart-shaped cookies on the prepared baking sheets, leaving about an inch or two between them. They won’t spread a ton, but they need their personal space. Pop them in the preheated oven and bake for 11-13 minutes. You’re looking for lightly golden edges while the centers still look soft and slightly underdone. Chef’s Secret: They continue to cook on the hot baking sheet, so pulling them at this point is the secret to a soft, chewy center.
- The Patient Wait: This is the hardest part. Let the cookies cool on the baking sheet for a full 5 minutes. This allows them to set up so they don’t fall apart when you move them. After that, carefully transfer them to a wire rack to cool completely… or, you know, grab a glass of milk and enjoy one (or two) warm. I won’t tell.
Sharing the Love: How to Serve These Beauties
Presentation is part of the fun! You’ve put in the work, now let’s make these cookies shine. My favorite way to serve them is on a big, rustic wooden board or a vibrant platter. Stack a few in the center and scatter some extra chocolate chips or even some festive red and pink sprinkles around for a pop of color.
For the ultimate “wow” moment, place a single warm cookie on a small plate, dust it with a little powdered sugar, and add a small scoop of vanilla bean ice cream on the side. The contrast of the warm cookie and the cold, creamy ice cream is a game-changer.
If you’re giving these as a gift, find a cute box or a cellophane bag, tie it with a ribbon, and you’ve got a present that’s straight from the heart—literally. It’s a simple, homemade gesture that speaks volumes.
Make It Your Own: Creative Twists & Swaps
This recipe is a fantastic canvas for your creativity. Here are a few of my favorite ways to mix it up:
- Salted Caramel Pretzel Hearts: Fold in 1 cup of crushed pretzel pieces and ½ cup of soft caramel bits along with the chocolate chips. Finish the baked cookies with a light sprinkle of flaky sea salt. Sweet, salty, crunchy perfection.
- Mocha Chip Love: For the coffee lovers! Add 1-2 tablespoons of instant espresso powder to the dry ingredients. The coffee deepens the chocolate flavor without making it taste like a latte. It’s incredible.
- Funfetti Valentine’s Version: Swap out 1 cup of the chocolate chips for ½ cup of red and ½ cup of pink sprinkles. It’s a festive, colorful twist that’s perfect for parties.
- Gluten-Free & Dairy-Free Friends: No problem! Use a 1:1 gluten-free all-purpose flour blend. Replace the butter with your favorite plant-based stick butter (the kind made for baking) and use dairy-free chocolate chips. The method stays exactly the same.
- Stuffed Cookie Surprise: Feeling adventurous? Take two smaller rolled-out hearts, place a square of your favorite chocolate bar or a Rolo in the center of one, top with the second heart, and press the edges to seal. Bake as directed. You’ve just created a molten-centered masterpiece!
Jackson’s Kitchen Notes
This recipe has evolved so much since those first lopsided hearts in my grandma’s kitchen. I’ve probably made this base dough a hundred times, tweaking it until it was just right. The no-chill aspect was a game-changer I discovered on a busy weeknight when a cookie craving hit hard. I realized that by rolling and cutting them, we weren’t relying on a chilled dough ball to hold its shape, so we could skip that step entirely!
One of my favorite kitchen fails turned into a win: I once ran out of regular chips and had to use all minis. The result was so good—a perfectly uniform chocolate distribution—that I decided to make the mix of mini and regular a permanent part of the recipe. Sometimes, the best discoveries happen by accident when you’re just having fun and not taking it all too seriously.
Your Questions, Answered!
Q: My dough is too sticky to roll. What did I do wrong?
A: Don’t panic! This usually means your butter was a little too soft or you’re in a particularly humid kitchen. No biggie. Just add a tablespoon of flour at a time to the dough until it’s manageable, and make sure you’re flouring your surface, rolling pin, and cookie cutter generously.
Q: Can I make the dough ahead of time?
A: Absolutely. You can roll and cut the cookies, then place the unbaked shapes on a parchment-lined tray, freeze them solid, and transfer to a freezer bag. They’ll keep for up to 3 months. When you’re ready, bake them straight from the freezer, adding 1-2 minutes to the baking time.
Q: My cookies didn’t spread and are a bit cakey. Why?
A: This often points to too much flour. The most common culprit is scooping the measuring cup directly into the flour bag, which packs it down. Next time, try fluffing your flour with a spoon, then spooning it gently into your measuring cup and leveling it off with a knife. This “spoon and level” method makes a world of difference.
Q: Can I use a different shaped cookie cutter?
A: Of course! This dough is your playground. Use stars for the 4th of July, Christmas trees for the holidays, or dinosaurs just because it’s Tuesday. The baking time will remain roughly the same as long as the thickness is consistent.
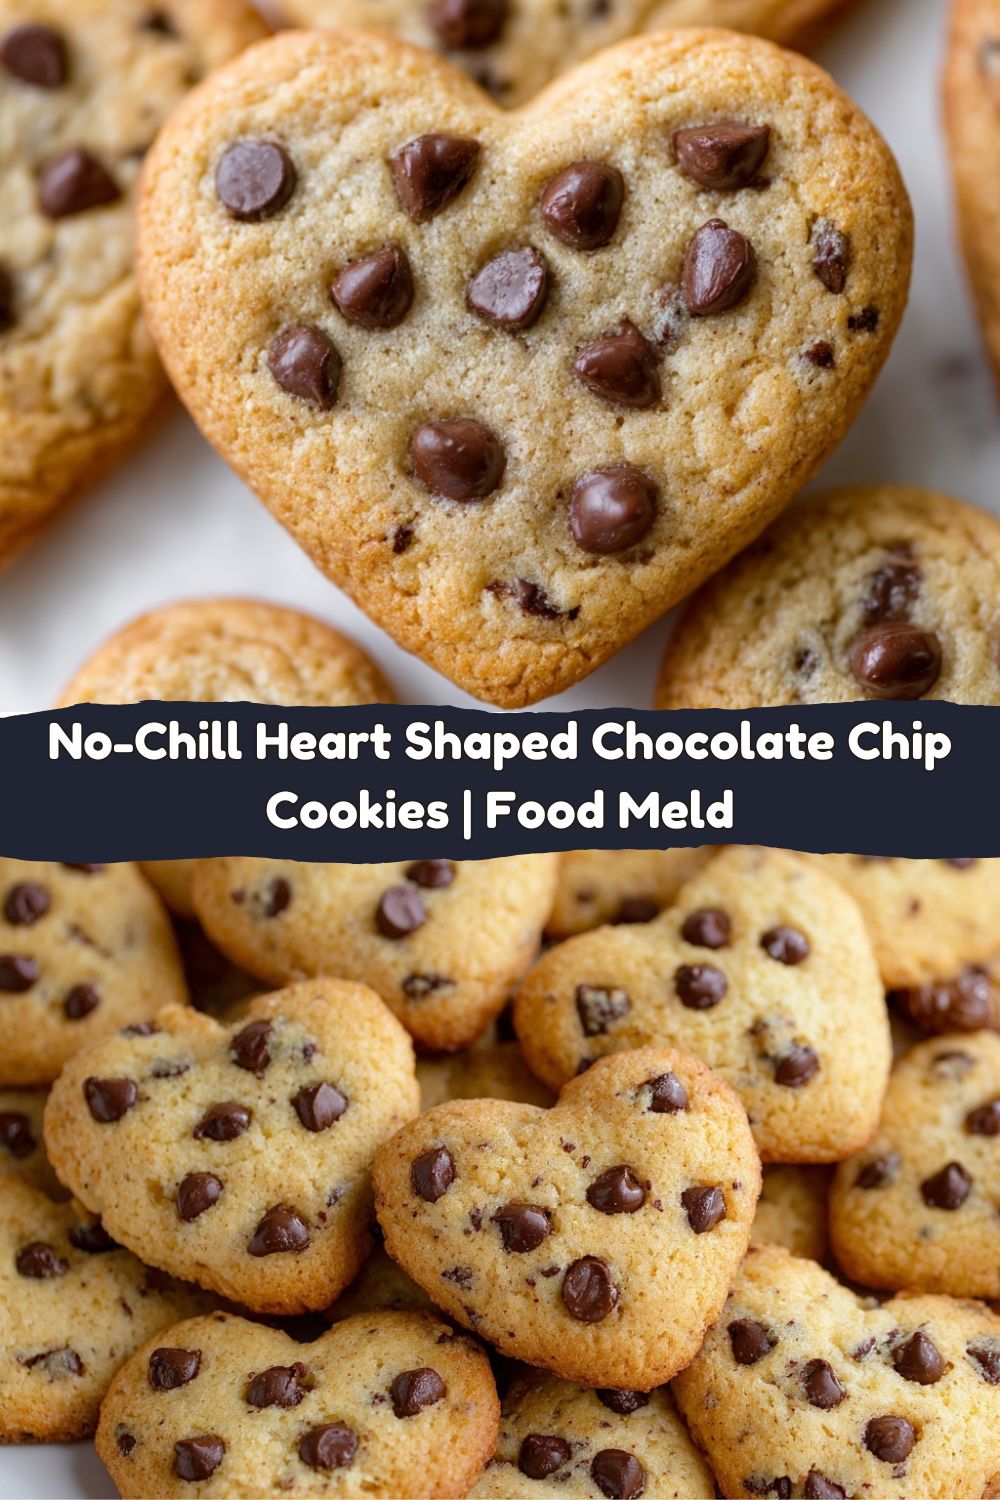
Heart Shaped Chocolate Chip Cookies : Sweet, Soft & Perfect for Sharing
- Total Time: 25 minutes
- Yield: 48 cookies 1x
Description
These heart-shaped chocolate chip cookies are soft in the center, golden at the edges, and packed with melty chocolate in every bite. Made without any chill time, they come together fast—perfect for Valentine’s Day, anniversaries, or just baking something sweet for someone you love. The mix of regular and mini chocolate chips gives every bite a chocolatey surprise.
Ingredients
4½ cups all-purpose flour
2 teaspoons baking soda
1½ teaspoons salt
2 cups unsalted butter, at room temperature
1 cup light brown sugar, packed
1 cup granulated sugar
4 teaspoons vanilla extract
4 large eggs, at room temperature
3 cups semisweet chocolate chips (mix of mini and regular for best texture)
Instructions
Preheat oven to 350°F (175°C). Line baking sheets with parchment paper.
In a medium bowl, whisk together flour, baking soda, and salt.
In a large bowl, use an electric hand mixer to cream butter, brown sugar, and granulated sugar until light and fluffy (about 2–3 minutes).
Add in the eggs one at a time, then mix in vanilla.
Gradually add dry ingredients to the wet mixture, mixing until just combined. Fold in chocolate chips.
On a lightly floured surface, roll the dough to about ½ thick. Use a heart-shaped cookie cutter to cut out cookies.
Place on prepared baking sheets, leaving some space between each cookie.
Bake for 11–13 minutes, or until edges are lightly golden and centers are still soft.
Cool on baking sheet for 5 minutes, then transfer to wire rack.
- Prep Time: 10 minutes
- Cook Time: 15 minutes
Nutrition
- Calories: 215 / Cookie
- Sugar: 14g / Cookie
- Fat: 12g / Cookie
- Saturated Fat: 7g / Cookie
- Carbohydrates: 25g / Cookie
- Fiber: 1g / Cookie
- Protein: 2g / Cookie
Nutritional Info (For the Curious!)
Okay, let’s talk real talk. We’re here for a delicious, homemade treat, and I believe in enjoying every single bite. But I also believe in being transparent. This estimated nutritional information is for one cookie, based on the recipe making 48 cookies. Remember, these are estimates, and your actual count can vary based on the specific brands of ingredients you use and the exact size of your cookies.
Per Cookie (Approximate):
Calories: 215 | Fat: 12g | Saturated Fat: 7g | Carbs: 25g | Fiber: 1g | Sugar: 14g | Protein: 2g
My philosophy? Bake with love, share with friends, and savor the moment. It’s not just about the food; it’s about the experience and the joy it brings. So, enjoy your creation without any guilt!
Your Next Kitchen Adventure Awaits
And there you have it! Your guide to creating the most delightful, shareable, and downright delicious Heart Shaped Chocolate Chip Cookies. I hope this recipe brings as much laughter and joy to your kitchen as it has to mine over the years.
Remember, the real magic isn’t in creating a picture-perfect cookie (though yours will look amazing). It’s in the flour-dusted countertops, the smell that fills your home, and the smile on someone’s face when you hand them a treat made just for them. That’s what Food Meld is all about—taking simple ingredients and turning them into unforgettable moments.
I’d love to see your creations! Tag me on social @FoodMeld with your heart-shaped masterpieces. Now, go forth and bake something awesome. Until next time, happy cooking!
— Jackson