Forget Everything You Know About “Just a Cookie”
Hey friends, Jackson from Food Meld here. Let’s get real for a second. We all love a classic birthday cake, right? The layers, the frosting, the whole shebang. But sometimes, you need a dessert that’s a little less fuss and a whole lot more fun. A dessert that looks like a party and tastes like a warm, gooey, straight-out-of-the-oven chocolate chip cookie hug.
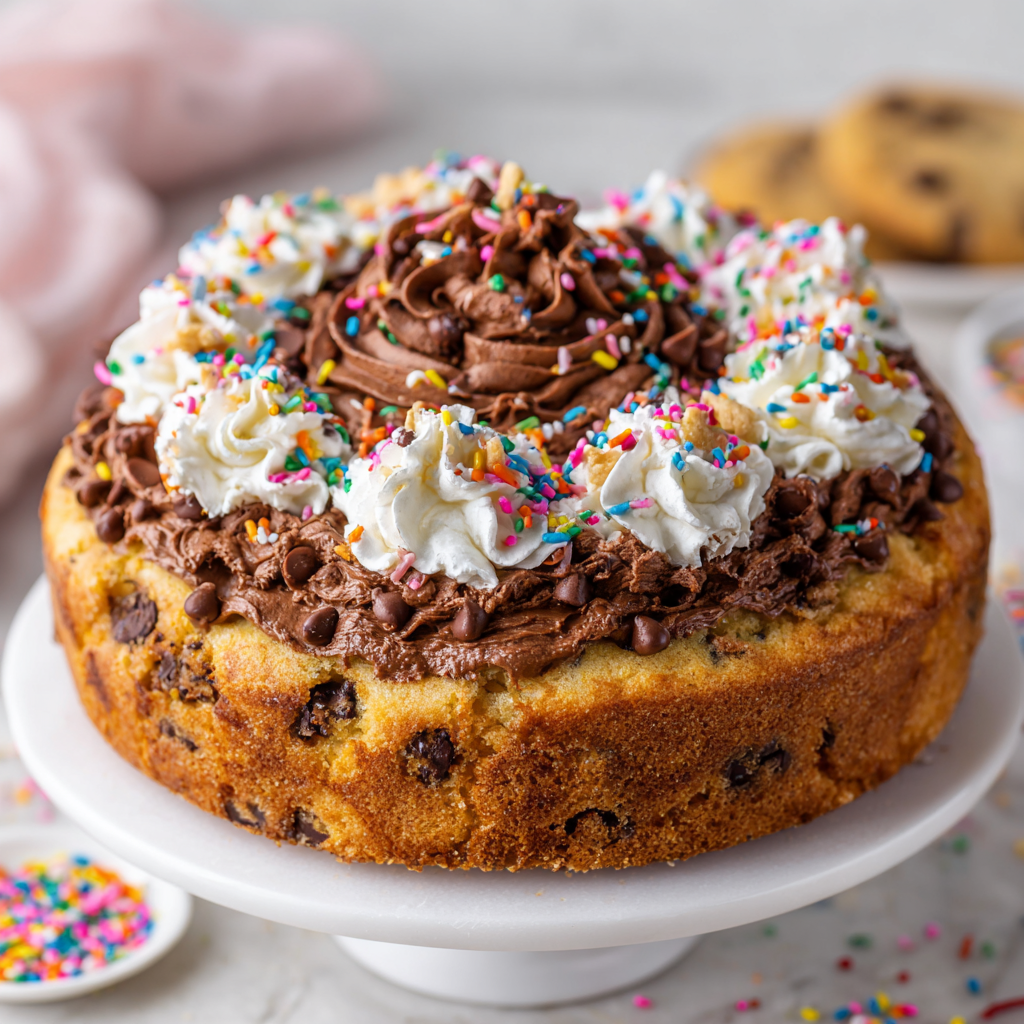
That’s exactly what this Giant Chocolate Chip Cookie Cake is all about. We’re taking every single thing you adore about that iconic cookie—the crispy-edged, chewy-centered, buttery-rich magic—and baking it into one glorious, shareable (or not, no judgment) masterpiece. And because we’re here to make things unforgettable, we’re crowning it with a cloud of the creamiest, dreamiest chocolate buttercream you’ve ever tasted.
This isn’t just a dessert; it’s a statement. It’s the star of the birthday party, the “you got the job!” celebration, the “it’s Tuesday and we deserve it” treat. It’s deceptively simple to make, but the payoff is massive. I’ve tested this recipe more times than I can count, tweaking and perfecting until it was absolutely, 100% foolproof. So, grab your favorite mixing bowl and let’s cook something awesome together. Welcome to the ultimate cookie cake experience.

The Cookie That Started It All
This recipe takes me right back to my grandma’s linoleum-floored kitchen. She wasn’t a fancy baker, but she was a powerhouse of comfort food. Her chocolate chip cookies were legendary—always thick, always a little under-baked in the very best way, and served with an ice-cold glass of milk.
One year for my birthday, she didn’t have a cake pan. Did that stop her? Not a chance. She just took her entire batch of cookie dough, pressed it into a well-seasoned cast-iron skillet, and baked it into one giant, puffy cookie. She called it my “cookie pie.” We ate it warm, straight from the pan with spoons, laughing as the melted chocolate smeared across our faces. That messy, joyful, improvisational spirit is the heart of Food Meld. It’s about using what you have and creating something spectacular from simple, honest ingredients. This frosted cookie cake is my elevated, slightly more polished homage to her—and that feeling of pure, uncomplicated joy.
Gathering Your Flavor Arsenal
Here’s everything you’ll need to create this legend. I’ve included some of my favorite chef insights and swaps to make this recipe your own.
For the Cookie Cake:
- 5 cups all-purpose flour: This is the foundation that gives our cake its structure and that wonderfully thick, chewy texture. If you’re in a humid climate, you might need a tiny bit more to keep the dough from being too sticky.
- 2 tsp baking soda: Our leavening agent! This is what gives the cookie cake its perfect lift and that slight puff. Make sure it’s fresh for the best results.
- 2 tsp salt: Trust me on this. Salt is the secret weapon that makes all the flavors pop and keeps the sweetness from being one-dimensional. I use fine sea salt.
- 2 cups unsalted butter, softened: The key to richness and that classic cookie flavor. “Softened” is crucial here—it should be cool to the touch but leave a slight indent when you press it. This ensures it creams perfectly with the sugar.
- 2/3 cup granulated sugar: Adds sweetness and helps create those delightfully crisp edges.
- 2 cups golden brown sugar: This is the MVP for chewiness and that deep, caramel-like flavor. The molasses in the brown sugar is what works the magic.
- 2 eggs + 2 egg yolks: The whole eggs bind everything together, and the extra yolks are my little chef hack for an ultra-rich, tender, and chewy crumb.
- 2 tsp vanilla extract: Use the good stuff! Pure vanilla extract adds a warm, complex aroma you just can’t get from imitation.
- 2 ½ cups semisweet chocolate chips: I’m a semisweet fan for that perfect balance of bitter and sweet, but feel free to mix it up (see variations below!).
For the Chocolate Buttercream Frosting:
- 1 cup unsalted butter, softened: Again, properly softened butter is non-negotiable for a silky, fluffy frosting.
- 5 cups powdered sugar: This gives the frosting its structure and sweetness. We’ll sift it to avoid any lumps!
- 1 cup cocoa powder: Use a good-quality cocoa for the deepest chocolate flavor. Dutch-processed will give you a smoother, less acidic taste.
- 1 tsp vanilla extract: A splash to round out all the flavors.
- 4 tbsp milk: Whole milk is best for richness, but any milk will work to get your frosting to the perfect spreading consistency.
- Rainbow sprinkles (optional): Because sprinkles are a direct injection of fun. It’s a scientific fact.
Let’s Build This Beauty: Your Step-by-Step Guide
Ready to make some magic? Follow these steps, and you’ll be a cookie cake hero in no time. I’ve packed this section with all my favorite tips and hacks to guarantee success.
- Preheat and Prep. Fire up your oven to 350°F (175°C). Now, grab your two 9-inch springform pans. (If you only have one, you can bake in batches, but two makes it easy!). Grease them really well with butter or non-stick spray, and for an absolute foolproof release, line the bottom with a round of parchment paper. This little step ensures your beautiful cookie cakes slide out perfectly.
- Combine the Dry Team. In a large bowl, grab your whisk and give the flour, baking soda, and salt a good, thorough whisking. We’re not just mixing here; we’re aerating the flour and making sure the leavening is evenly distributed. This prevents those weird bitter pockets of baking soda. Set this bowl aside—this is your dry team, ready for action.
- Cream the Butter & Sugar. In the bowl of your stand mixer (or a large bowl with a hand mixer), plop in the softened butter, granulated sugar, and brown sugar. Now, beat it on medium-high speed for a good 2-3 minutes. Don’t rush this! We’re looking for a mixture that’s turned noticeably paler in color and is light and fluffy. This step incorporates air, which is key for texture.
- Incorporate the Wet Ingredients. Scrape down the sides of the bowl with a spatula. With the mixer on low, add the eggs and egg yolks one at a time, letting each fully incorporate before adding the next. Then, pour in that gorgeous vanilla. Mix until it’s all one happy, homogenous mixture.
- Bring the Teams Together. Keeping your mixer on low, gradually add the dry ingredients to the wet. Mix just until the flour streaks disappear and a soft dough forms. Pro-Tip: Overmixing at this stage can lead to a tough cookie cake. A few flour streaks are okay—we’ll finish by hand!
- The Grand Finale: Chocolate Chips. Take the bowl off the mixer. Dump in all those glorious chocolate chips. Now, use your trusty spatula to fold them in by hand. This gives you more control and ensures every single bite is packed with chocolate.
- Press and Top. Divide the dough evenly between your two prepared pans. Now, get your hands a little dirty! Use your fingers or the bottom of a measuring cup to press the dough into a smooth, even layer. Press a few extra chocolate chips onto the top—this makes it look bakery-level beautiful after it bakes.
- Bake to Perfection. Pop those pans into your preheated oven and bake for 22-25 minutes. You’re looking for golden-brown edges and a top that looks just set. The center might still look a tiny bit soft—that’s exactly what we want! It will continue to cook as it cools, giving you that perfect chewy texture. Chef’s Hack: Do the “thumbprint test.” Gently press the center; it should spring back slightly, leaving a small indent.
- The Most Important Step: Cool Completely. I know, the aroma is killing you, but you have to let these giant cookies cool completely in their pans on a wire rack. If you try to frost a warm cookie cake, you’ll have a melty, sliding mess. Patience is a virtue, I promise!
- Make the Frosting. While the cakes cool, let’s make that buttercream. In a clean bowl, beat the softened butter until it’s super creamy. Sift in the powdered sugar and cocoa powder—this is the secret to a lump-free, silky frosting. Start slow unless you want a powdered sugar cloud in your kitchen! Add the vanilla and milk, then crank the speed to medium-high and beat for 2-3 minutes until it’s light, fluffy, and dreamy.
- Decorate and Devour! Once the cakes are stone-cold, release them from the pans. Place one on a serving plate. You can spread the frosting with an offset spatula for a rustic look, or for that classic cookie cake appearance, fit a piping bag with a Wilton 2D or 1M tip and pipe generous swirls around the edges. Top with a mountain of rainbow sprinkles. Place the second cake on top and repeat the frosting process. Slice, serve, and get ready for the applause.
How to Serve This Show-Stopper
Presentation is part of the fun! I love serving this cookie cake on a large, rustic wooden board or a simple cake stand to let it really shine. A pizza cutter is my go-to tool for slicing clean, satisfying wedges.
While this dessert is a superstar all on its own, a few accompaniments can take it over the top. A scoop of high-quality vanilla bean ice cream melting over a warm slice is pure heaven. For the adults, a glass of cold milk or a rich cup of coffee is the perfect partner to cut through the sweetness. For a real “wow” moment at a dinner party, offer a drizzle of warm salted caramel sauce or a raspberry coulis for a touch of fruity acidity. However you serve it, make sure you have plenty of napkins on hand—this is a gloriously messy affair!
Make It Your Own: Creative Twists & Swaps
The beauty of this recipe is its versatility. Don’t be afraid to play with your food! Here are a few of my favorite ways to mix it up:
- The Ultimate Chocoholic: Ditch the all-semichip routine. Use a mix of dark chocolate chunks, milk chocolate chips, and white chocolate chips for a dynamic, multi-layered chocolate experience.
- Salty-Sweet Sensation: Fold in 1 cup of chopped pretzel pieces along with the chocolate chips. The salty crunch against the sweet, chewy cookie and rich frosting is an absolute game-changer.
- Nutty for Nuts: Add 1 cup of toasted, chopped walnuts or pecans to the dough. The toasty, buttery flavor of the nuts adds a wonderful depth and texture.
- Peanut Butter Paradise: Swirl 1/2 cup of creamy peanut butter into the dough before baking, and make a peanut butter frosting by replacing 1/2 cup of the butter in the frosting recipe with 1/2 cup of peanut butter. You’re welcome.
- Festive Funfetti: For birthdays, fold 1/2 cup of rainbow jimmies (the long sprinkles) right into the cookie dough along with the chips. It turns the entire cake into a colorful celebration.
Jackson’s Kitchen Notebook
This recipe has evolved so much since that first skillet cookie pie at my grandma’s. The biggest lesson? The two-pan method. I used to bake one giant, super-thick cookie, and the center was always a little too doughy while the edges got too dark. Splitting it between two pans gives you the perfect cookie-to-cake ratio and ensures an even, flawless bake every single time.
And a funny story: The first time I tested the frosting, I was so excited I started piping it onto a cookie cake that was still warm. Let’s just say it turned into a delicious chocolate soup puddle. A delicious failure, but a failure nonetheless! It taught me the invaluable lesson of patience in baking. Now, I use the cooling time to clean up the (admittedly epic) mess I’ve made in the kitchen.
Your Questions, Answered!
I’ve gotten a lot of questions about this recipe over the years. Here are the most common ones to help you out.
Q: My cookie cake came out flat. What happened?
A: This is almost always a butter issue! If your butter was too soft or melted, it won’t hold the air you creamed into it. Make sure it’s just softened, not greasy. Also, double-check that your baking soda is fresh and that you measured your flour correctly (spoon it into the cup, don’t scoop!).
Q: Can I make this ahead of time?
A> Absolutely! You can bake the cookie cake layers up to two days in advance. Let them cool completely, then wrap them tightly in plastic wrap and store at room temperature. Make the frosting the day of for the freshest taste and texture. You can also freeze the unfrosted layers for up to a month.
Q: My frosting is too thick/too thin. How can I fix it?
A> Frosting is all about balance. Too thick? Add more milk, one teaspoon at a time, until it reaches your desired consistency. Too thin? Add a bit more sifted powdered sugar, a quarter cup at a time, until it thickens up.
Q: I don’t have springform pans. What can I use?
A> No problem! You can use two 9-inch cake pans. Just make sure you grease and line them EXTRA well. Let the cakes cool for about 15 minutes in the pan, then carefully run a knife around the edge and invert them onto a cooling rack.
Let’s Talk Nutrition (The Fun Kind)
Look, we’re here for a good time, not a long time, and this is a celebration dessert. But I believe in being transparent! This is a rich, indulgent treat, and that’s exactly its purpose. A single slice is incredibly satisfying. The calories come from the high-quality butter, sugars, and chocolate, which are what create that incredible flavor and texture. The small amount of protein comes from the eggs and flour.
My philosophy? Enjoy a slice mindfully, savor every single bite, and share the rest with people you love. It’s all about balance. You can absolutely enjoy this as part of a happy, healthy lifestyle—it’s about the celebration, the connection, and the pure joy that a truly great dessert can bring.
You’ve Got This!
And that’s it, friends — the Giant Chocolate Chip Cookie Cake that started with a skillet and a little kitchen improvisation, now perfected for every celebration imaginable. This is the dessert that refuses to play it small. It’s nostalgic yet elevated, simple yet spectacular — a recipe that turns flour, butter, and sugar into something that feels like a party.
The beauty of this cake isn’t just in how incredible it tastes (though, let’s be honest, that chewy, gooey center is pure magic). It’s in what it represents — connection, creativity, and the joy of sharing something homemade. It’s the kind of dessert that makes people gather closer, laugh louder, and go in for “just one more bite.”
So, whether you’re baking it for a birthday, a Tuesday night treat, or just because the world needs a little more sweetness, remember this: baking doesn’t have to be perfect — it just has to be full of heart.
Now grab a fork (or don’t bother), dive in, and celebrate every delicious, chocolate-filled moment.
With big flavor and even bigger gratitude,
– Jackson, from Food Meld


