
Who Says Healthy Snacks Can’t Taste Like Candy?
Hey friends, Jackson from Food Meld here! Let’s get real for a second. How many times have you reached for a protein bar, taken one hopeful bite, and been met with the texture of chalky cardboard and a weird, chemical aftertaste? You’re left feeling virtuous, sure, but also a little… disappointed. You start wondering if “healthy” and “delicious” are just destined to live on opposite sides of the pantry, forever at odds.
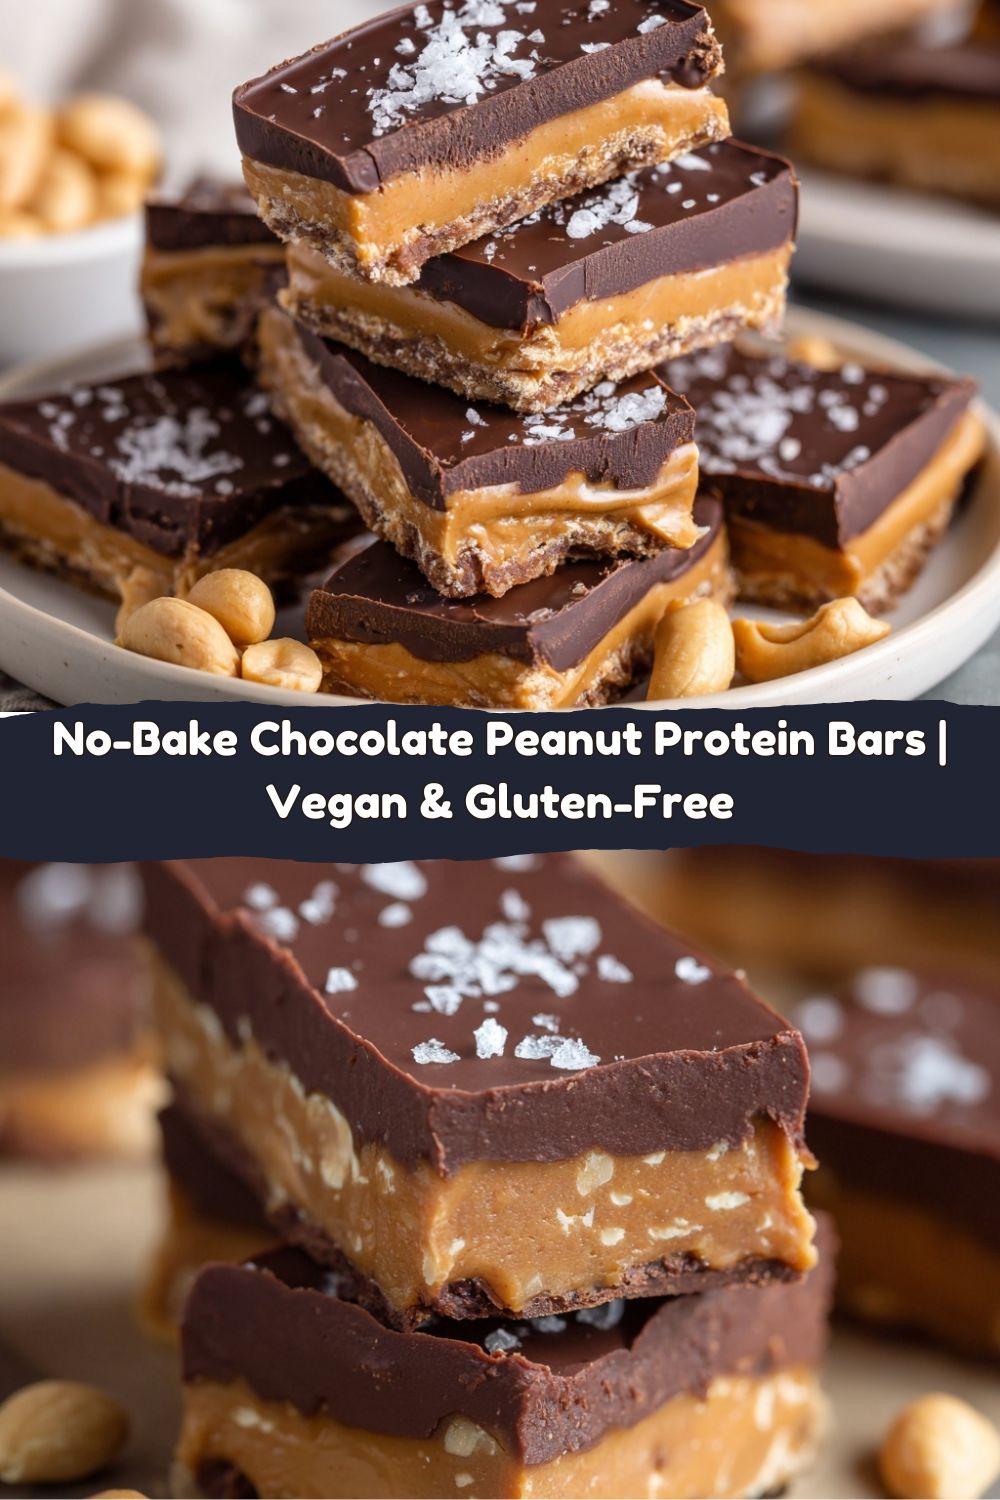
Well, I’m here to tell you that era is officially over. We’re throwing a flavor party, and everyone’s invited. I’m talking about my No-Bake Chocolate Peanut Protein Candy Bars. The name says it all, but the taste? The taste is a whole different level of awesome.
Imagine this: a soft, chewy, almost fudge-like base that’s packed with creamy peanut butter and rich chocolate flavor. It’s so good, so satisfyingly sweet, that you’ll have a hard time believing it’s also packed with clean protein, lower in sugar, and made with ingredients you can actually pronounce. No baking required, just a bowl, a spoon, and about 10 minutes of your time. These bars are the ultimate kitchen hack for busy parents, hungry athletes, or anyone (hello, me!) who just needs a little something to power through the afternoon slump. They’re gluten-free, dairy-free, and so family-approved, they might just become your new secret weapon. Let’s get into it!
The Candy Aisle Rebellion
This recipe takes me right back to being ten years old, standing in the grocery store checkout line with my grandma. My eyes were locked on those shiny, foil-wrapped peanut butter cups. They were my kryptonite. Grandma, being the wise woman she was, would usually cave and get me one, but she’d always say, “Jackson, one day you’re gonna learn to make something even better yourself.”
I think she’d get a real kick out of these bars. They capture that same magical combination—the salty-sweet peanut butter, the rich chocolate shell, the way it melts in your mouth—but they’re made with a little more know-how and a lot more love. It’s my grown-up, slightly-more-nutritious rebellion against the candy aisle. It’s that “you’ve gotta try this” moment I’m always chasing, and the best part? You can feel amazing about eating them. Now, let’s grab our ingredients and create some new kitchen memories.
Gathering Your Flavor Arsenal
One of the things I love most about this recipe is its beautiful simplicity. We’re using a short list of powerhouse ingredients that work together to create something truly special. Here’s your shopping list:
- 1 cup vegan chocolate peanut protein powder: This is our flavor and protein foundation! I use a plant-based blend, but your favorite whey or casein protein will work too—just note it might change the texture slightly. The key is finding one you enjoy the taste of on its own.
- ½ cup creamy peanut butter: The soul of the operation. I find that natural, runny peanut butter creates a perfect, pliable dough. If you’re using a no-stir kind (like Skippy or Jif), that’s totally fine! You might just need a tiny bit less almond milk. For a nut-free version, sunflower seed butter is a fantastic swap.
- 6–8 tbsp unsweetened almond milk: Our magic binder. We add this slowly because the exact amount can vary based on your protein powder’s absorbency and the thickness of your peanut butter. We’re aiming for a thick, moldable dough—think Play-Doh, not batter.
- 6 tbsp pure maple syrup or sugar-free pancake syrup: This adds that classic candy-bar sweetness and helps everything stick together. Maple syrup gives a deeper flavor, while a sugar-free syrup keeps the carbs lower. Agave nectar or honey (if you’re not strictly vegan) are also great here.
- 1 tsp pure vanilla extract: Don’t you dare skip this! A good vanilla adds a warm, bakery-style depth that makes the flavor profile pop. It’s the secret weapon in so many desserts.
- ¼ tsp salt: Trust me on this. Salt is what makes the sweet flavors *sing*. It enhances the peanut butter and chocolate and keeps the bar from tasting flat.
- 5 oz dairy-free milk chocolate or regular milk chocolate, melted: The glorious, shiny crown on our creation. I love using a good-quality dairy-free chocolate bar that I chop and melt myself—it tastes so much better than chocolate chips! But use what you love and have on hand.
Let’s Build These Bars: A Step-by-Step Adventure
Ready for the fun part? This is where we turn that bowl of ingredients into your new favorite snack. Put on some music, clear a little counter space, and let’s get our hands dirty (figuratively, of course—we’re using a spoon!).
- Mix the Base – Get Your Arm Ready!Grab a medium-sized mixing bowl. To it, add your protein powder, peanut butter, maple syrup, vanilla extract, and that all-important salt. Now, take a sturdy spoon or spatula and start mixing. It’s going to be thick and clumpy at first—that’s exactly what we want! This is where the patience comes in. Now, start adding your almond milk one tablespoon at a time, mixing thoroughly after each addition. Watch the magic happen as it transforms from a crumbly mess into a thick, cohesive dough. Chef’s Hack: Stop adding milk when the dough holds together when you press it between your fingers. If it’s too sticky, add a touch more protein powder. If it’s too dry, another splash of milk will do the trick.
- Shape the Bars – Channel Your Inner SculptorLine a standard loaf pan (that’s an 8×4 or 9×5 inch pan) with parchment paper. Let the paper hang over the sides a bit—this will be your handy handle for lifting the whole slab out later! Transfer your dough into the pan and press it down firmly and evenly. I like to use the bottom of a flat glass or a small measuring cup to really compact it and get a smooth, even surface. The more you press it down now, the less likely your bars are to crumble later.
- Top with Chocolate – The Grand FinaleTime for the chocolate! Melt your chocolate slowly. You can do this in a double boiler, or my preferred lazy method: in a microwave-safe bowl in 20-second bursts, stirring well between each burst. Pour the beautifully melted chocolate over your peanut butter base. Use an offset spatula or the back of a spoon to spread it into a smooth, even layer. Chef’s Hack: This is the perfect time to add any optional toppings. A sprinkle of flaky sea salt is a game-changer. Some chopped roasted peanuts add a wonderful crunch. Go wild!
- Set and Slice – The Hardest Part (The Waiting!)Carefully place the pan in the refrigerator. Let it chill for at least an hour, or for a super-fast set, pop it in the freezer for 20-25 minutes. You’ll know it’s ready when the chocolate coating is firm to the touch. Once it’s set, use those parchment paper handles to lift the entire slab out of the pan. Place it on a cutting board and use a sharp knife to slice it into 12 even bars. Pro Tip: For super clean cuts, wipe your knife clean with a warm, damp cloth between slices.
How to Serve & Savor Your Masterpiece
Okay, you’ve waited patiently, and now it’s time for the reward! These bars are incredibly versatile. I love grabbing one straight from the fridge for a quick, chilled treat—the firm, cool texture is so satisfying. For a more indulgent, almost soft-serve ice cream bar experience, let one sit at room temperature for 5-10 minutes before biting in.
Presentation is half the fun! If I’m serving these to friends or bringing them to a potluck, I’ll arrange them on a rustic wooden board. They look fantastic alongside a cup of hot coffee for an afternoon pick-me-up or as a post-dinner “dessert” that won’t weigh you down. Pack them in lunchboxes (they’re school-safe!), take them on hikes, or keep a stash in your gym bag. They’re your new go-to fuel for a busy, flavor-packed life.
Make It Yours: Fun Flavor Twists
The basic recipe is a solid 10/10, but part of the “Food Meld” philosophy is playing with your food! Here are a few of my favorite ways to mix it up:
- The Cookie Dough Dream: Swap the chocolate protein powder for a vanilla or snickerdoodle flavor. Replace the peanut butter with almond butter, and stir in a handful of mini dairy-free chocolate chips into the base itself before pressing it into the pan.
- The Tropical Crunch: Use a vanilla protein powder, and swap the peanut butter for coconut butter. Mix in 2 tablespoons of unsweetened shredded coconut and 2 tablespoons of chopped macadamia nuts into the dough. Top with a dark chocolate coating for a true tropical vibe.
- The Double Chocolate Nut Crunch: Are you a crunch fiend? Me too. Use chocolate protein powder and stir ¼ cup of chopped roasted peanuts or almonds right into the base mixture before you press it down. You get texture in every single bite.
- The Super-Seed Boost: For an extra fiber and omega-3 kick, stir 1-2 tablespoons of chia seeds or ground flaxseed into your base dough. You won’t really taste them, but you’ll get all the nutritional benefits.
- The “Elvis” Special: Mash one very ripe banana and mix it into the base along with the other wet ingredients. You might need a little less almond milk. It adds a natural sweetness and a seriously delicious flavor combo with the peanut butter and chocolate.
Jackson’s Kitchen Notes & Stories
This recipe has seen a few… *experiments* in the Food Meld test kitchen. The first batch I ever made, I got a little overzealous with the almond milk and created a mixture so wet, it was more of a pudding than a bar. We ate it with a spoon, and it was still delicious, but not quite the texture we were going for! That’s how I learned the “add milk slowly” rule the hard way.
Over time, I’ve found that the brand of protein powder makes the biggest difference in texture. Some are just naturally more absorbent than others. Don’t be afraid to adjust the liquid as you go—you’re the boss of your dough! This recipe is forgiving and wants to work for you. These bars have become a non-negotiable staple in my freezer. I even pack them in my carry-on when I travel. They’ve saved me from more than one overpriced, underwhelming airport snack.
Your Questions, Answered!
I’ve made these bars a zillion times, and I’ve heard all your awesome questions. Here are the most common ones:
- My mixture is too dry and crumbly. What did I do wrong?No worries, this is super common! Different protein powders are the usual culprit. The fix is easy: just add more liquid. Add another tablespoon of almond milk (or even a little maple syrup) and mix. Keep going, one tablespoon at a time, until the dough holds together when you squeeze it.
- My mixture is too sticky and wet! Help!We can fix this, too! Simply add a little more protein powder, a tablespoon at a time, until the dough is thick and moldable. If you don’t have more protein powder, a tablespoon or two of almond flour or oat flour will also do the trick.
- Can I freeze these bars?Absolutely! In fact, I highly recommend it. They freeze beautifully for up to 3 months. I wrap them individually in parchment paper and store them in a freezer bag. You can grab one and let it thaw for 10 minutes, or eat it frozen for a firmer, fudge-like treat.
- My chocolate coating cracked when I sliced the bars. Why?This usually happens if the chocolate layer is too thick or if the bars are *too* cold from the freezer. Let them sit at room temperature for just 5 minutes before slicing. Using a sharp, warm knife (wiped clean between cuts) also helps immensely.
Chocolate Peanut Protein Candy Bars : No-Bake & Family-Approved
- Total Time: 1 hour 10 minutes
- Yield: 12 Bars 1x
Description
These chocolate peanut protein candy bars are the kind of treat you’ll want to keep stocked in your fridge year-round. Creamy peanut butter, rich chocolate, and plant-based protein come together in a soft, chewy, candy-like bar that’s totally no-bake. They’re gluten-free, dairy-free, lower in sugar, and made with clean, simple ingredients—no mystery fillers, just pure flavor. Perfect for a quick energy bite, school-safe snack, or post-workout treat that actually tastes like dessert.
Ingredients
1 cup vegan chocolate peanut protein powder (or your favorite flavor)
½ cup creamy peanut butter (natural or no-stir works)
6–8 tbsp unsweetened almond milk (adjust to achieve dough-like texture)
6 tbsp pure maple syrup or sugar-free pancake syrup
1 tsp pure vanilla extract
¼ tsp salt
5 oz dairy-free milk chocolate or regular milk chocolate, melted
Optional Twists:
Add ¼ cup chopped roasted peanuts for crunch
Stir in 1 tbsp chia seeds or flax for added fiber
Sprinkle flaky sea salt on top after chocolate sets
Instructions
Mix the Base:
In a bowl, combine protein powder, peanut butter, maple syrup, vanilla, and salt. Slowly add almond milk, 1 tbsp at a time, mixing until a thick, moldable dough forms.
Shape the Bars:
Press mixture evenly into a parchment-lined loaf pan. Use the back of a spoon to smooth the surface.
Top with Chocolate:
Pour melted chocolate over the protein base and spread evenly. For extra texture, sprinkle crushed peanuts or sea salt on top.
Set and Slice:
Chill in the fridge for 1 hour, or freeze for 20 minutes until firm. Slice into bars and store in an airtight container.
- Prep Time: 10 minutes
- Chill Time: 1 hour
Nutrition
- Calories: 175 / Bar
- Sugar: 4g / Bar
- Fat: 10g / Bar
- Carbohydrates: 10g / Bar
- Fiber: 2g / Bar
- Protein: 12g / Bar
Nutritional Info (The Good Stuff!)
Let’s talk about what’s fueling you! The following is an approximate nutritional breakdown per bar (based on 12 bars and using the specific ingredients listed, including sugar-free syrup). Remember, this can vary based on your exact brands and any add-ins.
- Calories: ~175
- Protein: 12g
- Fat: 10g
- Carbohydrates: 10g
- Sugar: 4g
- Fiber: 2g
These bars are a fantastic balance of macronutrients. The protein and healthy fats from the peanut butter keep you full and satisfied, while the lower sugar content means you avoid that nasty energy crash. It’s a snack that truly fuels your body and your taste buds.
You’ve Just Made Something Unforgettable
And there you have it! You’re now the proud creator of a batch of unbelievably delicious, no-bake protein bars that actually taste like a treat. This is what Food Meld is all about—taking simple, real ingredients and turning them into something bold, comforting, and packed with flavor. You didn’t need any fancy equipment or complicated techniques, just a little “what if we tried this?” energy.
I am so proud of you for getting in the kitchen and mixing it up. This recipe is your new canvas. Play with the flavors, make it your own, and most importantly, share it with someone you love. That’s where the real magic happens.
Now, I’d love to hear from you! Tag me on Instagram @FoodMeld with a picture of your creations. Did you add sea salt? Go for the cookie dough version? I want to see it all. Until next time, keep cooking something awesome.
– Jackson


