3-Ingredient Peanut Butter Cookies: Your New Secret Weapon
Hey friends, Jackson here from Food Meld. Let’s get real for a second. We all have those days. You know the ones. The kids are hangry, you’ve got surprise guests, or you just need a warm, sweet something with your afternoon coffee, stat. The last thing you want to do is pull out the stand mixer, sift three types of flour, and dirty every bowl in the kitchen.
That’s where this little lifesaver of a recipe comes in. We’re talking about 3-Ingredient Peanut Butter Cookies. Yes, you read that right. Just three ingredients standing between you and a plate of warm, soft, unbelievably delicious cookies. This isn’t a trick; it’s kitchen magic at its finest. It’s the recipe I turn to when I need a win, and I’m so excited to share it with you.
I’m a firm believer that incredible flavor doesn’t have to be complicated. Sometimes, the best recipes are the simplest ones, where each ingredient gets to shine. In this case, the star is clearly the peanut butter, and the sugar and egg are its perfect backup singers, creating a harmony of chewy, sweet, and nutty goodness in every single bite. So, if you’re ready to experience the ultimate in easy baking, grab your favorite jar of peanut butter. We’re about to make some magic happen, and I promise, you’re going to feel like a total kitchen rockstar.
A Cookie Jar Full of Memories
This recipe takes me right back to my Nana’s linoleum-floored kitchen. She was the queen of “making do,” a true Southern lady who could whip up a feast from what seemed like thin air. One rainy afternoon, I was pouting because we were out of chocolate chips for our usual weekend bake. I thought my day was ruined. Nana just winked, pulled out her trusty jar of Jif, and said, “Honey, we don’t need ’em. We’re makin’ the magic ones.”
My eight-year-old mind was blown as I watched her mix just three things in a single bowl. I got to press the criss-cross pattern with her favorite fork, the one with the chipped red handle. The smell that filled her house was pure, unadulterated comfort. Those cookies were gone before they even had a chance to cool completely, and they taught me one of my first and most important kitchen lessons: the best food isn’t about being fancy. It’s about the joy of creating something delicious, together, with what you have. Every time I make these, I think of her, and that’s a flavor you just can’t buy.
Gather Your Trio of Heroes
See? I told you it was simple. This is the part where you check your pantry and realize you’re probably already a cookie-baking superhero in waiting. Here’s the lowdown on what we’re using and why it works so beautifully.
- 1 Cup (240g) Peanut Butter: This is the heart and soul of the operation! I highly recommend using a conventional, store-bought creamy peanut butter like Jif or Skippy. Why? They’re stabilized with oils and sugars, which gives our cookies the perfect texture. Using a natural peanut butter (the kind that separates) can sometimes lead to a greasier or drier cookie, but if it’s all you have, give it a good, vigorous stir first! Chunky peanut butter works great too if you want a little extra texture.
- 1/2 Cup (100g) Sugar We’re using regular granulated white sugar here. It not only provides the sweetness but also helps the cookies spread and get those lovely crispy edges. Some folks like to use a mix of white and brown sugar for a deeper, almost molasses-like flavor, and that’s a fantastic twist! If you go that route, try ¼ cup of each.
- 1 Large Egg This is our binder, the glue that holds our peanut butter and sugar dream team together. It adds structure and a bit of richness, giving us that soft, cake-like crumb. Make sure it’s at room temperature for the easiest mixing!
Let’s Make Some Cookie Magic: Your Foolproof Steps
Okay, team. Preheat that oven to 350°F (180°C) and let’s get our hands dirty. This whole process is so fast, you’ll be done before your oven even finishes preheating!
- Mix It Up! Grab a large bowl and dump in your peanut butter, sugar, and that room-temperature egg. Now, just stir until it’s completely smooth and no streaks of egg remain. You can use a spatula, a wooden spoon, or even a hand mixer if you want, but honestly, it’s so easy to do by hand. Chef’s Hack: Scrape down the sides of the bowl a couple of times to make sure everything is fully incorporated. You’re looking for a play-dough-like consistency that’s smooth and a little shiny.
- Roll ‘Em Up! Now for the fun part. Using a tablespoon or a small cookie scoop, portion out the dough and roll it into smooth, one-inch balls between your palms. This is a great job for little helpers! Place the dough balls on a baking sheet lined with parchment paper or a silicone baking mat. Pro Tip: Leaving about two inches between each ball gives them plenty of room to spread out and become perfect little cookie puddles.
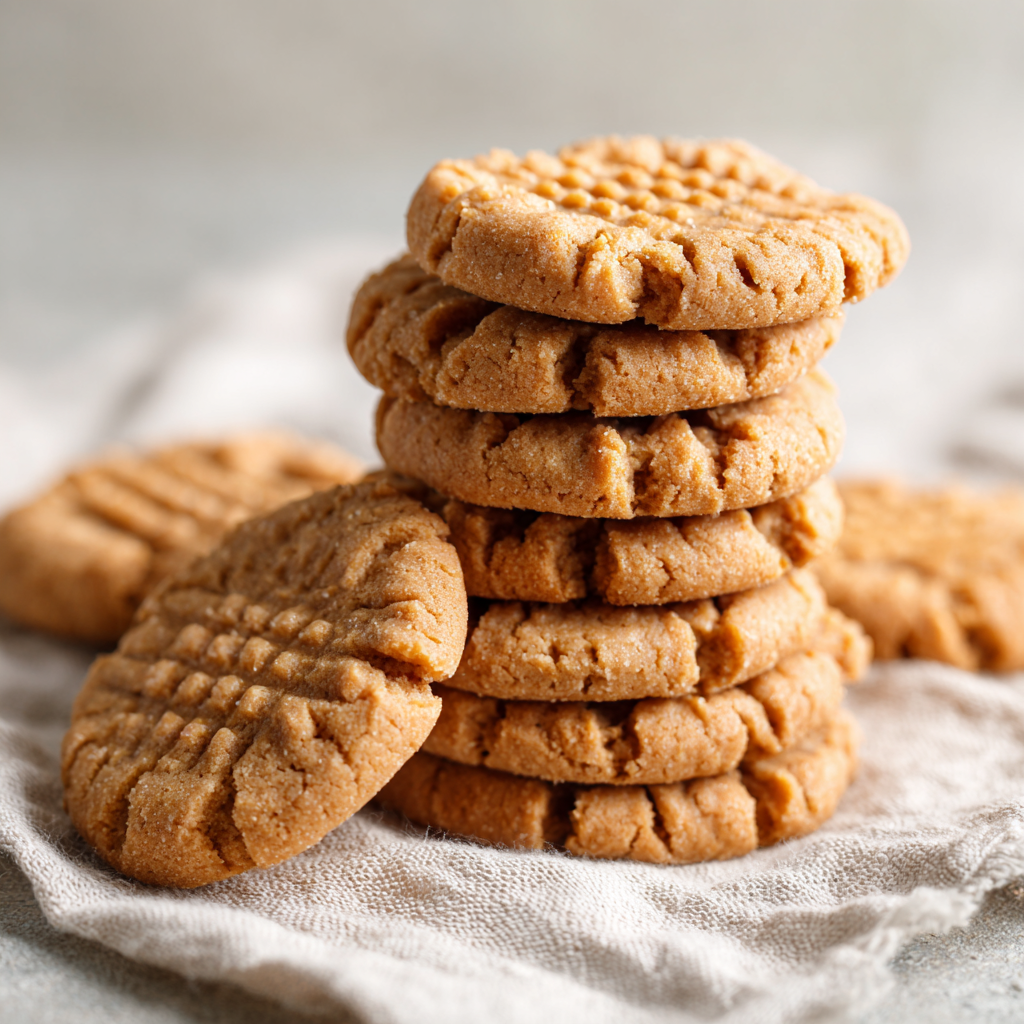
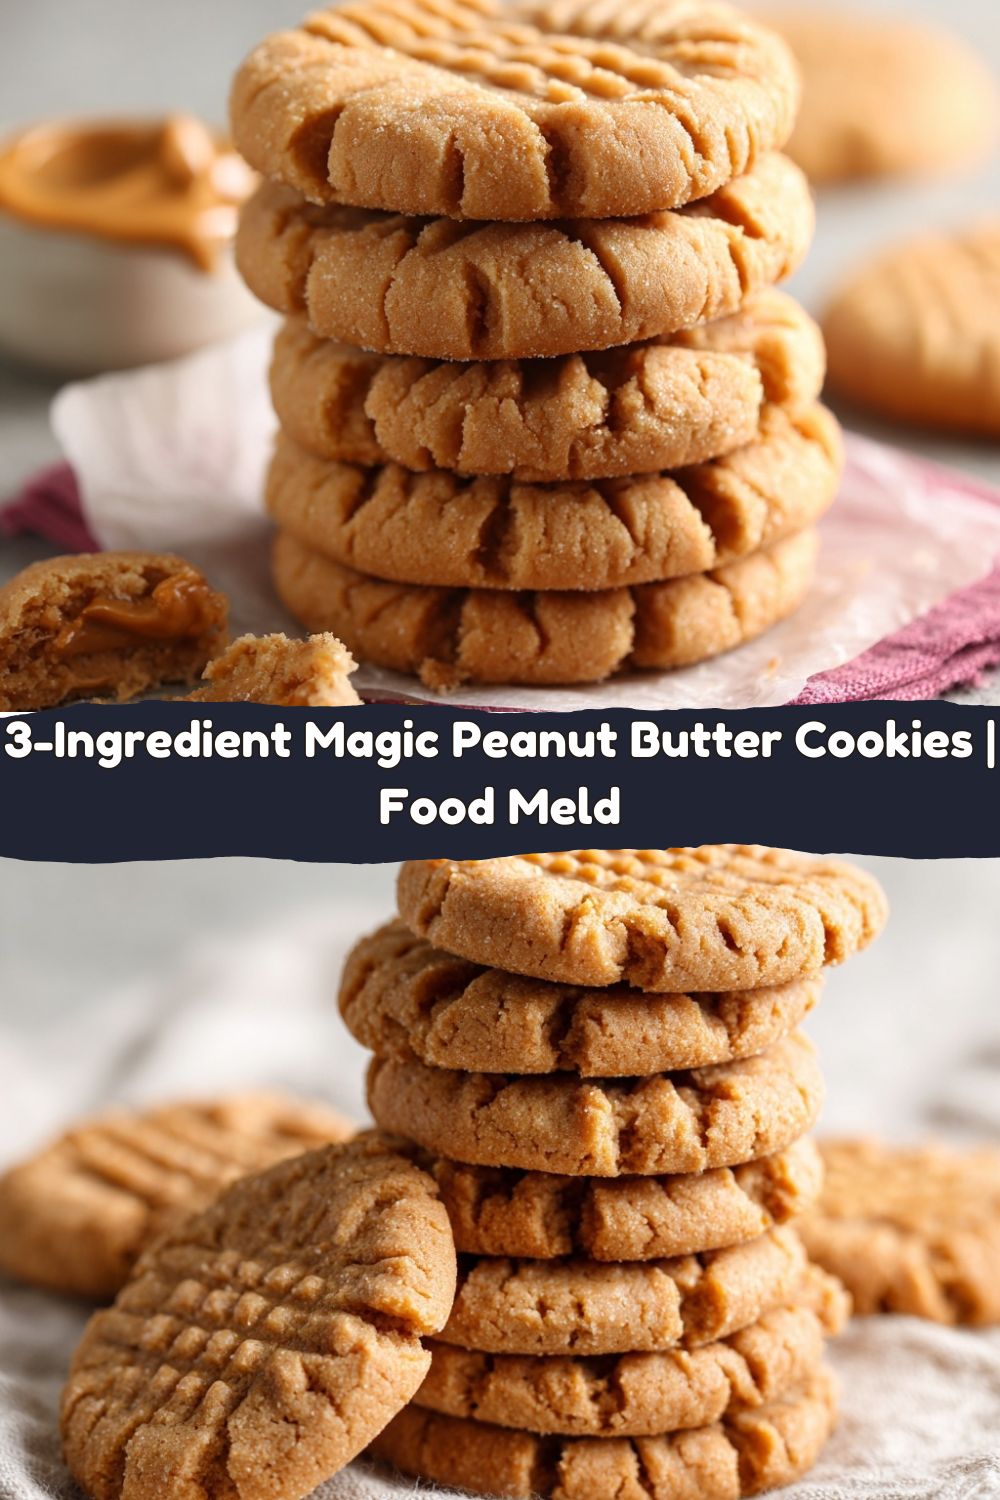
- The Signature Criss-Cross! Here’s where we give these cookies their iconic look. Take a fork and gently press down on each dough ball to flatten it. Then, turn the fork 90 degrees and press again to create that classic grid pattern. Little Chef Insight: If your fork starts sticking to the dough, just dip it in a little bit of sugar before each press. It adds a tiny bit of sparkle and prevents sticking!
- Bake to Perfection! Slide that baking sheet into your preheated oven and bake for 8-10 minutes. Now, here’s the most important tip: they will not look done! When you pull them out, the centers will still look soft and puffy, and the edges will be just barely golden. This is exactly what you want. They firm up as they cool. Overbaking is the only way to mess these up, leading to dry, crumbly cookies. Trust the process!
- The Patient Wait! This is the hardest part. Let the cookies cool on the baking sheet for at least 10-15 minutes. They are incredibly fragile when they first come out of the oven. Giving them time to set up on the sheet is crucial for them to hold their shape when you transfer them to a wire rack to cool completely. I know it’s tempting, but don’t skip this step!
How to Serve Up These Beauties
Honestly, shoving one directly into your mouth while standing over the cooling rack is a totally valid serving method. But if you want to get a little fancy, here are a few of my favorite ways to enjoy them.
For the ultimate comfort moment, serve a couple of these cookies still slightly warm with a tall glass of ice-cold milk. The way the milk softens the warm, chewy center is a little slice of heaven. They’re also fantastic crumbled over a bowl of vanilla ice cream for an instant, no-fuss dessert.
If you’re having friends over, stack them high on a rustic wooden board or a vintage plate. Their simple, homestyle look is part of their charm. These cookies are the perfect partner to your morning coffee or afternoon tea, and they pack beautifully in a lunchbox (if they last that long!).
Mix It Up! Fun Flavor Twists
Once you’ve mastered the classic, it’s time to play with your food! This simple dough is a fantastic canvas for your creativity. Here are a few of my favorite ways to mix it up.
- Chocolate Chip Peanut Butter Bliss: Stir in ¼ to ½ cup of chocolate chips right into the dough. Semi-sweet is classic, but dark chocolate or even white chocolate chips are incredible.
- The Salty-Sweet Dream: Right after you press the cookies with the fork, sprinkle the tops with a little flaky sea salt. It elevates the peanut flavor to a whole new level.
- Double Peanut Power: Use chunky peanut butter for built-in peanut crunch, or stir in ¼ cup of chopped, salted peanuts for an extra textural punch.
- Flourless Power Bites (Gluten-Free!): Guess what? These cookies are naturally gluten-free! Just double-check your peanut butter label to be safe. You can also swap the sugar for a coconut sugar for a less refined option.
- Festive Fun: Roll the dough balls in colored sugar before pressing them for a holiday-themed treat!
Jackson’s Kitchen Notes & Stories
This recipe has been in my back pocket for years, and it’s saved my bacon more times than I can count. I once showed up to a potluck empty-handed because I forgot I’d signed up for dessert. I swung by the grocery store, bought the three ingredients, and whipped up a batch in my friend’s kitchen in 20 minutes flat. Everyone thought I’d spent all day baking! It’s my go-to “emergency cookie” recipe, and it has never, ever let me down.
Over time, I’ve learned that the key is truly in the peanut butter. The more I test, the more I stand by using a standard, no-stir variety for guaranteed perfect results every single time. But hey, cooking is about adventure, so don’t be afraid to experiment and make it yours!
Your Questions, Answered!
I’ve gotten a lot of questions about this recipe over the years, so I’ve compiled the most common ones here to help you out.
Q: My cookies came out really dry and crumbly. What happened?
A: The most common culprit is overbaking! Remember, they continue to cook on the hot baking sheet after you take them out of the oven. Pull them when the edges are just set, even if the centers look soft. Using a natural peanut butter can also sometimes lead to a drier texture.
Q: Can I make these without an egg?
A: This is a tricky one, as the egg is the only binder. I haven’t found a perfect, reliable substitute that keeps the 3-ingredient spirit. A “flax egg” can sometimes work, but it may change the texture, making them more dense.
Q: My cookies didn’t spread at all. Why?
A: This usually points to the peanut butter. If you used a natural peanut butter that was too dry or thick, or if you accidentally packed the peanut butter too tightly into your measuring cup, the dough can become too stiff to spread. Next time, try a different brand or fluff the peanut butter in the jar before scooping.
Q: How should I store these?
A: Once completely cool, store them in an airtight container at room temperature. They’ll stay deliciously soft for about 5 days. You can also freeze the baked cookies for up to 3 months!
A Quick Peek at the Nutrition
Now, I’m all about balance. Life is too short not to enjoy a good cookie, but I also like to know what I’m eating. These cookies are a treat, but they’re made with simple, whole ingredients you can recognize.
Each cookie packs a nice little protein punch from the peanut butter and egg, which can help keep you satisfied. They are, of course, a sweet treat, so the sugar content is there, but it’s straightforward. Because they’re flourless, they’re naturally gluten-free, which is a great bonus for friends with dietary restrictions (just confirm your peanut butter is gluten-free!). As with all the good things in life, the key is enjoying them mindfully.
Approximate Nutrition per Cookie: Calories: 100 | Fat: 7g | Carbs: 7g | Sugar: 6g | Protein: 3g | Sodium: 45mg
Let’s Keep the Conversation Going!
And there you have it! The simplest, most satisfying cookie recipe in my entire arsenal. I hope this recipe becomes a trusted friend in your kitchen, just like it is in mine. It proves that you don’t need a pantry full of fancy ingredients to make something truly special and delicious.
I’d love to hear how your cookie adventure goes! Did you add chocolate chips? Did you use chunky peanut butter? Tag me on social @FoodMeld with a photo of your creations and use the hashtag #FoodMeldMagic. Seeing your kitchen wins absolutely makes my day.
Now, go forth and bake without fear. Remember, cooking should be fun, a little messy, and always, always full of flavor. Until next time, friends – let’s keep melting those flavors together!


