The Slider That Started It All: My Go-To Recipe for Feeding a Hungry Crowd
Hey friends, Jackson from Food Meld here. Let’s get right to it: have you ever been in a situation where you need to feed a bunch of people, fast, and you want it to look like you slaved over a hot stove for hours? Maybe it’s a last-minute game day gathering, a holiday potluck you almost forgot about, or just one of those “I cannot even think about what to make for dinner” kind of nights.
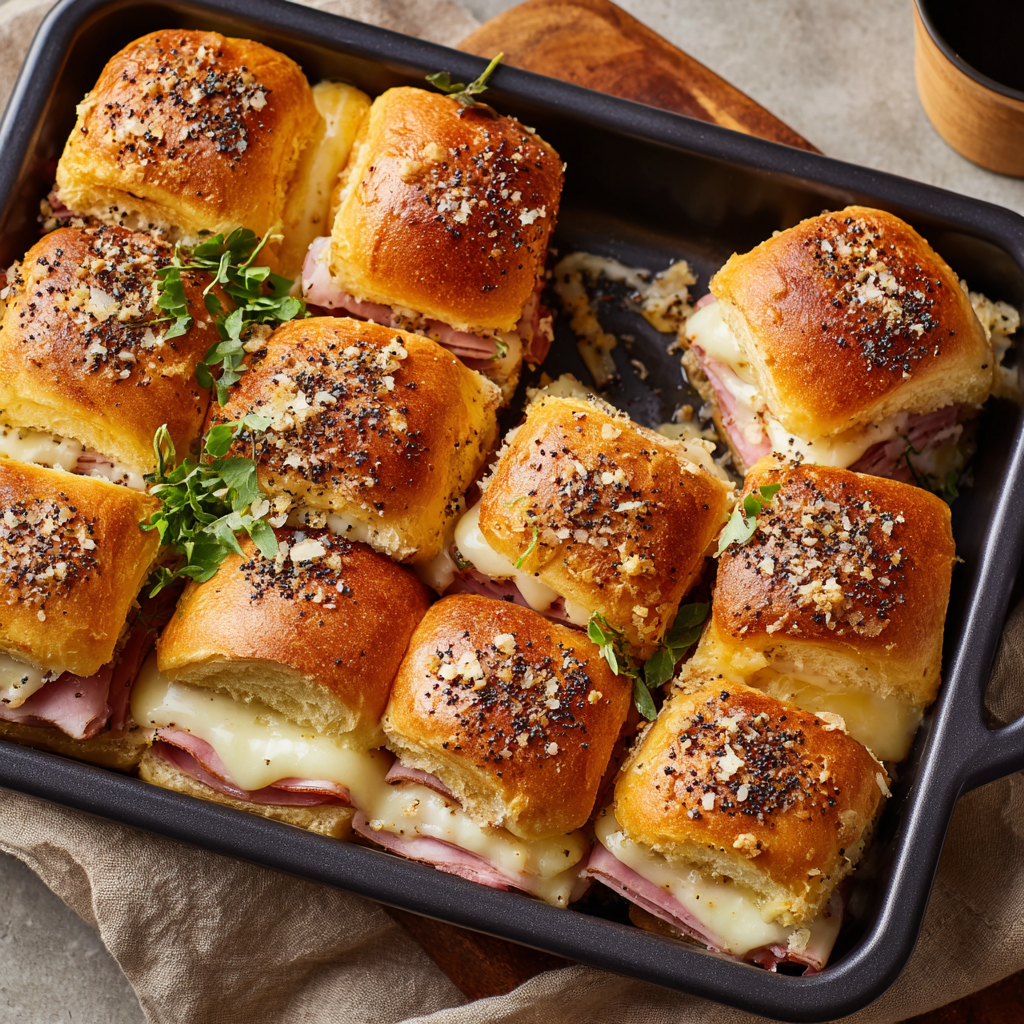
I’ve been there more times than I can count. And every single time, my saving grace, my secret weapon, my never-fail, always-impress recipe is these unbelievably good Baked Ham & Havarti Sliders.
We’re talking about the kind of food that makes people gather around the oven, peeking through the glass. It’s the dish that disappears from the pan faster than you can say “seconds?” These sliders are pure, unadulterated comfort. Imagine: soft, slightly sweet Hawaiian rolls hugging layers of savory black forest ham and creamy, dreamily melted Havarti cheese. The whole thing gets smothered in a simple, magical mustard-butter glaze that bakes into a golden, crackly, flavor-packed crust on top.
The best part? It’s ridiculously easy. We’re talking 10 minutes of hands-on work. You don’t need to be a chef to pull this off—you just need to love good food and appreciate a seriously smart kitchen hack. This is the epitome of what I stand for at Food Meld: bold, comforting flavors that are totally approachable and, most importantly, a whole lot of fun to make. So, preheat that oven, grab your favorite baking dish, and let’s cook up some magic together.

A Slider Story: How a Kitchen “Oops” Became a Family Legend
This recipe always takes me back to my first big Thanksgiving hosting attempt. I was young, ambitious, and maybe a little in over my head. The turkey was brining, the pies were prepped, and I had a house full of hungry cousins and uncles who were… let’s just say, “sampling” the appetizers a little too enthusiastically.
My planned starter was looking a little too fancy and not nearly substantial enough. Panic started to set in. I scanned the fridge, my eyes landing on the leftover Hawaiian rolls from breakfast, a pack of deli ham for sandwiches, and a block of Havarti I’d bought on a whim. In a moment of pure “what if we tried this?” energy, I threw them together, whipped up a quick butter glaze with what I had on hand, and shoved the whole tray into the oven as a Hail Mary.
Friends, those sliders were the star of the show. They were gone before the turkey even came out of the oven. My Uncle Dave still asks me every year, “You makin’ those little sandwich things?” That kitchen “oops” taught me a huge lesson: the best food isn’t always the most complicated. It’s the food made with a little ingenuity and a lot of heart. These sliders have that heart baked right in.
Gathering Your Flavor Squad: The Ingredients Breakdown
This is where the magic starts. Simple ingredients, big impact. Here’s everything you’ll need and my quick chef insights on why each one matters.
- 1 (12-count) package Savory Butter Hawaiian Rolls – Don’t separate them! We’re keeping the whole sheet intact. These rolls are the perfect foundation—soft, slightly sweet, and they hold up beautifully to the baking process. Chef’s Tip: If you can’t find the “Savory Butter” kind, the classic sweet Hawaiian rolls work perfectly. The hint of sweetness is a fantastic contrast to the salty ham.
- 12 slices black forest ham – I love the rich, smoky flavor of black forest ham. It’s got more personality than your standard deli ham. Substitution Tip: Feel free to use honey ham, smoked turkey, or even pastrami for a different vibe! Just make sure it’s good quality—it makes all the difference.
- 6 slices Havarti cheese, halved – Havarti is the secret weapon. It melts like a dream into the most luxurious, creamy blanket for the ham. Chef’s Insight: Its mild, buttery flavor doesn’t overpower the other ingredients; it just brings everything together in a glorious, melty hug. No Havarti? Swiss cheese is a classic and delicious substitute.
For the Mustard-Butter Glaze:
- 4 tbsp salted butter – This is the base of our flavor-packed topping. It creates that irresistible golden-brown crust.
- 1 tsp Dijon mustard – This adds a subtle tang and depth that cuts through the richness. Chef’s Hack: If you only have yellow mustard, that works too! The flavor will just be a bit brighter and more forward.
- ¼ tsp Worcestershire sauce (optional) – My little umami booster. It adds a complex, savory note that makes people wonder, “What is *in* this?”
- ¼ tsp onion powder (optional) – This gives a gentle, all-over onion flavor without any crunchy bits.
- 1 tbsp poppy seeds – They add a wonderful little crunch and a nutty flavor that just screams “delicious.”
Let’s Build Some Magic: Your Step-by-Step Guide
Okay, team. Time to assemble. This process is so simple it’s almost therapeutic. Follow these steps, and you’ll be a slider hero in no time.
- Preheat & Prep. Fire up your oven to 350°F (175°C). While it’s warming, line a 9×13 baking dish with foil or parchment paper. Chef’s Hack: This isn’t just for easy cleanup (though that’s a huge win). It also makes it a breeze to lift the whole block of sliders out for slicing and serving. Trust me on this one.
- Slice the Rolls Like a Pro. Here’s the key move: without pulling the individual rolls apart, take the entire sheet of connected Hawaiian rolls and slice the whole thing in half horizontally, like you’re slicing a giant bun. You’ll end up with one solid bottom layer and one solid top layer. Place the bottom layer snugly into your prepared baking dish.
- Layer on the Goodness. Now for the fun part! Layer all 12 slices of that gorgeous ham evenly over the bottom layer of rolls. It’s okay if it overlaps—we want every bite to be packed. Next, place your halved slices of Havarti cheese over the ham, covering as much surface area as possible. Chef’s Tip: Don’t be shy with the cheese! The melty, cheesy pull is half the experience. Once your ham and cheese are perfectly positioned, gently place the top half of the rolls back on, like putting the lid on the most delicious sandwich present ever.
- Whip Up the “Liquid Gold” Glaze. In a small saucepan over low heat, melt your butter. Once it’s liquid sunshine, take it off the heat and stir in the Dijon mustard, Worcestershire sauce, onion powder, and poppy seeds. Give it a good whisk until it’s a beautifully unified, fragrant sauce.
- Brush It On. Using a pastry brush (or the back of a spoon in a pinch), generously brush that mustard-butter glaze all over the top of the rolls. Get into every nook and cranny! This glaze is what transforms these from simple sandwiches into a baked masterpiece.
- Bake to Perfection. Cover the entire baking dish tightly with foil. This initial steamy bake is crucial—it melts the cheese perfectly and heats the sliders all the way through without burning the tops. Bake covered for 15 minutes. Then, remove the foil and bake for another 5-7 minutes, or until the tops are a beautiful golden brown and you can hear the buttery sauce sizzling. Your kitchen will smell incredible.
- The Most Important Step: Let Them Rest! I know, the temptation is real. But you *have* to let them sit for about 5 minutes after they come out of the oven. This allows the cheese to set slightly, making them much easier to slice and preventing a cheese-burn situation. Use a sharp serrated knife to slice along the perforations of the rolls and serve them up!
Plating Up & Serving in Style
How you serve these bad boys can take them from great to legendary. Here are my favorite ways to present them:
The Classic Crowd-Pleaser: Simply serve the whole baking dish right in the middle of the table with a stack of napkins. Let people dig in and pull apart their own sliders. It’s interactive, fun, and creates a fantastic, communal eating experience.
Elevated Appetizer: For a party, transfer the sliced sliders to a beautiful wooden board or platter. Scatter some cornichons (those little pickles), a handful of potato chips, and a small bowl of grainy mustard for dipping on the side. It instantly looks chic and thoughtfully curated.
The Complete Meal Deal: Turning this into dinner? Easy. I love serving two sliders per person alongside a big, bright, crunchy salad—like a simple arugula salad with a lemon vinaigrette. The freshness of the salad cuts through the rich, buttery sliders perfectly. A cup of tomato soup for dipping is also a next-level move that never fails.
Mix It Up! 5 Flavorful Twists on the Classic
Once you’ve mastered the classic, the world is your oyster… or your slider. Get creative and make it yours! Here are a few of my favorite variations:
- The “Everything” Slider: Swap the ham for thinly sliced roast beef and the Havarti for provolone. Add a smear of creamy horseradish sauce inside the rolls before assembling. Game changer.
- Pizza Party Sliders: Use sliced pepperoni and mozzarella cheese. Mix a little garlic powder and Italian seasoning into the butter glaze. Serve with a side of warm marinara for dipping.
- Turkey Ranch Club: Layer sliced turkey and crispy cooked bacon. Add a very thin layer of ranch dressing inside the rolls before adding the meat and cheese. Use cheddar for that classic club sandwich feel.
- Vegetarian Delight: Sauté sliced mushrooms and spinach with a little garlic until soft. Let it cool, then use this as the filling along with slices of provolone or mozzarella. The savory, earthy flavors are incredible.
- Spicy Hawaiian: Add a layer of sliced jalapeños (pickled or fresh) over the ham. Use a spicy pepper jack cheese instead of Havarti for a real kick.
Jackson’s Chef Notes & Kitchen Confessions
This recipe has evolved so much since that first Thanksgiving panic. I’ve learned that you can make the glaze ahead of time and just reheat it gently before brushing. I’ve also discovered that letting the assembled, un-baked sliders hang out in the fridge for an hour or two before baking actually lets the flavors meld even more beautifully.
One time, I was filming a video for the blog and I was so busy chatting to the camera that I completely forgot to put the top layer of rolls back on! I just had a tray of ham and cheese staring back at me. I laughed, called it a “deconstructed slider bake,” and we ate it with forks. It was still delicious, but lesson learned: even simple recipes require a tiny bit of focus. The beauty is, even when you “mess up,” it still usually turns out tasty. That’s the fun of cooking!
Your Questions, Answered!
Q: Can I make these ahead of time?
A: Absolutely! You can assemble the entire slider block (through step 5), cover it tightly with plastic wrap, and refrigerate it for up to 24 hours. When you’re ready, just take the plastic off, brush with a little extra glaze if you want, and bake as directed. You might need to add 2-3 extra minutes to the bake time since you’re starting from cold.
Q: My bottoms got a little soggy. What happened?
A: This usually happens if the sliders aren’t eaten immediately. To prevent it, make sure your baking dish is the right size (a 9×13 is perfect) so the sliders fit snugly, and don’t skip the step of uncovering them for the final bake. That extra heat helps crisp everything up. Letting them rest after baking also helps the bottom firm up.
Q: Can I freeze these?
A: You can! Assemble them (without baking), wrap the whole dish extremely well in both plastic wrap and foil, and freeze for up to 2 months. Bake from frozen, covered, for about 25-30 minutes, then uncover and bake for 5-10 minutes until hot and golden.
Q: I don’t have a pastry brush. What can I use?
A: No worries! A silicone brush is best, but in a pinch, you can carefully use the back of a spoon to drizzle and spread the glaze. You can even just pour it slowly and tilt the pan to help it coat the tops evenly.
Nutritional Info (Because We’re All Curious!)
Okay, let’s keep it real. This is indulgent, comforting party food, and we love it for that! But here’s a general breakdown per slider (approximate, as ingredients can vary):
- Calories: ~220
- Carbohydrates: 17g
- Fat: 12g
- Protein: 9g
If you’re looking for ways to lighten it up slightly, you can use a low-fat Havarti cheese, a leaner ham, and reduce the butter in the glaze by 1 tablespoon (it’ll still be delicious!). But sometimes, you just gotta embrace the butter and cheese—it’s all about balance!
Your New Go-To Recipe Awaits
And there you have it! My all-time favorite, no-fuss, always-impresses recipe for Baked Ham & Havarti Sliders. This is more than just a recipe to me; it’s a reminder that the best moments in the kitchen often come from a place of simplicity and joy. It’s about gathering people, sharing incredible flavor, and creating those “you’ve gotta try this” moments that I live for.
Until next time, keep mixing it up and enjoying every single bite. Let’s cook something awesome together soon!
– Jackson


