
Sunshine on a Plate: Your New Favorite Rustic Dessert
Hey friends, Jackson from Food Meld here. Let’s get real for a second. Sometimes, you want a show-stopping dessert that makes everyone at the table go “WOW,” but you don’t have the time or energy for a fussy, perfect-looking pie. Sound familiar? That, my friends, is exactly where the magic of a galette happens.
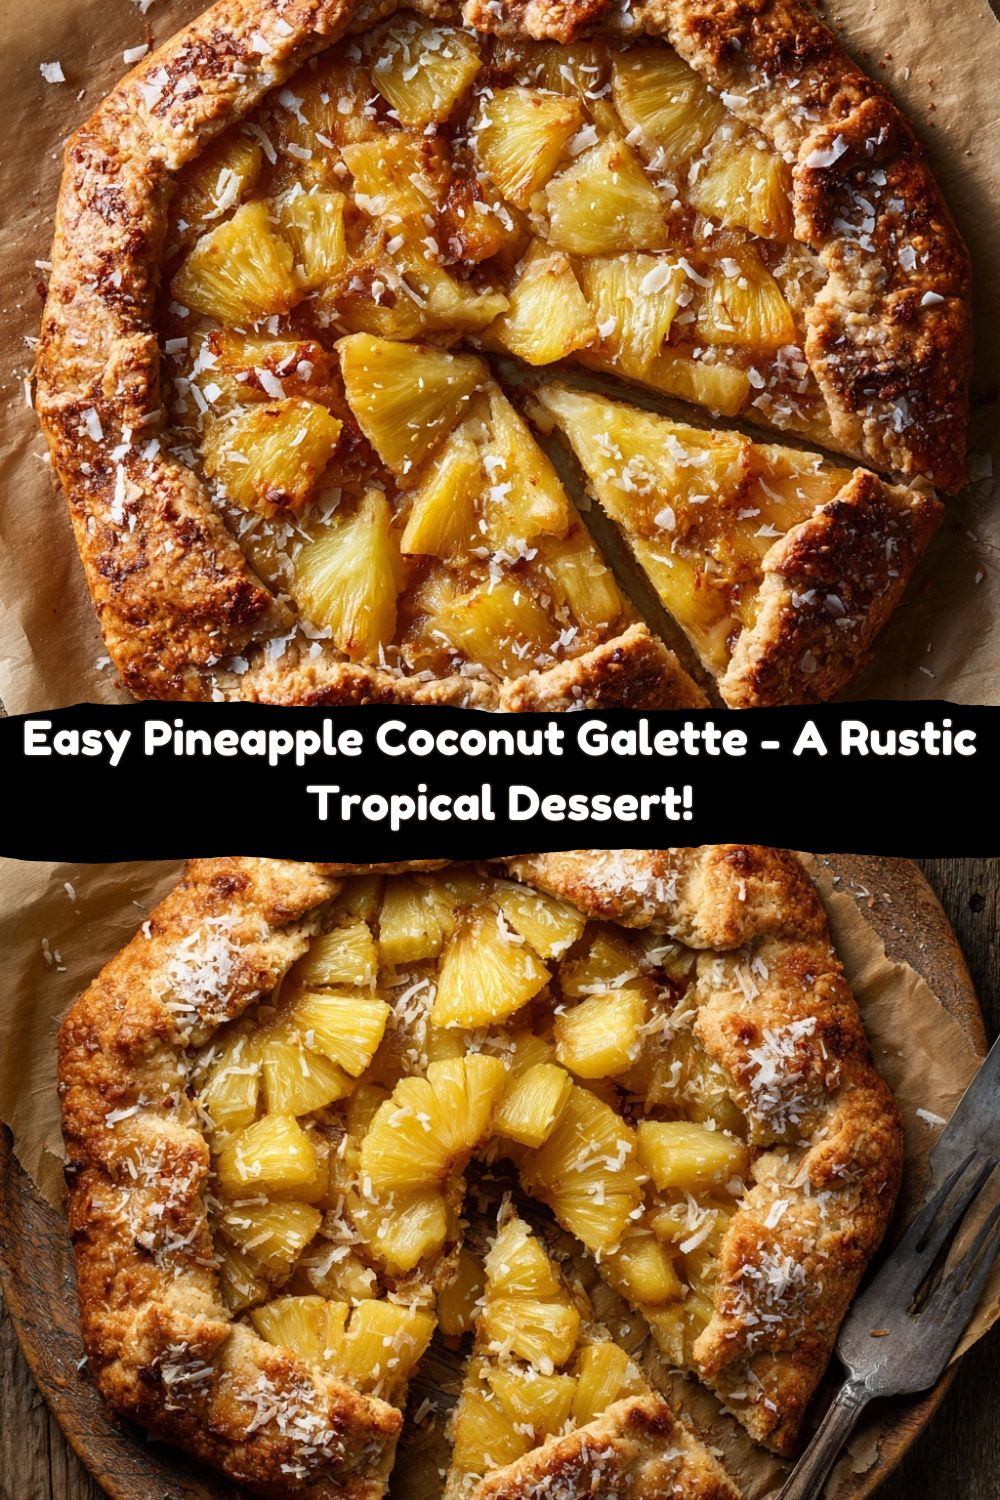
Think of a galette as pie’s cool, laid-back cousin. It’s a free-form, rustic tart that says, “I’m here for flavor, not for fuss.” There’s no crimping, no lattice-weaving drama—just pure, unadulterated, fruit-filled joy. And today, we’re taking that joy on a tropical vacation with this Pineapple Galette with a Coconut Crust.
This beauty is a total game-changer. We’re talking a flaky, buttery crust speckled with sweet, toasty coconut, hugging a warm, bubbling filling of juicy pineapple spiced with cinnamon and nutmeg. It’s like a slice of sunshine and a warm island breeze, all baked into one incredible dessert. It’s the kind of thing that makes a regular Tuesday night feel like a celebration, and it’s so much easier than it looks. So, preheat your oven, grab your favorite baking sheet, and let’s cook something awesome together.
A Taste of the Islands in My Grandma’s Kitchen
This recipe takes me right back to my grandma’s kitchen, which was always warm, a little steamy, and smelled like a million good things all at once. She was the queen of “making do” and creating magic with what she had. One sweltering summer day, she had a single, perfectly ripe pineapple on the counter and a hankering for something sweet, but pie dough intimidated her. “Too many rules, Jackson,” she’d say with a wave of her hand.
So, she did what all the greats do: she improvised. She tossed that pineapple with some brown sugar and spices, whipped up a simple dough, and just folded it over the filling, creating this beautiful, rustic, kinda lopsided masterpiece. It was golden, juicy, and we ate it straight from the pan with big scoops of vanilla ice cream. That messy, joyful freedom is what I try to bring to every recipe here at Food Meld. It’s not about perfection; it’s about the feeling you get when you take that first, incredible bite.
Gathering Your Tropical Toolkit
One of the best things about this galette is the ingredient list. It’s short, sweet, and packs a huge punch of flavor. Let’s break it down.
For the Coconut Crust:
- 1 cup whole wheat pastry flour: This gives our crust a lovely, tender heartiness and a nutty flavor that stands up to the sweet pineapple. Chef’s Insight: If you don’t have it, all-purpose flour works perfectly! This is just my little twist for extra flavor and fiber.
- ½ cup sweetened shredded coconut: The star of the crust! It toasts up as it bakes, adding incredible texture and that classic tropical taste.
- 5 tbsp cold butter, cubed: I can’t stress this enough—COLD butter is the secret to a flaky crust. When those little cold bits melt in the oven, they create steam pockets, which equals flaky perfection.
- 2–3 tbsp cold water: Just enough to bring it all together. Cold water keeps our butter from melting before it hits the oven.
For the Spiced Pineapple Filling:
- 2 cups fresh pineapple, thinly sliced: Fresh is best here for that bright, vibrant flavor and firm texture. Substitution Tip: In a pinch, well-drained canned pineapple chunks (not crushed) can work, but pat them super dry!
- ⅓ cup brown sugar: This adds a deep, molasses-like sweetness that pairs beautifully with the pineapple and spices.
- 2 tsp ground cinnamon: For that warm, cozy spice note.
- ½ tsp grated nutmeg: A little nutmeg goes a long way, adding a layer of complexity that makes the whole thing taste… well, more grown-up and special.
- 2 tbsp cold butter, cubed: We’ll dot this over the filling before baking. It melts into the fruit, creating a rich, caramel-y sauce that is absolutely divine.
Let’s Build This Beauty: Your Step-by-Step Guide
Alright, team. Time to get our hands a little dusty. Don’t be nervous—this is the fun part! I’m walking you through every single step.
- Make the Crust Dough. In a medium bowl, whisk together your whole wheat pastry flour and shredded coconut. Now, add your cold, cubed butter. Here’s my favorite hack: use a pastry cutter, two forks, or even just your (clean!) fingertips to “cut” the butter into the flour. You’re looking for a mixture that resembles coarse, pebbly sand with some larger pea-sized bits of butter still visible. This is GOOD! Those butter bits are your flaky future. Now, drizzle in the cold water, one tablespoon at a time, and gently mix with a fork until the dough just starts to clump together. Don’t overwork it!
- Chill Out. Turn the shaggy dough out onto a piece of plastic wrap. Gently press and form it into a flat disk—no need for a perfect circle! Wrap it up and pop it in the fridge for at least 30 minutes. This is a non-negotiable rest period. It allows the gluten to relax (so your crust stays tender) and re-chills the butter, which is crucial for that flaky texture we’re after.
- Wake Up the Oven & Prep the Filling. While the dough chills, preheat your oven to 375°F (190°C). This gives it plenty of time to get to the right temp. Then, in another bowl, toss your thinly sliced pineapple with the brown sugar, cinnamon, and nutmeg. Let it sit for a few minutes—you might see some juices start to release. That’s flavor gold, right there.
- Roll It Out. Take your chilled dough disk and place it on a large piece of parchment paper. (Using parchment means easy cleanup and no sticking!) Place another piece of parchment on top. Now, roll it out into a rough circle, about 10-12 inches across and ¼-inch thick. Don’t sweat it if the edges are uneven—that’s the rustic charm! Remove the top piece of parchment.
- Assemble the Galette. Arrange your spiced pineapple slices in the center of the dough, leaving a solid 2-inch border all the way around. This is your folding room! Scrape any leftover sugary spice mixture from the bowl over the fruit. Now, take your 2 tbsp of cold, cubed butter and dot it evenly over the pineapple filling.
- The Big Fold. Here’s where the galette gets its character. Gently fold the bare edges of the dough up and over the filling, pleating it as you go around the circle. It should look beautiful and imperfect. The center of the fruit will remain exposed, ready to bubble and caramelize.
- Bake to Golden Perfection. Carefully slide the parchment paper with the galette directly onto a baking sheet. Bake for 35-40 minutes. You’re waiting for the crust to be a deep, golden brown and the pineapple filling to be bubbly and fragrant. Your kitchen is going to smell incredible.
- The (Brief) Wait. I know, it’s hard. But let the galette cool on the baking sheet for at least 15-20 minutes before you slice into it. This allows the juicy filling to set just enough so it doesn’t run everywhere when you serve it.
How to Serve This Slice of Paradise
Presentation is part of the fun! I love serving this galette right on the parchment paper on a big wooden cutting board—it leans into that rustic, “I’m a baking superstar” vibe. Slice it into wedges like a pizza.
Now, for the accompaniments. This is non-negotiable for the full experience:
- A giant scoop of high-quality vanilla ice cream melting over the warm pineapple and flaky crust. The hot-and-cold contrast is everything.
- Feeling fancy? A dollop of freshly whipped cream with a tiny pinch of cinnamon folded in is divine.
- For a true island feel, try a drizzle of toasted coconut syrup or a sprinkle of extra toasted coconut flakes over the top.
This is perfect for a weekend brunch, a potluck showstopper, or the grand finale to a casual weeknight dinner with friends.
Make It Your Own: Fun Twists & Swaps
Once you’ve mastered the basic formula, the world is your oyster… or, well, your tropical fruit basket. Here are a few of my favorite ways to mix it up:
- Tropical Meld: Swap out half the pineapple for sliced mango or diced peaches. You’ll get an even more complex tropical flavor profile.
- Boozy Bliss: Add a tablespoon of dark rum or Malibu coconut rum to the pineapple filling before you toss it. It deepens the flavor and adds a wonderful warmth.
- Ginger Zing: Add 1 teaspoon of freshly grated ginger or ¼ teaspoon of ground ginger to the spice mix. Ginger and pineapple are a match made in heaven.
- Vegan Delight: This is an easy one! Use a high-quality vegan butter (keep it cold!) in both the crust and the filling. It works like a charm.
- Gluten-Free Adventure: Substitute the whole wheat pastry flour with your favorite 1:1 gluten-free all-purpose flour blend. The result is just as delicious and crispy.
Jackson’s Kitchen Notes & Stories
This recipe has evolved so much since that first day in my grandma’s kitchen. I’ve probably made it two dozen different ways. One time, I was out of brown sugar and used maple syrup—it was a happy, delicious accident that made the filling even saucier. Another time, I added a handful of blueberries that were about to turn, and the purple-blue juice swirling with the yellow pineapple was almost too pretty to eat. (Keyword: almost.)
The biggest lesson? Don’t fear the juices. If some of the filling liquid leaks out and caramelizes on the parchment paper, just lean into it. That sticky, sugary goodness is a chef’s treat. This galette is meant to be a little messy, a little imperfect, and 100% full of love and flavor.
Your Questions, Answered!
I’ve gotten a few questions about this recipe over the years, so let’s tackle the big ones.
Q: My crust was tough, not flaky. What happened?
A: The most common culprit is overworking the dough. When you mix the water in, stop as soon as it holds together. And when you’re rolling it out, use a gentle hand. Remember, visible bits of butter are a good thing!
Q: My filling is super runny. How can I prevent that?
A> Fruit releases juice—it’s a fact of life! To help thicken it, you can toss the pineapple with one tablespoon of cornstarch or tapioca flour along with the sugar and spices. This will help absorb some of the excess liquid as it bakes.
Q: Can I make this ahead of time?
A> Absolutely! You can make the dough disk up to 2 days in advance and keep it wrapped in the fridge. You can also assemble the whole galette, freeze it solid on the baking sheet, then wrap it well and keep it frozen for up to 2 months. Bake from frozen, adding 10-15 minutes to the baking time.
Q: My shredded coconut is burning in the oven!
A> If you notice the coconut in the crust getting too dark too quickly, don’t panic! Just tent the galette loosely with a piece of aluminum foil for the remainder of the baking time. This will shield the crust while allowing the filling to continue bubbling away.
Let’s Talk Nutrition (The Fun Way)
I’m not a nutritionist, but I am a guy who believes in balance and knowing what’s going into your food. This is a dessert, so it’s a treat, but it’s made with real, whole ingredients, and that’s something to feel good about.
Using whole wheat pastry flour adds a bit of fiber, which is great for digestion. Pineapple is packed with Vitamin C and an enzyme called bromelain, which can help with inflammation. And while there is sugar, we’re keeping it reasonable and using brown sugar for its mineral content. A single slice is a satisfying, delightful way to end a meal without feeling overstuffed. Remember, it’s all about enjoying the food you love!
Nutrition (per slice, 1 of 6):
Calories: ~230 | Sugar: 15g | Fat: 12g | Carbs: 28g | Fiber: 3g
Prep Time: 15 mins | Chill Time: 30 mins | Bake Time: 40 mins | Total Time: ~1 hr 25 mins | Servings: 6
You Did It! Now, Savor the Moment.
Look at that! You just created a stunning, restaurant-quality dessert right in your own kitchen. I hope you’re feeling as proud as you should be. This Pineapple Galette is more than just a recipe; it’s a reminder that the best food doesn’t have to be complicated. It’s about bold flavors, a creative spirit, and sharing something made-with-love with the people who matter most.
I’d love to see your creation! Tag me on social @FoodMeld and use the hashtag #FoodMeld so I can see your beautiful, rustic galettes and all the fun twists you come up with. Until next time, keep mixing it up, keep making it yours, and most importantly, enjoy every single bite.
Happy baking,
Jackson


