Forget Store-Bought: Let’s Make Some Sweetheart Magic!
Hey friends, Jackson from Food Meld here. Let’s be real for a second. Valentine’s Day can feel a little… predictable. The same boxes of chocolates, the same overpriced roses. But what if you could hand someone a treat that was not only ridiculously cute but also made with your own two hands? A treat that says, “I think you’re awesome enough to whip up something magical for”? That’s the power of these Sweetheart Marshmallow Pops.
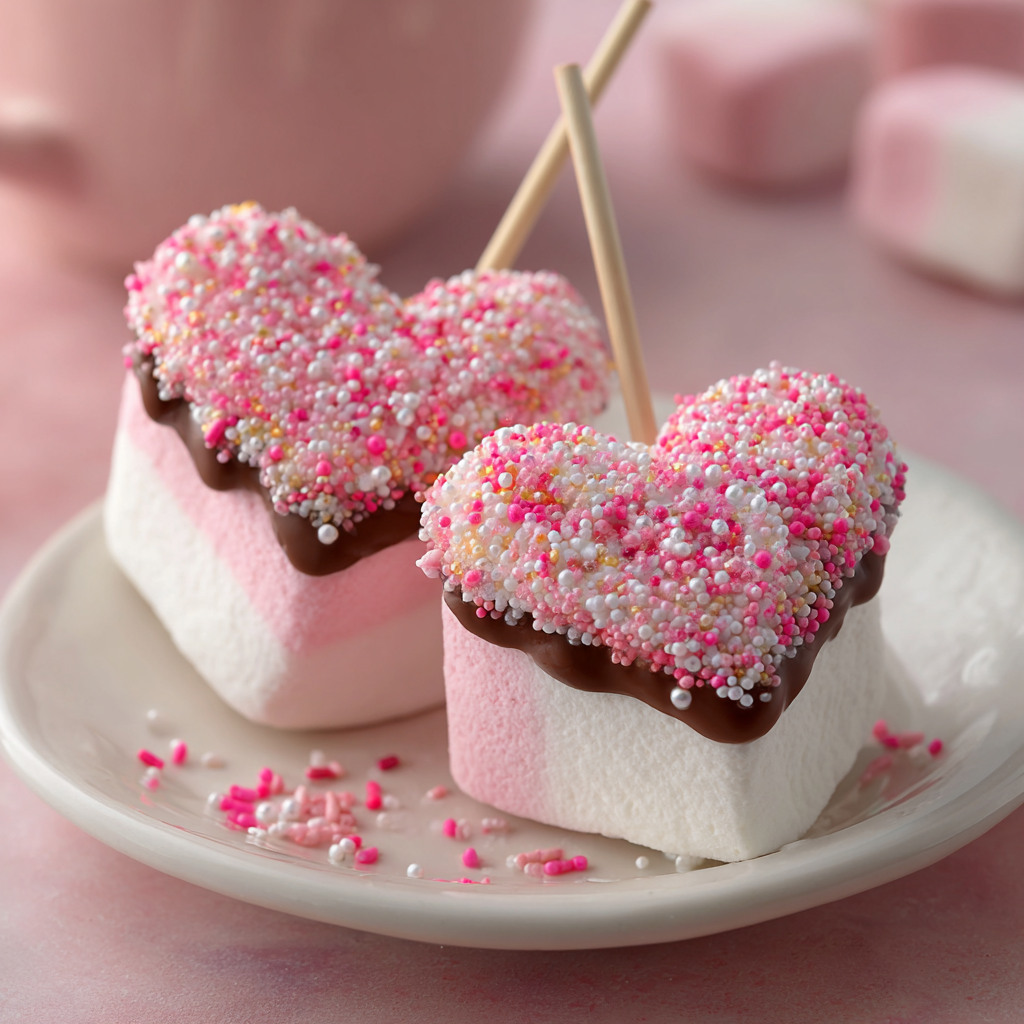
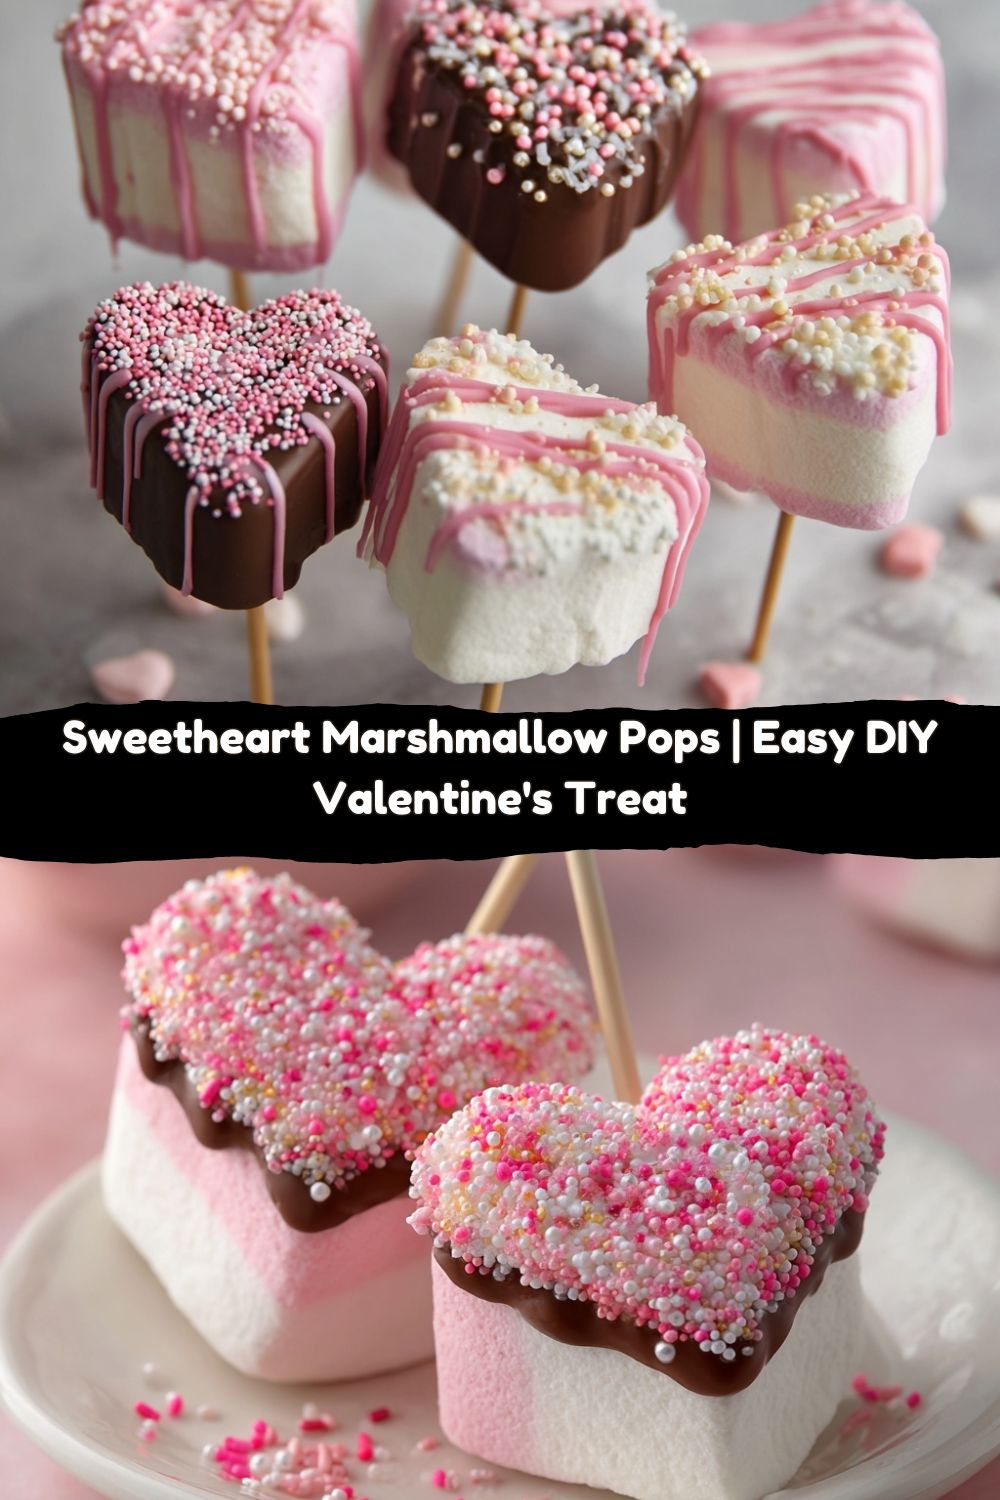
We’re talking cloud-like, homemade marshmallows, softer and more flavorful than anything you’ll find in a plastic bag. We’re shaping them into adorable hearts, dipping them in a sleek coat of rich chocolate, and loading them up with a confetti of sprinkles. They’re fun, they’re festive, and they carry that special “wow, you MADE these?!” factor that I live for.
Now, I see you. You might be thinking, “Jackson, marshmallows from scratch? That sounds… intense.” But trust me on this. It’s a simple syrup and a stand mixer doing the heavy lifting. It’s a chance to play with food coloring and get a little messy. It’s about creating those “you’ve gotta try this” moments right in your own kitchen. So, grab your mixer, and let’s cook something awesome—and incredibly sweet—together.
A Sticky-Fingered Valentine’s Memory
This recipe takes me right back to my grandma’s kitchen, though not in the way you might think. She wasn’t a marshmallow whiz; she was a “semi-homemade” queen before it was a thing. Every Valentine’s Day, she’d buy a bag of plain marshmallows, a bag of chocolate chips, and every sprinkle and red hot she could find. She’d melt that chocolate in a makeshift double boiler (a bowl over a pot of water, of course), and my cousins and I would stand there, armed with forks and toothpicks, creating what we were convinced were culinary masterpieces.
Our hands were covered in chocolate, the counter was a glittery disaster zone, and we’d be hopped up on sugar for hours. But the pure, unadulterated joy of making something with our hands and giving those lopsided, sprinkle-bombed creations to our parents? That was the real treat. These Sweetheart Marshmallow Pops are my grown-up, from-scratch homage to that feeling. It’s that same spirit of playful, messy, heartfelt creation, just with a slightly more refined (and much fluffier) end product.
Gathering Your Sweetheart Squad: The Ingredients
Don’t let the short list fool you—these simple ingredients are about to perform a culinary magic trick. Here’s the lineup and my chef-ly two cents on each one.
- 3 envelopes unflavored gelatin: This is the backbone of our fluffy structure. It’s what transforms liquid syrup into that iconic, bouncy texture. Make sure it’s unflavored—we don’t want any Jell-O surprises!
- 1 cup cold water, divided: We split this for a reason! The first half (½ cup) is for “blooming” the gelatin, which just means waking it up and getting it ready to work. The other half goes into the sugar syrup.
- 1 ½ cups granulated sugar: Sweetness and structure. This is the heart of our marshmallow.
- 1 cup light corn syrup: This hero ingredient prevents the sugar from crystallizing, ensuring our marshmallows are smooth and creamy, not grainy. For a swap, you can use agave nectar, but the texture might be a touch softer.
- ¼ tsp salt: Never, ever skip the salt in sweets! It’s the secret weapon that makes the vanilla pop and the sweetness feel balanced, not one-note.
- 1 tbsp vanilla extract: Go for the good stuff! This is the primary flavor, so a pure vanilla extract makes a world of difference. Feeling adventurous? A tiny bit of almond extract (¼ tsp) is a delicious twist.
- Pink food coloring: Gel food coloring is my best friend here. It gives you vibrant color without adding extra liquid that could deflate your fluff. A few drops is all you need!
- Melted white or milk chocolate (for dipping): I’m a sucker for the contrast of white chocolate on pink marshmallows, but milk or dark chocolate is divine. Use high-quality melting wafers for the easiest, smoothest dipping experience.
- Lollipop sticks: You can find these at any craft store. They turn a marshmallow into a pop, making it fun to hold and gift.
- Sprinkles or edible glitter (optional, but highly encouraged): This is where you let your personality shine! Valentine’s sprinkles, crushed freeze-dried strawberries, or even a little flaky sea salt for a gourmet touch.
- Powdered sugar + cornstarch (for dusting): Our trusty non-stick team. Marshmallows are famously sticky, and this duo is the barrier that keeps everything manageable.
Let’s Get Fluffy: The Step-by-Step Guide
Ready to see some magic happen? Follow these steps, read my little hacks along the way, and you’ll be a marshmallow master in no time.
- Prep Your Pan & Bloom the Gelatin: First, take an 9×13-inch baking pan and give it a serious coating of non-stick spray. Then, whisk together about a ½ cup of powdered sugar and ¼ cup of cornstarch. Dust the pan liberally with this mixture, tapping out any excess. This is your insurance policy! Now, in the bowl of your stand mixer, sprinkle the gelatin over the ½ cup of cold water. Let it sit and “bloom” for about 10 minutes. It will look like a weird, lumpy apple sauce—that’s perfect! It’s just getting ready.
- Create the Sugar Syrup: While the gelatin blooms, combine the granulated sugar, corn syrup, salt, and the remaining ½ cup of water in a medium saucepan. Stir it over medium heat just until the sugar dissolves. Now, stop stirring! Attach a candy thermometer to the side of the pan and let the syrup boil. We’re waiting for it to hit 240°F, the “soft-ball stage.” This is crucial for texture. Chef Hack: No candy thermometer? You can test by dropping a tiny bit of syrup into a cup of cold water. If it forms a soft, pliable ball that flattens when you take it out, you’re good!
- The Magic Moment: Whip It Good! This is the fun part. With your mixer on low speed, carefully and slowly pour the hot sugar syrup into the bloomed gelatin. Be careful, it’s crazy hot! Once it’s all in, crank that mixer to high speed. Now, walk away for 10-12 minutes. Seriously. Let the machine work. It will go from translucent and thin to thick, white, and incredibly fluffy—like a shiny, billowy cloud. It should nearly triple in volume.
- Add Flavor & Color: Once your marshmallow fluff is stiff and holds stiff peaks, reduce the mixer speed to low and add the vanilla extract. For the pink color, I like to add just a few drops of gel coloring at the very end and run the mixer for only about 10 more seconds to create a subtle, swirly effect. For a solid pink, let it mix a bit longer.
- Spread and Set: Immediately scrape the fluffy goodness into your prepared pan. This stuff is sticky! I like to lightly wet my spatula or hands to help smooth the top without it sticking everywhere. Dust the top with more of your powdered sugar/cornstarch mix. Now, the hardest part: patience. Let it sit, uncovered, for at least 4-6 hours, or overnight is even better. It needs time to set up firm.
- Cut and Stick: Once set, loosen the edges and turn the giant marshmallow slab out onto a cutting board dusted with more powdered sugar mix. Use a heart-shaped cookie cutter to cut out your shapes. Dip the tip of your lollipop sticks into the melted chocolate first, then push them about halfway into the base of each marshmallow heart. That little bit of chocolate acts like glue and helps secure the stick!
- The Grand Finale: Dip and Decorate! Now, let your inner artist out! Dip the top of each marshmallow pop into your melted chocolate, let the excess drip off, and then immediately shower it with sprinkles. Set them upright in a styrofoam block or lay them on a parchment-lined baking sheet to let the chocolate fully set.
Sharing the Sweetness: How to Serve These Pops
Presentation is part of the fun! You’ve put in the work, now let’s show these pops off. For a party, I love sticking them all in a big piece of food-safe styrofoam covered in wrapping paper or a cute fabric, creating a beautiful, edible centerpiece. For gifting, you can wrap each one individually in clear cellophane bags tied with a ribbon. They make incredible Valentine’s for a classroom, co-workers, or your neighbors.
Stack a few together in a mason jar tied with a baker’s twine bow for a simple, heartfelt gift. And of course, they’re the perfect sweet ending to a cozy Valentine’s dinner at home. Just pile them on a cute plate and watch them disappear. They pair wonderfully with a dark roast coffee or a glass of cold milk to balance the sweetness.
Make It Yours: Fun Flavor Twists
The basic recipe is a blank canvas. Once you’ve mastered it, feel free to get creative and mix it up!
- Chocolate-Strawberry Swirl: Add a tablespoon of cocoa powder when you add the vanilla for a chocolate marshmallow base. Use a toothpick to swirl in a reduction of mashed strawberries for a real fruit kick.
- Cookies & Cream: Fold in ½ cup of crushed Oreo pieces right after the vanilla. Dip in dark chocolate and roll in more Oreo crumbs. Trust me on this one.
- “Tropical Love” Version: Swap the vanilla for ½ teaspoon of coconut extract. Dip in white chocolate and roll in toasted coconut flakes. Instant vacation vibes.
- Peppermint Kiss: Use ½ teaspoon of peppermint extract instead of vanilla. Keep the marshmallows white, dip in dark chocolate, and crush up some candy canes for sprinkles. Perfect for a winter wedding or holiday party!
- Vegan-Friendly Swap: You can make these vegan! Use agar agar powder (following package instructions for substitution ratios) instead of gelatin, and ensure your sugar is certified vegan (some is processed with bone char). Dip in dairy-free chocolate.
Jackson’s Kitchen Confidential
This recipe has evolved so much in my kitchen. The first time I made marshmallows, I underestimated the stickiness and ended up with what I can only describe as a “fluff monster” clinging to every surface, including my hair. My dog thought it was the best day ever. Lesson learned: dust everything generously!
I also learned that a stand mixer is your best friend here. While you can use a hand mixer, your arm might fall off during the 12-minute whipping time. And don’t rush the setting time! I know it’s tempting, but a properly set marshmallow is worth the wait. It makes for a clean cut and a pop that holds its shape. These little lessons are all part of the fun, messy journey of cooking.
Your Questions, Answered!
Q: My marshmallow mixture didn’t get fluffy. What went wrong?
A: The most common culprit is the sugar syrup temperature. If it didn’t hit 240°F, the structure won’t set correctly. A candy thermometer is your best investment here. Also, make sure you’re whipping for the full 10-12 minutes on high speed!
Q: My marshmallows are SO sticky, even after dusting. Help!
A: They are inherently sticky, but a proper dusting coat is key. Don’t be shy with the powdered sugar and cornstarch mix when prepping the pan and the cutting surface. If they’re still too sticky to handle after setting, they may have needed a bit longer to firm up.
Q: Can I make these ahead of time?
A: Absolutely! That’s one of the best parts. Once fully set and decorated, store them in a single layer in an airtight container at room temperature. They’ll stay perfectly fresh and delicious for up to a week, and often longer.
Q: Why did my chocolate get thick and clumpy when I tried to dip?
A: That sounds like “seized” chocolate, which usually happens when a tiny bit of water gets into the melting chocolate. Make sure your marshmallows and tools are completely dry before dipping. To fix it, you can try stirring in a tiny amount of coconut oil or vegetable shortening to smooth it back out.
Let’s Talk Nutrition (The Fun Kind!)
Look, we’re making homemade marshmallow pops dipped in chocolate. This is a celebration treat, through and through! I’m all about balance, so let’s enjoy these beauties mindfully. Each pop (yielding about 22 from the batch) comes in at roughly 110 calories. They have about 17g of sugar and 3g of fat, primarily from the chocolate.
The beauty of making them yourself is that you control the ingredients. You can use organic sugar, a high-quality vanilla, and a chocolate you love. You’re avoiding the preservatives and artificial flavors found in many store-bought candies. So, savor one or two, share the rest, and enjoy every sweet, fluffy, chocolatey bite without any guilt. Life’s too short not to enjoy the treats you love!
You Did It! Now Go Spread the Love.
And there you have it! You’ve just created something truly special from scratch. You took a handful of simple ingredients and transformed them into a gift of pure, edible joy. That’s no small feat. I hope you’re feeling incredibly proud of your creation and that you had as much fun making these Sweetheart Marshmallow Pops as I do every single time.
Remember, cooking is about the experience—the slight mess, the sweet smell of vanilla filling your kitchen, the smile on someone’s face when you hand them a treat made just for them. That’s the real magic. So, take a picture of your beautiful pops, tag me over at @FoodMeld, and show off your handiwork! I can’t wait to see your creations. Until next time, keep mixing it up, making it yours, and enjoying every single bite.
Happy Valentine’s Day, friends!
– Jackson


