Heart-Shaped Chocolate Bark: Your Secret Weapon for Sweetness
Hey friends, Jackson from Food Meld here. Let’s be real for a second. Sometimes, you need to whip up something that looks like you spent hours in a fancy pastry kitchen, but you *actually* have about 10 minutes and a serious craving for something sweet. You want that “wow” factor without the “oh no” stress. Am I right?
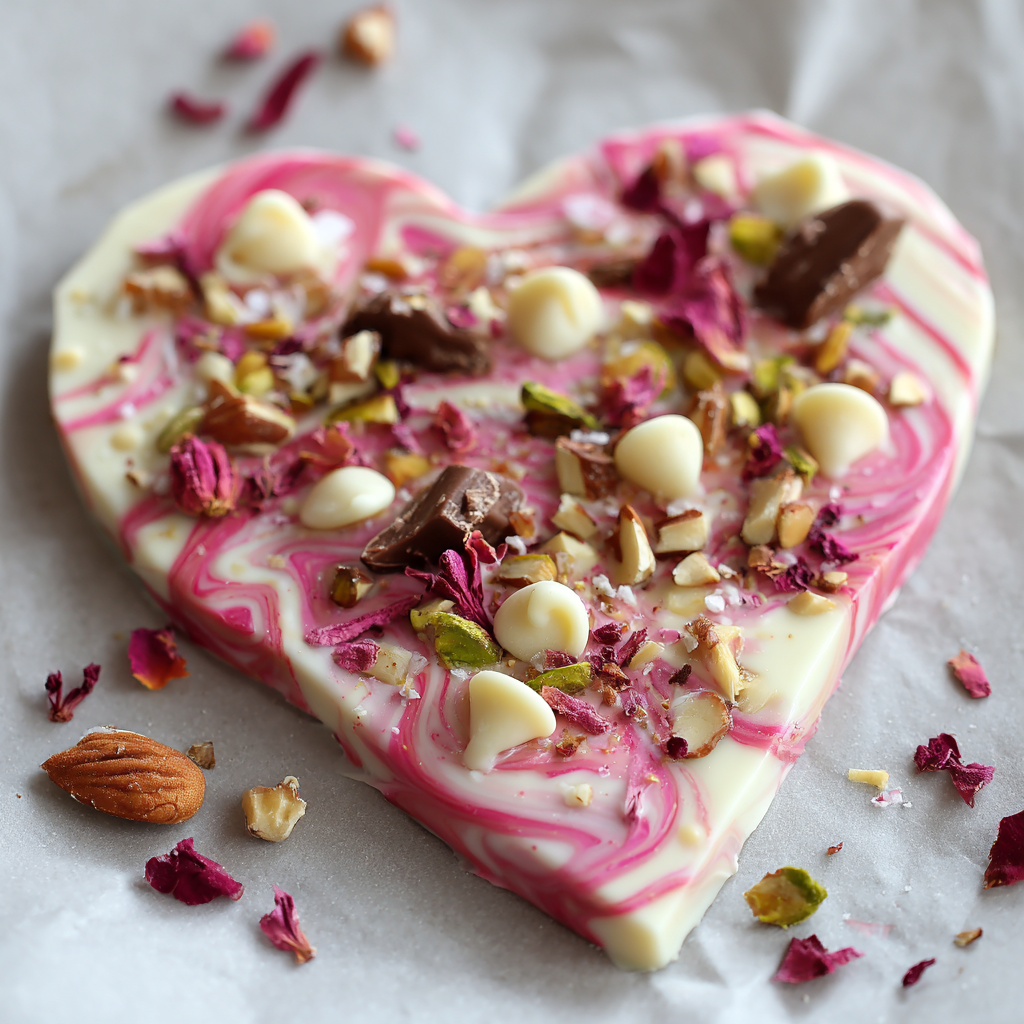
Well, my favorite little trick for exactly that situation is this stunning Heart-Shaped Chocolate Bark. We’re talking a beautiful canvas of marbled pink and white chocolate, loaded with crunchy pistachios, chewy cranberries, and a little edible sparkle. It’s elegant, it’s playful, and it screams “I care about you” without you having to scream in frustration.
This isn’t just a recipe; it’s a vibe. It’s for the last-minute Valentine, the Galentine’s Day spread, the “just because” treat for your roommates, or the simple joy of making something pretty with your own two hands. It’s a no-bake wonder that celebrates imperfection—those rustic, broken pieces have so much more charm than anything perfectly uniform. So, grab your favorite mixing bowls, and let’s create some edible magic that’s as fun to make as it is to eat. Welcome to your new go-to impressive dessert!

A Sweet Slice of Memory
This recipe always takes me back to my grandma’s kitchen, a place that smelled perpetually of sugar and love. She wasn’t a fancy chef, but she was a wizard with simple ingredients. One rainy afternoon, she pulled out a block of chocolate, a handful of pecans from the tree out back, and the last of her holiday candies. With a few taps of a hammer, she created this wild, beautiful mosaic on a sheet pan. She called it her “Everything Nice” bark.
Watching her break it into jagged pieces, her hands dusted with a little cocoa, I learned a powerful lesson: the best food isn’t about perfection. It’s about joy, creativity, and using what you have to make someone smile. My heart-shaped bark is just a dressed-up, Valentine’s-ready version of her “Everything Nice” philosophy. It’s my way of passing on that same feeling—that a little bit of mess and a whole lot of heart can create something truly unforgettable.
Gather Your Goodies
Here’s the beautiful part: this is less of a strict recipe and more of a template. You can swap, change, and personalize to your heart’s content! (Pun totally intended.)
- 8 oz White Chocolate, chopped or in chips: I like using a good-quality baking bar for a smoother melt, but chips work in a pinch! The key is that white chocolate can be a bit finicky, so we’ll treat it gently. Chef’s Insight: Using a bar you chop yourself often melts more evenly than pre-formed chips because they contain less stabilizers.
- 4 oz Pink Candy Melts or Colored White Chocolate: Candy melts are my go-to for that vibrant, stable pink color. If you want to use all white chocolate, just add a drop or two of oil-based food coloring to your melted white chocolate. Substitution Tip: You can use dark or milk chocolate for the pink portion for a different flavor profile!
- ¼ cup Dried Cranberries or Cherries: That pop of tart, chewy fruit is a fantastic contrast to the sweet chocolate. I love the festive red color of cranberries against the pink and white. Chef’s Insight: If your dried fruit is a little hard, give it a rough chop to make it easier to bite into once the bark is set.
- ¼ cup Chopped Pistachios, Almonds, or Walnuts: Crunch factor! Pistachios give a gorgeous green pop, while almonds offer a more subtle texture. Substitution Tip: For a nut-free version, swap in seeds like pumpkin or sunflower seeds for that essential crunch.
- Optional: Edible Rose Petals, Freeze-Dried Raspberries, or Sprinkles: This is where you get to be the artist. Edible rose petals feel incredibly elegant, freeze-dried raspberries add a tangy punch, and fun sprinkles bring the party. Don’t be shy!
Let’s Make Some Magic: The Step-by-Step
Okay, team. This is where the fun begins. Put on some good music, clear a little counter space, and let’s do this.
- Prep Your Canvas. Line a baking sheet with parchment paper. If you’re a visual person like me and want a defined heart shape, you can lightly trace a large heart (about 9×9 inches) on the parchment with a pencil, then flip the paper over so the pencil lead isn’t touching the chocolate. No tracing? No problem! We can freehand a heart shape—it’s more rustic and charming that way. Chef’s Hack: A tiny dab of chocolate under each corner of the parchment paper will “glue” it to the baking sheet and prevent it from sliding around when you spread the chocolate.
- The Meltdown (The Good Kind!). Place your white chocolate in a microwave-safe bowl. Microwave in 30-second intervals, stirring well after each blast, until it’s smooth and creamy. Do the exact same thing in a separate bowl with your pink candy melts. Chef’s Pro-Tip: DO NOT overheat the white chocolate! It’s delicate and can seize up (get clumpy) if you rush it. If it does seize, add a tiny teaspoon of coconut oil or vegetable oil and stir vigorously—it can sometimes bring it back from the brink.
- Create Your Marbled Masterpiece. Pour the melted white chocolate onto your prepared parchment paper and use a spatula or the back of a spoon to spread it into your heart shape, about ¼ to ½ inch thick. Now, take your pink chocolate and drizzle it all over the white chocolate base in zig-zags, swirls, or dollops. Then, take a toothpick or the tip of a knife and gently drag it through the two colors to create beautiful marbled patterns. Chef’s Commentary: This is the part where you can’t mess up. Every swipe creates a unique design. Have fun with it! Less is more—you want to marble, not mix it into one uniform pink color.
- The Topping Tango. Immediately after marbling, while the chocolate is still wet, shower your toppings over the surface. Start with the bigger items like nuts, then add the smaller bits like cranberries and sprinkles. Gently press them down with your fingers so they stick. Chef’s Hack: If you’re using heavier toppings, let the chocolate sit for just a minute or two to set up slightly so they don’t all sink to the bottom.
- The Patience Game. Now, we wait. You can let the bark set at cool room temperature if your kitchen isn’t too warm, or you can pop the entire baking sheet into the refrigerator for 15-20 minutes until it’s completely firm to the touch. Chef’s Tip: Chilling is faster, but avoid the freezer unless you’re in a huge rush, as it can cause condensation which might make your chocolate “sweat” later.
- The Grand Finale: Breaking It Up. Once the bark is completely firm, lift the entire sheet off the parchment paper. My favorite method is to just use my hands to break it into rustic, uneven pieces. It feels satisfying and looks artisanal. If you want more defined shapes, you can use a heart-shaped cookie cutter and gently press it into the bark. Chef’s Story: I always save the little shards and crumbs from the breaking process—they’re perfect for topping ice cream!
Sharing the Love: How to Serve It
Presentation is part of the fun! Pile the broken pieces high on a beautiful wooden board or a pretty ceramic platter. For a real show-stopper, arrange the pieces in the shape of one giant heart on the serving plate.
This bark is the ultimate shareable treat. It’s perfect for a Valentine’s Day dessert board alongside some fresh berries, a soft cheese, and a glass of bubbly. I also love packaging it up as gifts. Tuck a few pieces into a clear cellophane bag, tie it with a cute ribbon, and you’ve got a heartfelt, handmade present that’s infinitely better than anything from a store. It says, “I thought you were awesome enough to make something for.” And that’s a powerful message.
Mix It Up! Creative Twists on the Classic
Once you’ve mastered the basic formula, the flavor world is your oyster! Here are a few of my favorite ways to mix it up:
- Cookies & Cream Dream: Swap the pink chocolate for melted dark chocolate. Use crushed Oreo cookies and mini marshmallows as your toppings. It’s a s’mores-inspired dream!
- Tropical Escape: Use the white and pink chocolate base, but top with chopped macadamia nuts, toasted coconut flakes, and chopped dried mango or pineapple. Close your eyes, and you’re on a beach.
- Salty Pretzel Crunch: A personal favorite! Use a mix of white and milk chocolate. Top with broken pretzel pieces and a light sprinkle of flaky sea salt. The sweet-salty combo is absolutely killer.
- Superfood Bark: Feeling virtuous? Use dark chocolate as your base and top with goji berries, chopped almonds, pumpkin seeds, and a drizzle of drippy almond butter before it sets.
- Matcha Magic: Whisk a teaspoon of matcha powder into your melted white chocolate for a stunning green hue. Top with pistachios and dried apricots for an elegant, earthy treat.
Jackson’s Chef’s Notes
This recipe has been my trusty sidekick for years, and it’s evolved in the funniest ways. One year, I was making it for a pop-up dinner and ran out of pistachios. In a panic, I used crushed potato chips and it was a revelation—don’t knock it ’til you try it! The best kitchen moments often come from happy accidents.
I’ve also learned that the “imperfect” pieces—the ones that break in a weird way or have a funny shape—are always the first to disappear. It’s a good reminder for life and for cooking: sometimes, the quirks are what make things special. Don’t stress if your heart isn’t symmetrical or your marbling isn’t “Pinterest-perfect.” I promise, it will taste just as incredible.
Your Questions, Answered!
Q: My white chocolate got chunky and grainy when I melted it. What happened?
A: Ah, you’ve encountered “seized” chocolate! This usually means a tiny bit of moisture got into the mix (from a wet spoon or bowl) or it was overheated. To fix it, try stirring in a teaspoon of a neutral oil (like coconut or vegetable oil) until it smooths out. If it’s beyond saving, no worries—start over, and this time, ensure everything is completely dry and use those gentle 30-second bursts in the microwave.
Q: Can I use chocolate chips instead of baking bars?
A: You absolutely can! Chocolate chips are designed to hold their shape, so they sometimes contain stabilizers that make them a bit harder to melt super smoothly. They’ll still work wonderfully for a delicious bark, just be extra patient when melting and stirring.
Q: How far in advance can I make this?
A: This bark is a great make-ahead treat! Stored in an airtight container in a cool, dry place (or the fridge if your kitchen is warm), it will stay fresh and snappy for up to 2 weeks.
Q: My toppings are falling off! How do I make them stick?
A: The key is to add your toppings immediately after spreading the chocolate, while it’s still wet and sticky. If you find they’re still not adhering, you can give the finished, set bark a very light spritz with a fine mist of cooking spray (sounds weird, I know) and then re-sprinkle a few toppings—they’ll stick to the light oil film.
Nutritional Info (For the Curious!)
Okay, let’s keep it real—this is a treat, and it’s meant to be enjoyed as such! But here’s a general breakdown per serving (assuming you get 10 servings out of this batch): You’re looking at about 180 calories. The primary ingredients—chocolate and nuts—do bring some good things to the table. Dark chocolate (if you use it) contains antioxidants, and nuts provide healthy fats, protein, and fiber. The dried fruit adds a touch of natural sweetness and fiber.
This recipe is naturally vegetarian and, as long as you use certified gluten-free chocolate and toppings, it’s happily gluten-free. The beauty of making it yourself is that you control the ingredients, so you can tailor it to your dietary needs and preferences.
Final Thoughts
And there you have it! My go-to recipe for a dessert that’s equal parts stunning, simple, and soul-satisfyingly delicious. This Heart-Shaped Chocolate Bark is more than just a recipe; it’s a reminder that cooking doesn’t have to be complicated to be special. It’s about the joy of creating, the fun of getting a little messy, and the pure happiness of sharing something made with your own hands.
So, what are you waiting for? Grab that chocolate, raid your pantry, and let your creativity run wild. I can’t wait to see what you create! Tag me on social @FoodMeld with your beautiful bark creations. Now, let’s go cook something awesome together.
With love and a full heart (and a full stomach),
Jackson


