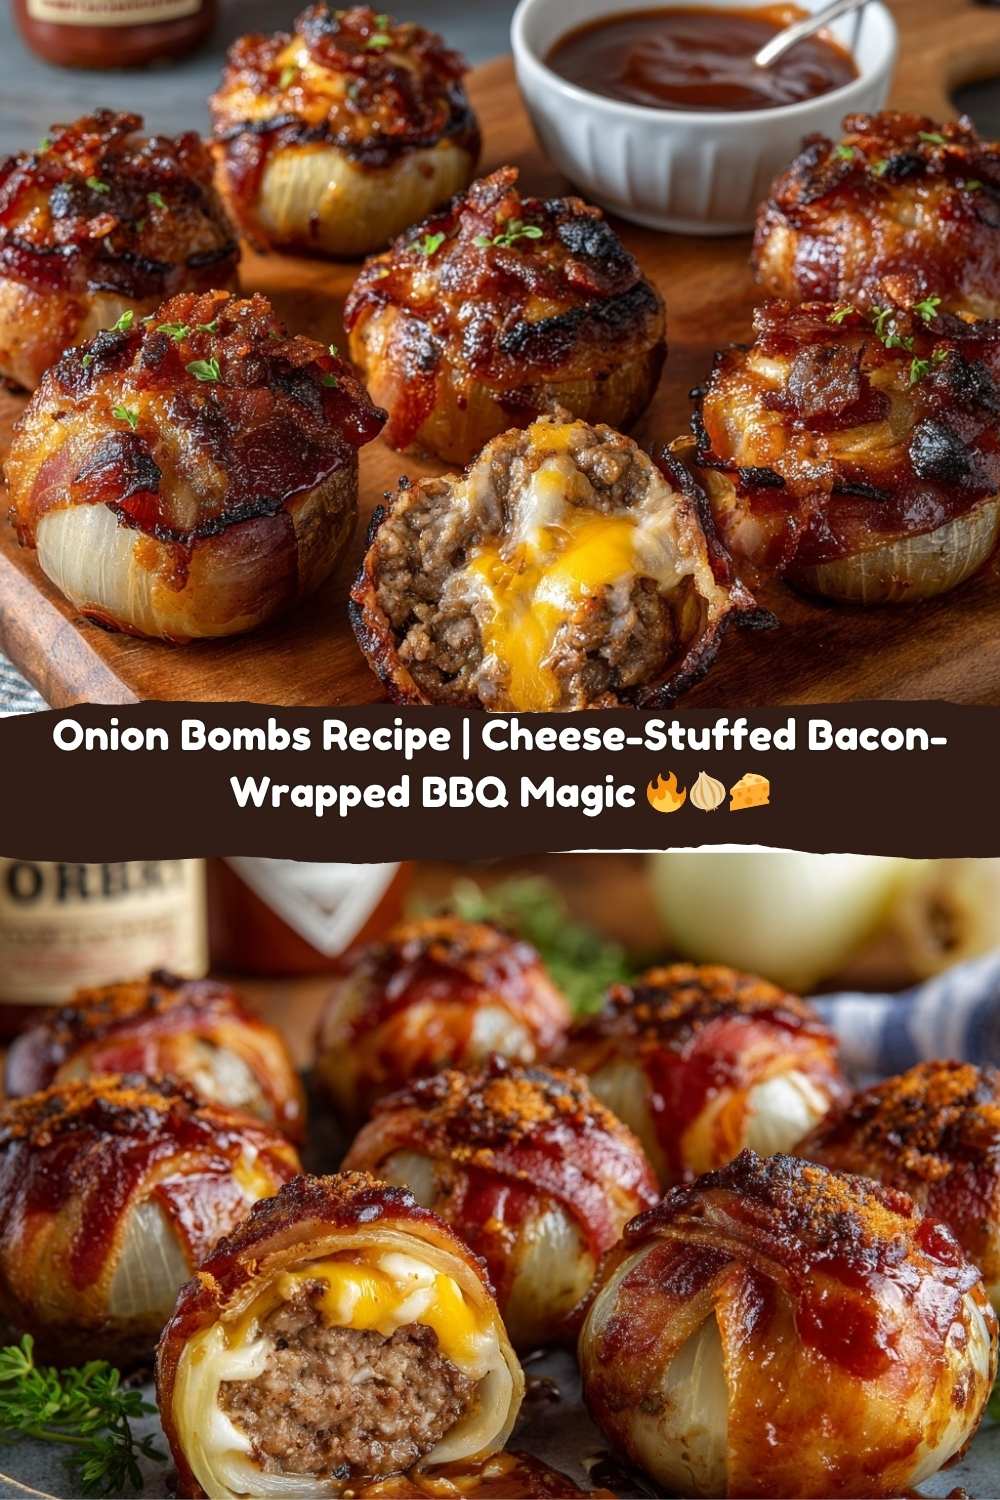
Onion Bombs Recipe: Your New Favorite Explosion of Flavor
Hey friends, Jackson from Food Meld here. Let’s get straight to it: are you tired of the same old burgers and dogs at your backyard BBQ? Do you want to make something that will literally stop the party—in the best way possible, where everyone just stops talking to stare at the glorious thing you’re carrying from the grill?
I’m talking about a showstopper. A conversation piece. A flavor bomb that lives up to its name in every single way.
Friends, meet your new culinary secret weapon: the Onion Bomb.
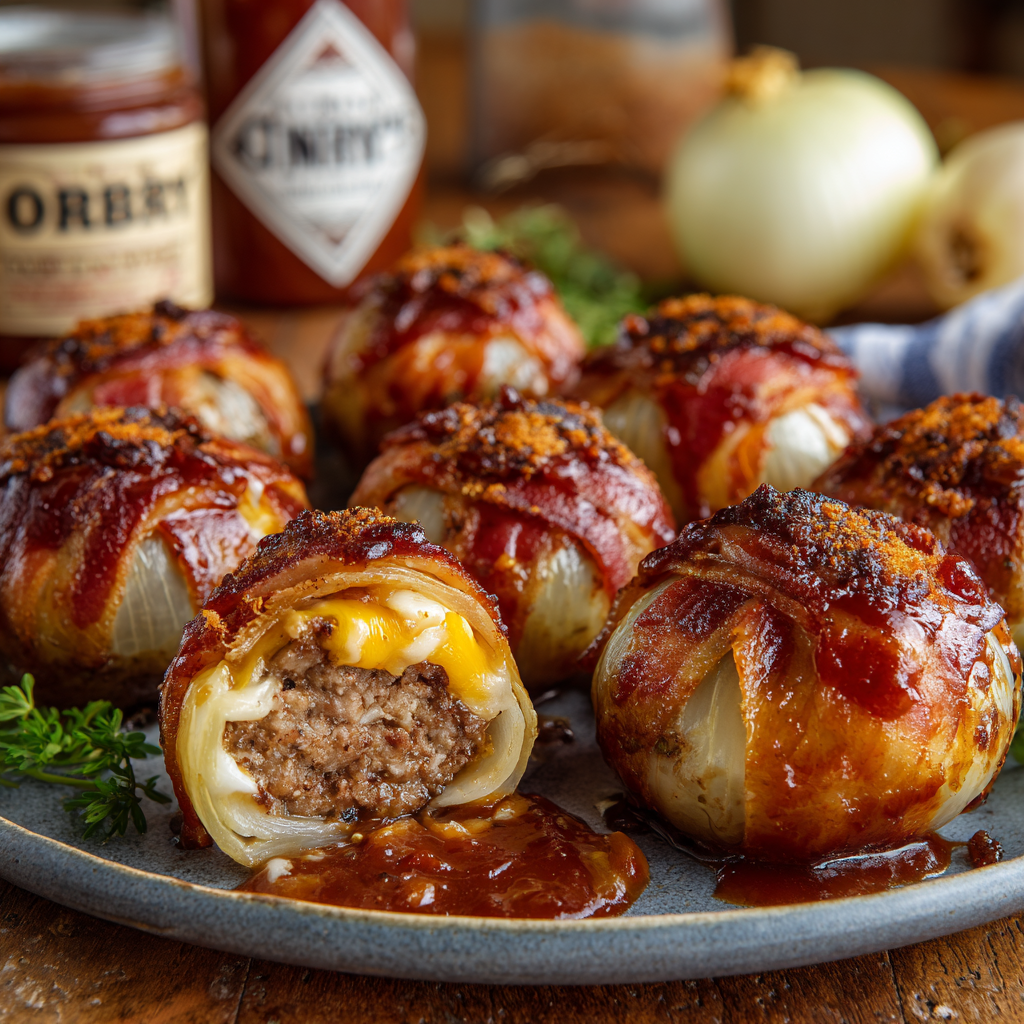
Imagine this: a juicy, perfectly seasoned meatball, hiding a molten core of sharp cheddar cheese. You wrap that precious cargo in the sweet, caramelized layers of a whole onion. Then, because we believe in going big, you swaddle the whole thing in a crispy, savory bacon blanket. A final glaze of your favorite BBQ sauce caramelizes into a sticky, sweet, and smoky crust. You slice into it, and the cheese comes oozing out like a delicious, cheesy lava flow.
This isn’t just a recipe; it’s an experience. It’s the kind of food that creates memories. It’s bold, it’s comforting, and it has that “what if we tried this?” energy written all over it. And the best part? It’s way easier to make than it looks. I’m here to walk you through every single step, share all my chef hacks, and turn you into the Onion Bomb hero of your next gathering. Let’s stop imagining and start cooking.
The Backyard BBQ That Started It All
I’ll never forget the first time I saw an onion bomb. It was at my Uncle Leo’s annual 4th of July blowout. The air was thick with the smell of charcoal and citronella, and Uncle Leo, a man of few words but many grilling tools, was holding court by the smoker. He pulled off this lumpy, dark, unassuming packet. He sliced it open right there on the cutting board, and I watched, mesmerized, as a river of golden cheese poured out from within the onion and bacon shell.
The crowd around him let out a collective “Ooooh.” It was like a culinary magic trick. I snagged a piece (okay, fine, I snagged three) and my taste buds just short-circuited. The sweetness of the onion, the saltiness of the bacon, the savory beef, and that gooey cheese center… it was a perfect bite. It was messy, it was fun, and it was absolutely unforgettable. I knew right then I had to make it my own. I went home, started testing, tweaking the seasonings, and perfecting the wrapping technique. This recipe is my love letter to that magical moment in Uncle Leo’s backyard—a moment I now get to recreate in my own kitchen, and now, in yours.
Gathering Your Onion Bomb Arsenal
Here’s everything you need to build eight glorious flavor explosions. Don’t stress if you’re missing an item or two—I’ve included my favorite swaps and chef insights so you can make it yours.
- 4 large yellow onions: You want them big and round, with tight, unblemished skin. The larger outer layers are your “bomb shells.” Chef’s Insight: Don’t toss the smaller inner bits! Finely chop them and add a handful to your meat mixture for an extra punch of sweet onion flavor.
- 2 lbs ground beef (80/20 blend): A little fat is your friend here. It keeps the meatballs incredibly juicy and prevents them from drying out during the longer cook time. Substitution Tip: Feel free to use a blend of half beef, half pork sausage for even more flavor complexity.
- ½ cup bread crumbs: These act as our binder, holding everything together. Substitution Tip: Panko breadcrumbs will give a slightly lighter texture, while crushed saltine crackers or even rolled oats work in a pinch.
- 1 large egg & ¼ cup milk: Our wet binder duo. The egg helps bind, and the milk soaked into the breadcrumbs adds moisture and tenderness to the meatball.
- ⅓ cup + 3 tbsp of your favorite BBQ sauce, divided: We mix some into the meat for flavor and use the rest as a glaze. Chef’s Insight: Choose a sauce you love to drink from the bottle! A smoky, sweet, and slightly spicy sauce works wonders here.
- 1 tsp each of garlic powder & onion powder: This is our flavor foundation. They distribute evenly and give that classic, comforting taste we’re after.
- 1 tsp salt & ¼ tsp black pepper: Seasoning 101! Don’t be shy. This is a lot of meat, and it needs proper seasoning to shine.
- 8 one-inch cubes of sharp cheddar cheese: The molten gold! I prefer a block of cheddar that I cut myself, as pre-shredded cheese contains anti-caking agents that can affect meltiness.
- 16 slices of bacon (2 per bomb): Standard-cut bacon is perfect. Don’t use thick-cut, as it might not crisp up fully by the time the meat is cooked. Chef’s Insight: Slightly stretch each slice as you wrap it. This helps it stay put and creates a tighter, crispier seal.
Building Your Flavor Bombs: A Step-by-Step Guide
Okay, team, put on your aprons and let’s get our hands dirty. This is the fun, messy part. Follow these steps, and you’ll be a bomb-building pro in no time.
- Prep Your Onion “Shells”: Peel your onions and slice them in half from root to tip. Now, gently separate the layers. You’re looking for the 2-3 largest, sturdiest outer layers from each half to act as your shell. Chef’s Hack: If the layers are stubborn and keep breaking, pop the halved onions in the microwave for 30 seconds. This softens them up just enough to make separating a breeze. Save the smaller inner pieces for another use (like those meatballs I mentioned!).
- Create the Ultimate Meatball Mix: In a large bowl, add your ground beef, bread crumbs, egg, milk, that ⅓ cup of BBQ sauce, garlic powder, onion powder, salt, and pepper. Now, roll up your sleeves and get in there with your hands! Mix it until everything is just combined. Pro Tip: Over-mixing will make your meatballs tough. Think gentle squishing, not aggressive kneading. You want a uniform mixture, but that’s it.
- The Secret Cheese Pocket: Divide your meat mixture into 8 equal portions. Take one portion and flatten it slightly in your palm. Press a cube of cheddar right into the center, then carefully fold the meat up and around it, sealing it completely. Roll it gently into a smooth ball. Make sure there are no cheese peepholes! Double-check that seal—this is what prevents a cheese meltdown (the messy kind, not the emotional kind).
- The Grand Wrap: This is where the bomb takes shape. Take two of your reserved large onion layers and place your cheese-stuffed meatball in the center. Encase the meatball with the onion, like you’re putting it in a little onion cradle. It doesn’t have to be perfect! Now, take two slices of bacon and wrap them around the onion-wrapped ball in a cross pattern. The bacon will act as your edible string, holding the whole beautiful mess together. If it feels loose, you can secure it with a toothpick, but the bacon usually sticks to itself pretty well.
- Glaze ‘Em Up: Place your assembled onion bombs on a baking sheet (if baking) or a tray (if grilling). Grab your remaining 3 tablespoons of BBQ sauce and give each bomb a generous brush. This initial glaze will caramelize and create a gorgeous, flavorful crust.
- The Main Event: Cooking!
- Oven Method (The Reliable Classic): Preheat your oven to 375°F (190°C). Bake for 40-45 minutes, or until the bacon is crispy and the internal temperature of the meatball (check with a meat thermometer!) reaches 160°F (71°C). For extra crispiness, you can broil for the last 2-3 minutes—just watch them like a hawk!
- Grill/Smoker Method (The Flavor King): Get your grill or smoker to a steady 350°F (175°C). Set it up for indirect heat (meaning the bombs aren’t directly over the flames). Place the bombs on the cool side of the grill, close the lid, and let them cook for 45-60 minutes. You’ll get an incredible smoky flavor that takes these to a whole new level.
How to Serve These Glorious Bombs
Presentation is key with a dish this epic. You don’t just slop these on a plate! I like to serve them on a big wooden board or a large platter. Place them right in the center, maybe with a little bowl of extra BBQ sauce for dipping in the middle and a sprinkle of fresh chopped chives or parsley for a pop of color.
Now, the most important part: let them rest for about 5 minutes after they come off the heat. I know, it’s torture, but it allows the juices to redistribute and prevents that cheese from erupting like Vesuvius the second you cut in (although, that’s a pretty cool effect too).
What to serve alongside? Keep it simple and let the bombs be the star. A classic creamy coleslaw, a straightforward potato salad, or some buttery corn on the cob are perfect partners. They’re also incredible sliced up and served on a bun as the most over-the-top sloppy joe you’ve ever had.
Mix It Up! Onion Bomb Variations
Once you’ve mastered the classic, the “what if we tried this?” fun begins. Here are a few of my favorite twists:
- Jalapeño Popper Style: Swap the cheddar cube for a mix of cream cheese and diced jalapeños. You get that creamy, spicy kick that’s absolutely irresistible.
- Italian Stallion: Use ground Italian sausage instead of beef, swap the BBQ sauce for marinara, and use a cube of mozzarella inside. Wrap it all up and serve with extra marinara for dipping.
- Swiss & Mushroom: Sauté some finely chopped mushrooms and mix them into the ground beef. Use a cube of Swiss cheese for the center and wrap the bacon as usual. The earthy, savory flavors are next-level.
- Buffalo Chicken Bomb: Use ground chicken or turkey, and mix in a ¼ cup of Buffalo sauce instead of BBQ sauce. Stuff with a blue cheese crumble and cheddar cube. Perfect for game day!
- Low-Carb/Keto Friendly: Easy! Just swap the breadcrumbs for ½ cup of finely grated parmesan cheese and use a sugar-free BBQ sauce. You’re golden.
Jackson’s Kitchen Notes & Stories
This recipe has seen some things, my friends. I’ve made it dozens of times, and every time I learn something new. The first time I ever made them, I was so excited I forgot to glaze them with BBQ sauce until the last 10 minutes. They were still delicious, but that sticky, caramelized glaze is a game-changer—don’t skip the initial brush!
Another time, I tried to get fancy and use super thick-cut bacon. Big mistake. The bacon was still flabby when the meat was done, and I had to finish them under the broiler, which almost melted the cheese into a puddle. Stick with regular-cut bacon; it’s the perfect balance of crispiness and cook time.
The beauty of this recipe is its imperfection. If a little cheese leaks out, who cares? It becomes a delicious, crispy cheese chip on the bottom. If an onion layer breaks, the bacon will patch it up. It’s a forgiving, fun, and always delicious project. Embrace the mess!
Onion Bomb FAQs: Your Questions, Answered
Q: Can I make onion bombs ahead of time?
A: You absolutely can! Assemble them completely (through the glazing step), place them on a baking sheet, and cover tightly with plastic wrap. You can refrigerate them for up to 24 hours before cooking. Let them sit at room temperature for 20-30 minutes before they go in the oven or on the grill.
Q: My cheese exploded out everywhere! What did I do wrong?
A> Ah, the classic cheese breach! This usually happens for one of two reasons: 1) The meat seal around the cheese wasn’t completely tight, leaving a weak spot for the molten cheese to escape. Or 2) The internal temperature got too high, too fast, causing a violent cheese eruption. Make sure you have a good seal and cook them over steady, indirect heat. A little leakage is normal, but a full-blown explosion means check your seal next time!
Q: Is there a way to make these less messy to eat?
A> I’ll be honest, the mess is part of the charm! But if you’re serving them at a slightly more formal gathering, you can absolutely make a “deconstructed” version. Simply make the cheese-stuffed meatballs, wrap them in bacon, and bake them on a bed of thinly sliced onions. You’ll get all the same flavors in a slightly more manageable package.
Q: My bacon isn’t getting crispy. Help!
A> This is a common issue, especially in the oven. The solution is simple: if your bombs are done but the bacon is still pale and flabby, just switch your oven to broil for 2-4 minutes. Keep a very close eye on them! They can go from perfect to burnt in seconds. The grill’s dry heat usually does a better job of crisping the bacon naturally.
Nutritional Info (Because We’re Adults, Sometimes)
Okay, let’s be real. You’re not making bacon-wrapped, cheese-stuffed meatballs because you’re on a diet. This is a celebratory food, a treat, a “let’s live a little” kind of meal. That said, it’s always good to know what you’re eating! This is a rough estimate per one Onion Bomb, calculated for the classic recipe.
Calories: ~480 kcal
Protein: 28g
Fat: 34g
Carbohydrates: 9g
Sugar: 5g
Remember, these numbers can vary based on the leanness of your beef, the brand of bacon and BBQ sauce you use, and the specific type of cheese. If you’re watching your intake, the variations section has some great lower-carb options!
Let’s Cook Something Awesome Together
And there you have it — the glorious, messy, melt-in-your-mouth Onion Bomb. A recipe that looks like pure backyard wizardry but is secretly as easy as it gets. Every time I make these, I’m reminded why I love cooking so much — it’s that spark of creativity, that moment of chaos when cheese leaks and bacon curls, and the way everyone suddenly crowds around the cutting board when you slice into one.
This is the kind of food that turns a regular cookout into a story people still talk about weeks later. It’s unapologetically bold, beautifully imperfect, and packed with the kind of flavor that makes you pause mid-bite just to nod in appreciation. Whether you grill, bake, or smoke them, these Onion Bombs will always deliver that “holy wow” moment we chase here at Food Meld.
So go on — fire up the grill, grab your tongs, and make a little delicious mayhem. And when that molten cheddar starts to ooze out in all its glory, take a photo before everyone dives in.
Until next time, keep experimenting, keep tasting, and keep saying, “what if we tried this?”
— Jackson


