Your New Favorite Kitchen Escape: No-Bake Peanut Butter Oat Bars
Hey friends, Jackson here from Food Meld. Let’s get real for a second. How many times have you found yourself staring into the pantry abyss, searching for that perfect snack? You know the one—it’s gotta be satisfying, a little sweet, but not the kind of sweet that sends you on a sugar rollercoaster ten minutes later. It needs to be easy to grab, wholesome enough to feel good about, and delicious enough to actually make you excited for that 3 PM snack attack.
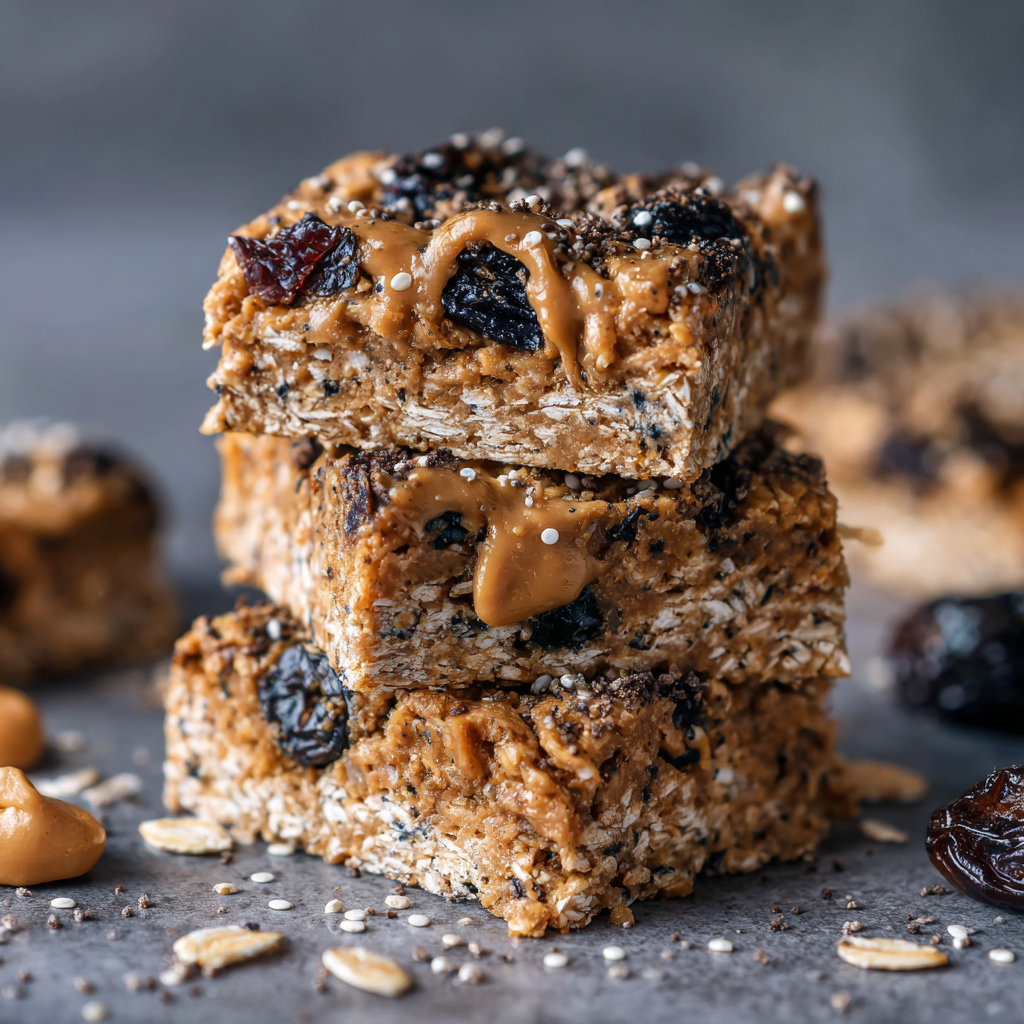
If you’re nodding your head, you and I are on the same wavelength. And I’ve got the absolute perfect solution for you. Forget those store-bought bars with a novel’s worth of ingredients you can’t pronounce. We’re making magic today with our Chewy Peanut Butter Oat Bars.
This is the kind of recipe that reminds you why hanging out in the kitchen is supposed to be fun. There’s no baking, no fancy equipment (just a trusty food processor), and no stress. We’re talking about a handful of simple, real ingredients coming together to create something truly unforgettable. The star of the show? Prunes and dates. Now, before you scroll past, hear me out! They create the most incredible, fudgy, naturally sweet base that holds everything together. Paired with creamy peanut butter and hearty old-fashioned oats, you get a bar that’s nutty, chewy, and packed with real-food energy.
So, whether you’re fueling up for a busy day, need a post-workout bite, or just want a dessert that doesn’t derail your vibe, these bars are your new best friend. Let’s dive in and cook something awesome together.

The Happy Accident That Started It All
This recipe actually came from a beautiful kitchen mishap. A few years back, I was determined to make a “healthy” fig newton situation for a camping trip. I had my dried fruit, my oats, my grand plans… and a food processor that decided it had other ideas. Let’s just say my dough was more “soup” than “sliceable bar.” In a moment of pure “what if we tried this?” energy, I started throwing in more oats and a giant scoop of peanut butter from the jar, thinking, “Well, at least it’ll taste good, even if it’s a mess.”
I pressed the sticky, hopeful glop into a pan, crossed my fingers, and tossed it in the fridge. The next morning, I sliced into it, fully expecting crumbs. Instead, I was greeted with the most perfectly chewy, dense, and satisfying bar I’d ever made. My friends devoured them on the trail, and the number one question was, “What’s in these? They’re incredible!” That happy accident became a staple in my kitchen, and after dozens of tweaks and tests, it’s evolved into the foolproof recipe I’m sharing with you today. It’s a reminder that sometimes the best flavors come from just going with the flow.
Gathering Your Flavor Arsenal
This is where the magic begins. The beauty of these bars is in their simplicity. Here’s your shopping list for a double batch—trust me, you’ll want extras!
- 4 cups (24 oz) Prunes, or a mix of prunes and dates: This is our natural sweetener and the glue that holds it all together! Prunes give a deep, rich sweetness and an amazing fudgy texture. Dates are a little lighter and caramel-like. Using a mix is my personal favorite. Chef’s Insight: If your dried fruit is a little old and hard, let it soak in the warm water for 10-15 minutes before blending to make your food processor’s job much easier.
- 1/2 cup Warm Water: This is our magic potion for turning tough dried fruit into a smooth, blendable paste. Start with 1/2 cup and add a tablespoon more at a time if your mixture is still too thick and chunky.
- 1 cup (256 g) Peanut Butter: We need the good, creamy stuff here. I recommend a natural, no-stir peanut butter for the best texture and flavor. The oils help create that perfect, sliceable bar. Substitution Tip: Any nut or seed butter works wonderfully! Almond butter, cashew butter, or even sunflower seed butter for a nut-free version are all fantastic swaps.
- 4 cups (320 g) Old-Fashioned Oats: The hearty backbone of our bar! Old-fashioned (rolled) oats give us the perfect chewy texture. Chef’s Insight: Avoid using quick oats if you can—they absorb moisture differently and can make the bars a bit gummy. The heartier texture of old-fashioned oats is key!
- Pinch of Salt: Never, ever skip this! A pinch of salt is the ultimate flavor enhancer. It makes the peanut butter pop and balances the sweetness of the fruit perfectly.
Let’s Build These Bars: Your Foolproof Roadmap
Ready to get your hands a little dirty? This is the fun part. Follow these steps, and you’ll have perfect bars every single time.
- Create Your Fruit Paste. Toss your prunes and/or dates into the bowl of your food processor. Pour in that 1/2 cup of warm water. Now, lock the lid and let it rip! Start by pulsing a few times to break things up, then let it run for a minute or two. You’re looking for a thick, smooth, almost black paste. Chef’s Hack: Stop and scrape down the sides a couple of times to make sure everything gets incorporated evenly. If the blades are spinning but not moving the fruit, it’s too dry—add another tablespoon of water.
- Bring in the Creamy Goodness. Once your fruit is a beautiful, sticky paste, add the entire cup of peanut butter and that all-important pinch of salt. Pulse several times, and then let the processor run again until the mixture is completely uniform. It will be smooth, incredibly fragrant, and you’ll probably want to eat it with a spoon right now. (I won’t tell.)
- Get Mixing (The Arm Workout!). Here’s where we change tools. Scrape the peanut butter-fruit mixture into a large mixing bowl. Now, dump in all 4 cups of old-fashioned oats. This is where you have a choice: you can go in with a sturdy spatula, or you can do what I do and use your clean hands. Chef’s Commentary: I’m a hands-on guy. Getting in there with your hands is the best way to feel when the oats are perfectly and evenly distributed. No dry spots! It’s a serious arm workout, but it’s so worth it.
- The Press is Everything. Line a 9×13-inch baking pan with parchment paper, leaving some overhang on the sides. This is your non-stick lifeline for getting the bars out later! Transfer your mixture into the pan and start pressing. I mean it—PRESS. Use the flat bottom of a measuring cup or a glass, and really compact that mixture down as firmly as you can. Pro Tip: This is the secret to bars that don’t crumble. The more you press, the better they hold together. Get it as even and tight as possible.
- The Patience Game. Pop the pan into the fridge, uncovered, and let it chill for at least one hour, but overnight is even better. This step is non-negotiable. It allows the oats to soften slightly and the bars to set up into that perfect, firm, sliceable texture we’re after.
- Slice and Conquer! Once the mixture is rock-solid, use the parchment paper “handles” to lift the entire slab out of the pan onto a cutting board. Use a sharp knife to slice it into bars or squares. I like to make 24 smaller bars, but you do you! Wrap them individually for grab-and-go ease, or store them all in a single airtight container.
How to Serve & Savor Your Masterpiece
Okay, you’ve waited patiently, and now it’s time for the reward! These bars are incredibly versatile. Here’s how I love to enjoy them:
The Classic Grab-and-Go: This is their primary purpose! Wrap one up and toss it in your bag for a mid-morning snack, a pre-gym energy boost, or a lifesaver during the afternoon slump. They travel like a dream.
Dessert Mode, Activated: Want to fancy it up? Place a bar on a plate, let it sit for just a minute to take the deep chill off, and then drizzle it with a little melted dark chocolate or a tiny dusting of flaky sea salt. It transforms your simple snack into a restaurant-worthy healthy dessert.
Breakfast of Champions: Pair a bar with a piece of fruit and a cup of coffee or tea for a balanced, no-fuss breakfast that actually keeps you full until lunch. It’s a million times better than a sugary cereal.
The Perfect Pairing: I love having one of these with a cold glass of almond milk or a warm cup of chai tea. The flavors complement each other perfectly.
Make It Yours: Creative Flavor Twists
This recipe is a blank canvas for your culinary creativity. Once you’ve mastered the base, try one of these fun variations to keep things exciting!
- The Chocolate Lover: This is a crowd-pleaser. After you press the mixture into the pan, melt 1/2 cup of dark chocolate chips with a teaspoon of coconut oil. Drizzle it artistically over the top before chilling. You can also fold 1/4 cup of mini chocolate chips right into the mixture with the oats.
- The Spiced Wonder: Add 1 teaspoon of ground cinnamon and 1/2 teaspoon of vanilla extract to the food processor when you add the peanut butter. It gives the bars a warm, almost snickerdoodle-like flavor that’s just incredible.
- The Super-Seed Boost: For an extra fiber and omega-3 punch, mix in 1/4 cup of chia seeds, flax seeds, or hemp hearts along with the oats. You won’t really taste them, but you’ll get all the nutritional benefits.
- The Tropical Escape: Swap out 1/2 cup of the oats for unsweetened shredded coconut. Fold in 1/4 cup of chopped dried mango or pineapple for a bright, sunny flavor that feels like a vacation.
- The Trail Mix Bar: Right before pressing, fold in 1/4 cup each of crushed roasted nuts (like almonds or pecans) and dried cranberries or raisins. It adds a fantastic crunch and bursts of different flavors.
Jackson’s Kitchen Notes & Stories
This recipe has been on quite a journey with me. I’ve made it for probably every potluck, road trip, and new-parent meal train I’ve been part of in the last five years. It’s my go-to, and it’s evolved based on feedback from all sorts of folks.
One of my favorite stories is from my friend Sarah, who is notoriously skeptical of “healthy” desserts. She took one bite, squinted at me, and said, “There’s no way this is good for you. It tastes like a candy bar.” That, my friends, is the highest compliment you can get in the Food Meld kitchen.
The biggest lesson I’ve learned? Don’t be shy with the pressing in step 4. I once rushed it and ended up with delicious, but very crumbly, “bar crumble” that I had to eat with a spoon. It was still delicious, but not the neat and tidy bar we’re aiming for. So take your time and press with purpose!
Your Questions, Answered!
I’ve gotten a lot of questions about this recipe over the years. Here are the most common ones to help you out.
Q: My bars are too crumbly! What did I do wrong?
A: This almost always comes down to two things: not enough moisture or not enough pressing. First, make sure you blended the fruit into a truly smooth, sticky paste. If your fruit was very dry, you might need an extra tablespoon or two of water. Second, did you PRESS that mixture into the pan? Really get in there and compact it. Finally, make sure you chill it for the full hour—this sets everything.
Q: Can I use a blender instead of a food processor?
A: You can try, but it’s trickier. A high-powered blender like a Vitamix will work, but you’ll likely need to stop and scrape down the sides more often and may need a bit more water to get the blades moving. A food processor is really the ideal tool for this job.
Q: How long do these bars last, and how should I store them?
A: Store them in an airtight container in the refrigerator for up to one week. They also freeze beautifully! Just wrap them individually in plastic wrap and pop them in a freezer bag for up to 3 months. Let one thaw in your lunchbox for a few hours, and it’ll be perfect by snack time.
Q: My mixture was super sticky and hard to work with. Is that normal?
A: Absolutely! This is a sticky situation, and that’s a good sign—it means there’s enough moisture to hold the bars together. Using slightly wet hands or a spatula sprayed with a little cooking spray can help manage the stickiness when you’re pressing it into the pan.
Fuel Your Body, Love Your Bite
I’m not a nutritionist, but I am a guy who believes in feeling good about what you eat. Here’s a general breakdown of what’s in these powerhouse bars (approximate, based on 24 bars). Remember, this is real food fuel!
Each bar gives you a solid dose of sustained energy. The complex carbs from the oats and fruit provide long-lasting fuel, while the healthy fats and protein from the peanut butter keep you feeling full and satisfied. A standout feature is the 4 grams of fiber per bar, thanks to our heroes: prunes, dates, and oats. This helps with digestion and keeps those hunger pangs at bay. The 13g of sugar is all natural, coming directly from the fruit, so you’re avoiding the refined sugars found in most commercial snack bars.
Approximate Nutritional Info Per Bar:
Calories: 180 | Fat: 7g | Carbohydrates: 26g | Sugar: 13g (natural) | Fiber: 4g | Protein: 4g | Sodium: 35mg
You’ve Got This!
And there you have it! Your complete guide to making the most delicious, wholesome, and satisfying no-bake peanut butter oat bars. This recipe is a testament to what I love most about cooking: it doesn’t have to be complicated to be incredible. It’s about taking a few simple, good ingredients and turning them into something that truly makes your day better.


