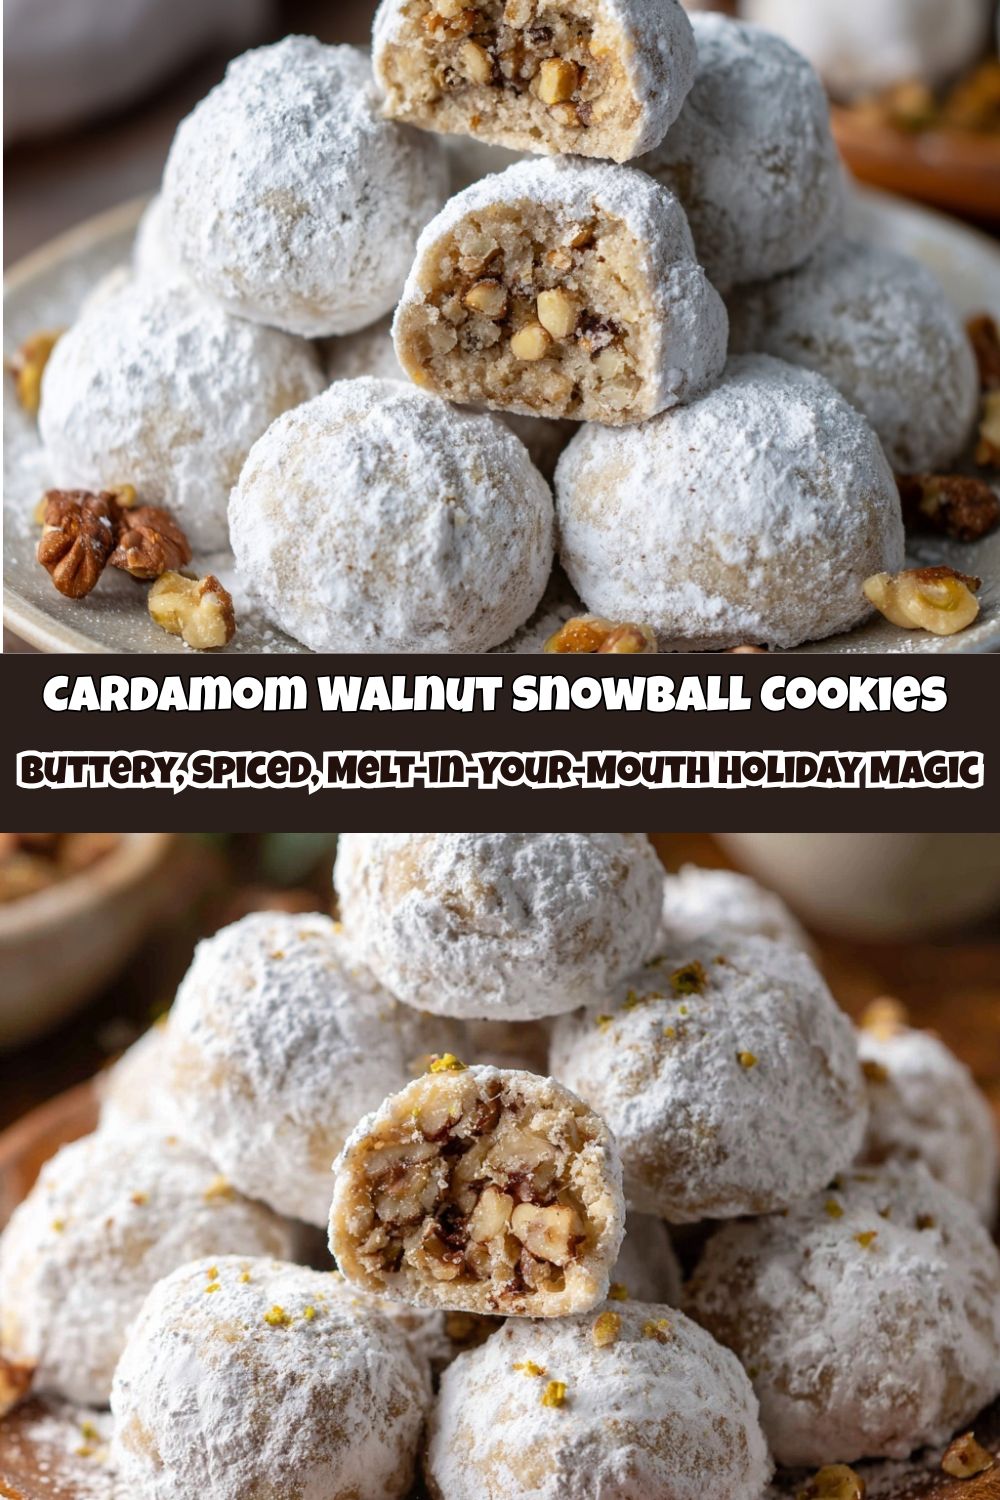
Let’s Bake a Little Bit of Magic: Cardamom Walnut Snowballs
Hey friends, Jackson here from Food Meld. Can we talk about cookie magic for a second? I’m not talking about the complicated, three-day, tempering-chocolate kind of magic (though I love that, too). I’m talking about the kind of magic that happens with a handful of simple ingredients, a single bowl, and about 20 minutes of your time. The kind that fills your kitchen with the warm, buttery, slightly exotic scent of toasting walnuts and cardamom and results in a cookie so tender it practically dissolves on your tongue.
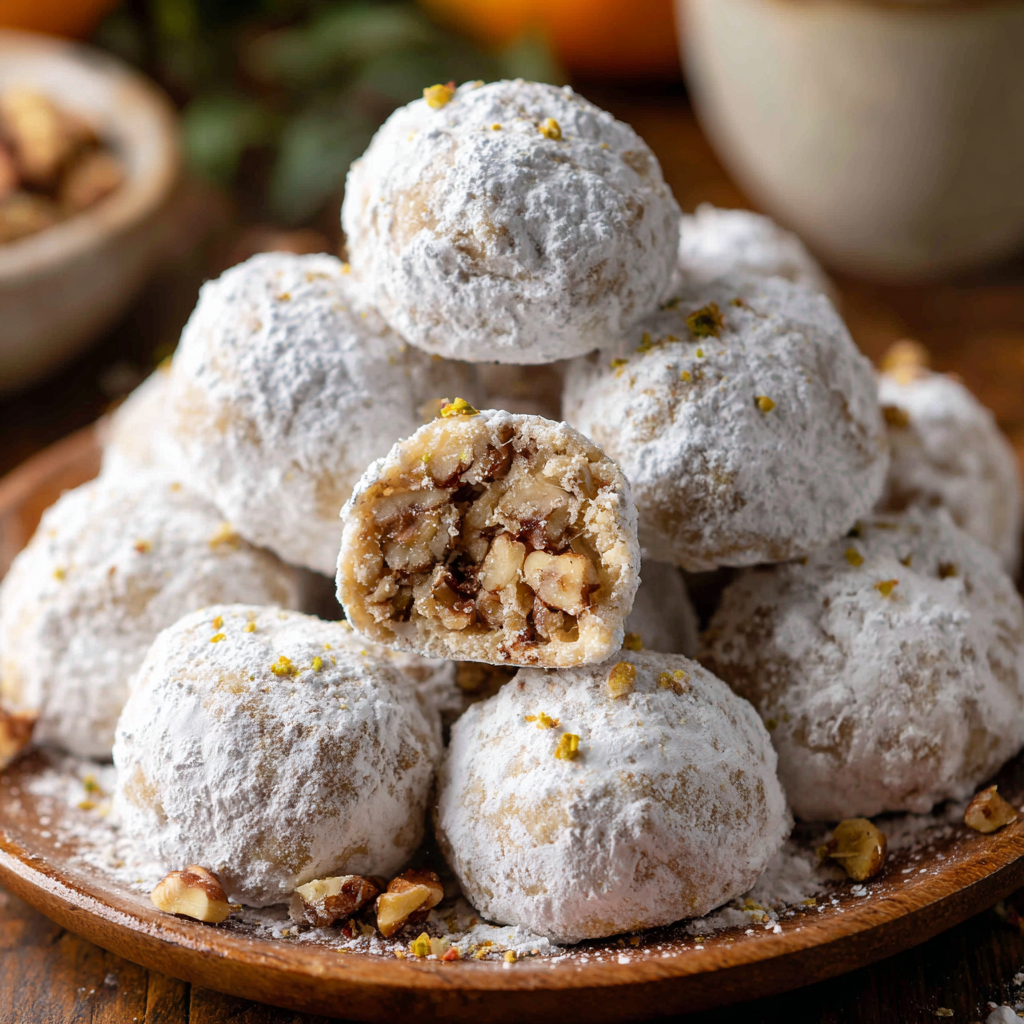
That’s the magic of these Cardamom Walnut Snowball Cookies. You might know them as Russian Tea Cakes or Mexican Wedding Cookies, but I’ve given them my own “Food Meld” twist. We’re taking that classic, melt-in-your-mouth base and waking it up with the aromatic, citrusy warmth of cardamom and the deep, toasty crunch of walnuts. And then, of course, we’re rolling them not once, but twice in a blizzard of powdered sugar because, well, more is more when it comes to this snowy, dreamy coating.
This recipe is my go-to for so many reasons. It’s my secret weapon for holiday cookie boxes, my “I-need-a-last-minute-dessert” savior, and my favorite thing to bake with a cup of tea on a lazy Sunday afternoon. It’s beginner-proof, deeply satisfying, and always, always gets those “Wow, what is that flavor?” comments. So, preheat your oven, grab your favorite mixing bowl, and let’s cook something awesome together. These little snowballs are about to become your new favorite kitchen hack for creating unforgettable moments, no matter the season.
A Pinch of Nostalgia and a Dash of “What If?”
This recipe always takes me right back to my grandma’s kitchen, which was permanently hazy with flour and smelled like vanilla and forgiveness. She made a version of these every Christmas, and my job was always the final powdered sugar roll. I’d emerge from the task looking like a miniature abominable snowman, covered in white dust and beaming with pride.
But you know me—I can’t leave well enough alone! A few years ago, I was baking a batch and found myself staring at my spice rack. That little jar of cardamom was whispering to me. It’s a flavor I fell in love with through global inspirations, from Swedish pastries to chai tea. I thought, “What if we tried this?” I added a generous teaspoon to the dough, and friends, it was a revelation. The cardamom doesn’t overpower; it just adds this incredible, fragrant warmth that makes the walnuts sing and turns a simple, nostalgic cookie into something truly extraordinary. It’s my little twist on a classic, a perfect “Food Meld” of Southern tradition (my grandma would approve, I think!) and a global flavor adventure.
Gathering Your Flavor Arsenal
Here’s the beautiful part: you probably have most of this in your pantry right now. This is a double batch because, trust me, one batch disappears way too fast. Let’s break down what we’re using and why.
- 2 cups all-purpose flour: The trusty foundation of our cookie. It gives structure without making them tough. No fancy flour needed here!
- 2 cups finely chopped walnuts, divided: Wait, divided? Yep! We’re using most of them (1 ½ cups) ground right into the dough for that consistent, nutty flavor in every bite. We’ll save the last ½ cup to fold in for little pops of texture. It’s a chef’s hack for a more interesting mouthfeel.
- 2 teaspoons ground cardamom: This is our star player! That floral, citrusy, slightly peppery warmth is what sets these snowballs apart. If your cardamom has been in the cupboard for a while, give it a sniff. If it doesn’t smell powerfully aromatic, it’s time for a fresh jar. It makes all the difference.
- ¾ teaspoon salt: Don’t you dare skip this! Salt is the ultimate flavor enhancer. It balances the sweetness and makes the butter and cardamom flavors pop. It’s the secret to a cookie that tastes complex, not just sweet.
- 1 cup (2 sticks) unsalted butter, softened: The heart and soul of the melt-in-your-mouth texture. Using unsalted lets you control the salt level. And “softened” is key! Leave it on the counter for an hour before you start. It should be cool to the touch but yield easily when you press it.
- ½ cup granulated sugar: We don’t need a lot of sugar in the dough itself because we’re coating them heavily in powdered sugar later. This amount provides just the right amount of sweetness and helps with the texture.
- 1 ½ teaspoons vanilla extract: The classic flavor backbone that makes everything taste like home. Use the real stuff if you can!
- 1 ½ cups powdered sugar (for coating): This is for our double-dip snow effect. It seems like a lot, but you’ll use it all. Don’t be shy!
Let’s Get Rolling: Your Step-by-Step Guide to Snowball Perfection
Ready to make some magic? This process is as simple and fun as it gets. I’ll walk you through each step with a few of my favorite kitchen hacks to ensure your snowballs are absolute perfection.
- Preheat and Prep. Fire up your oven to 350°F (175°C). This is our first step for a reason—you want that oven hot and ready when your dough is! Line your baking sheets with parchment paper. This isn’t just for easy cleanup; it prevents the bottoms from browning too quickly. A little chef insight: if you don’t have parchment, you can use a silicone baking mat or even just an ungreased sheet, but parchment is my number one choice.
- Mix the Dry Goods. In a medium bowl, whisk together your flour, 1 ½ cups of the finely chopped walnuts, cardamom, and salt. Whisking is important here! It aerates the flour and makes sure our cardamom and salt are evenly distributed, so every single cookie gets that perfect hit of flavor.
- Cream the Butter and Sugar. In a separate, larger bowl, beat the softened butter and granulated sugar together. We’re using a mixer (hand or stand) for this. You want to beat it on medium speed for a good 2-3 minutes, until it becomes pale, light, and fluffy. This step is crucial for creating a tender cookie that isn’t dense. You’re literally incorporating tiny air bubbles into the fat, which gives you that melt-in-your-mouth texture.
- Bring in the Vanilla. Add your vanilla extract to the butter mixture and beat for another 30 seconds just to combine. Your kitchen should be smelling pretty fantastic right about now.
- Combine Wet and Dry. Now, with your mixer on low speed, gradually add the flour and walnut mixture to the butter mixture. Mix just until the dough comes together and no dry streaks of flour remain. Do not overmix! Overworking the dough develops gluten and can make the cookies tough. A little chef hack: if the dough seems a bit crumbly, use your hands to gently press it together. The warmth from your hands will help it form a cohesive ball.
- Fold in the Texture. This is where we use that reserved ½ cup of walnuts! Switch to a spatula and gently fold them into the dough. This ensures we get those lovely little nutty surprises in every bite.
- Roll Those Snowballs! Using your hands, roll portions of dough into 1-inch balls. I like to use a small cookie scoop for uniformity, but a tablespoon measure works great too. Place them on your prepared baking sheets, spacing them about 1-1.5 inches apart. They don’t spread much, but they do need a little room for hot air to circulate. Pro tip: if your hands are warm and the dough is getting sticky, pop the whole bowl in the fridge for 10-15 minutes to firm up. Chilled dough is much easier to roll!
- Bake to Golden-Bottomed Perfection. Slide those trays into your preheated oven and bake for 12-14 minutes. You’re looking for the tops to be set and, most importantly, the bottoms to be a very light golden brown. The tops will still look pale, and that’s exactly what we want. Don’t overbake them, or they’ll lose their tender crumb.
- The Double-Dip Sugar Coating. This is the secret to that iconic, snowy look! Let the cookies cool on the baking sheet for exactly 5 minutes. They need to be firm enough to handle but still warm. Place your powdered sugar in a shallow bowl. Gently roll each warm cookie in the sugar, then transfer them to a wire rack to cool completely. Once they’re fully cooled, give them a second roll in the powdered sugar. This first coat melts slightly into the warm cookie, creating a lovely glaze, and the second coat gives you that fresh, snowy, picture-perfect finish.
How to Serve These Flavor Bombs
Okay, you’ve resisted eating them straight off the cooling rack (mostly), now what? Presentation is part of the fun! For a simple, elegant look, pile them high on a rustic wooden board or a beautiful cake stand. They look incredible dusted with just a little extra powdered sugar right before serving.
And the perfect pairing? A strong cup of coffee is a match made in heaven, cutting through the sweetness perfectly. But my absolute favorite way to enjoy them is with a hot mug of chai tea or a London Fog latte. The spices in the drink just harmonize beautifully with the cardamom in the cookie. They’re also fantastic crumbled over a bowl of vanilla ice cream for an next-level dessert. Get creative with it!
Make It Yours: Creative Twists & Swaps
This recipe is a fantastic canvas for your own creativity. Here are a few of my favorite “what if we tried this?” variations:
- Citrus Zest: Add the finely grated zest of one orange or lemon to the butter during the creaming step. The bright, sunny citrus aroma is a stunning partner for the cardamom.
- Nut Swap: Not a walnut person? No problem! Try using an equal amount of pecans for a more buttery, Southern feel, or pistachios for a gorgeous green-flecked dough and a fantastic flavor contrast.
- Spice It Up: Add ¼ teaspoon of ground cinnamon along with the cardamom for an even warmer, cozier spice profile. A tiny pinch of freshly ground black pepper can also add a surprising and delicious complexity.
- Gluten-Free: You can easily swap the all-purpose flour for a 1:1 gluten-free baking blend. I’ve done it with great success! Just make sure your blend includes xanthan gum.
- Dairy-Free: Use a high-quality plant-based butter stick (the kind made for baking). The results are surprisingly close to the original!
Jackson’s Chef’s Notes & Kitchen Confessions
This recipe has evolved so much in my kitchen. The first time I made them, I overmixed the dough and they were more like little hockey pucks than snowballs. Live and learn! Now, I’m militant about mixing just until combined. Another confession: I used to skip the “divide the walnuts” step, but adding that textural element was a complete game-changer. It’s the little things, I tell ya.
The funniest thing that ever happened was the time my dog, Biscuit, managed to snag one off the counter. He left a perfect, powdered-sugar-dusted nose print on the floor for the rest of the day as evidence. So, consider this a warning to keep your treats secure from four-legged kitchen helpers!
Your Questions, Answered!
Let’s tackle a few common questions to make sure your baking experience is smooth sailing.
Q: My dough is too crumbly and won’t hold a ball shape. What did I do wrong?
A: No panic! This usually means your butter was a bit too cold, or you just need to bring the dough together with your hands. The warmth from your hands is your best tool here. Press the crumbly dough together in the bowl, and it should come together. If it’s really being stubborn, a teaspoon of cold water can help bind it.
Q: Can I make these ahead of time and freeze them?
A: Absolutely! These are fantastic for freezing. You can freeze the rolled, unbaked dough balls on a tray, then transfer to a freezer bag. Bake straight from frozen, adding 1-2 minutes to the baking time. Or, you can freeze the fully baked and cooled cookies. Just give them a final dusting of powdered sugar after they’ve thawed.
Q: Why do I have to roll them twice in powdered sugar?
A> The first roll on the warm cookie creates a thin, slightly melted layer of icing that acts like glue. The second roll, once they’re cool, gives you that thick, pristine, snowy, dry coating that looks so beautiful and provides the final hit of sweetness. One roll just doesn’t have the same visual or textural impact.
Q: My cookies spread too much! Why?
A: This is almost always a butter issue. If your butter was too soft or melted, the cookies will spread. Make sure it’s just softened (you can leave an indent with your finger), not greasy or melty. Chilling the dough for 15-20 minutes before baking can also help prevent spreading.
Nutritional Info (For Your Inner Foodie Nerd)
Okay, let’s be real—we’re not eating snowball cookies for their kale-like properties. But it’s always good to know what you’re enjoying! Here’s a rough estimate per cookie (based on this double batch making about 48 cookies). Remember, this is an approximation and can vary based on specific ingredients used.
These little guys are a treat, and they get their incredible texture from the butter and walnuts, which provide healthy fats. The walnuts also add a bit of protein and fiber. The carbs and sugar come mostly from the flour and our powdered sugar coating. My philosophy? Enjoy every single, mindful, delicious bite without guilt. Life’s too short not to savor a perfect cookie made with real ingredients and a whole lot of love.
Your New Go-To Cookie Awaits
And there you have it! My not-so-secret, secret weapon for bringing a little joy and a whole lot of flavor to any day. These Cardamom Walnut Snowball Cookies are more than just a recipe; they’re a reminder that the best food is often the simplest, made with care and a dash of creative courage.
I hope you love making (and devouring) these as much as I do. They’ve brought so many smiles to my kitchen and to the people I share them with. So, get in there, get your hands a little dusty with powdered sugar, and create your own delicious memories. And when you make them, I’d love to see it! Tag me @FoodMeld online so I can cheer you on.
Until next time, keep mixing it up, making it yours, and enjoying every single bite. Happy baking!
— Jackson


