Forget Fussy Holiday Baking: Let’s Make Chocolate Gingerbread Bars
Hey friends, Jackson from Food Meld here. Can we talk about holiday baking for a second? I love it, you love it, but sometimes… it can feel like a whole production, right? Chilling dough, rolling pins flying, flour absolutely everywhere. It’s the kind of kitchen chaos that’s fun until you realize you’ve been on your feet for three hours and still have three dozen cookies to decorate.
What if I told you there’s a better way? A path to a dessert that delivers all the warm, spiced, comforting vibes of the season without the marathon baking session? A treat so good, it’ll have your family convinced you spent all day in the kitchen, when in reality, you were in and out in under an hour?
Friends, meet your new holiday hero: the Chocolate Gingerbread Bar.
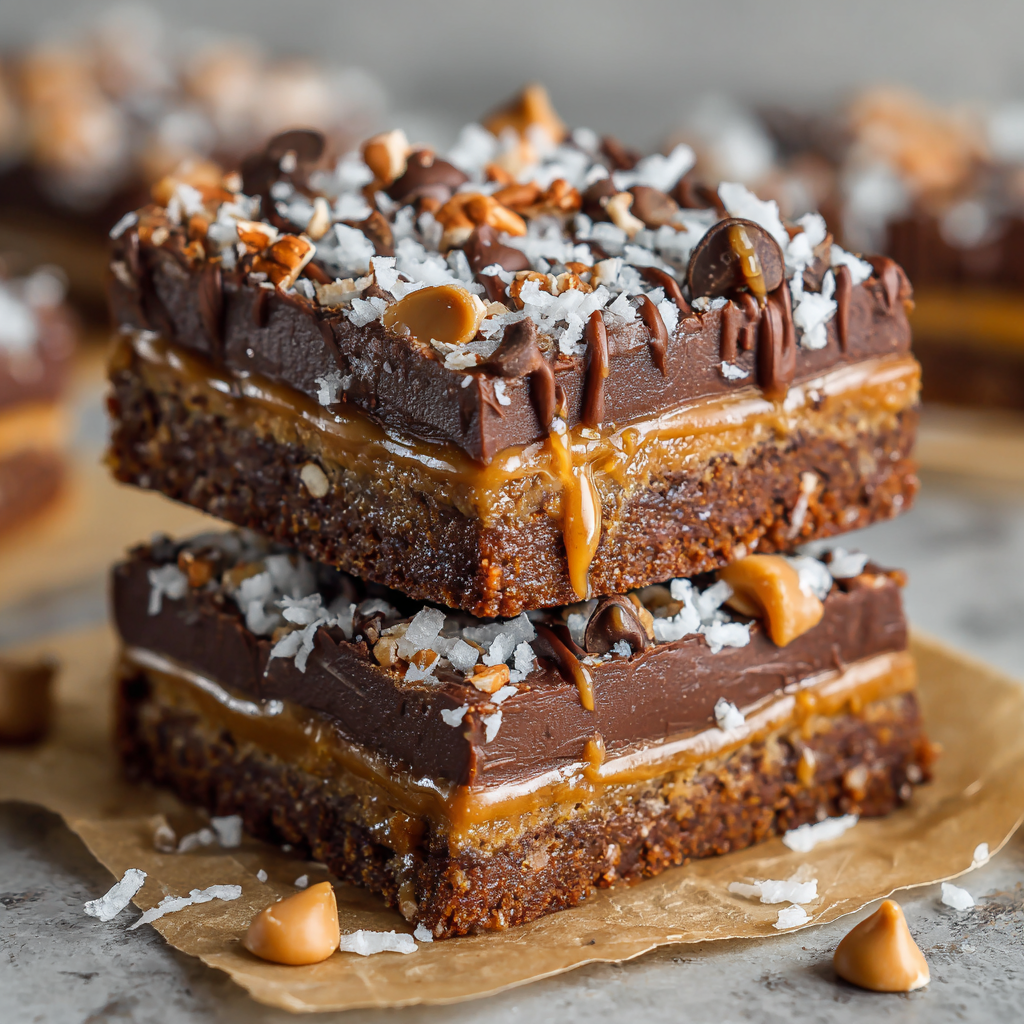
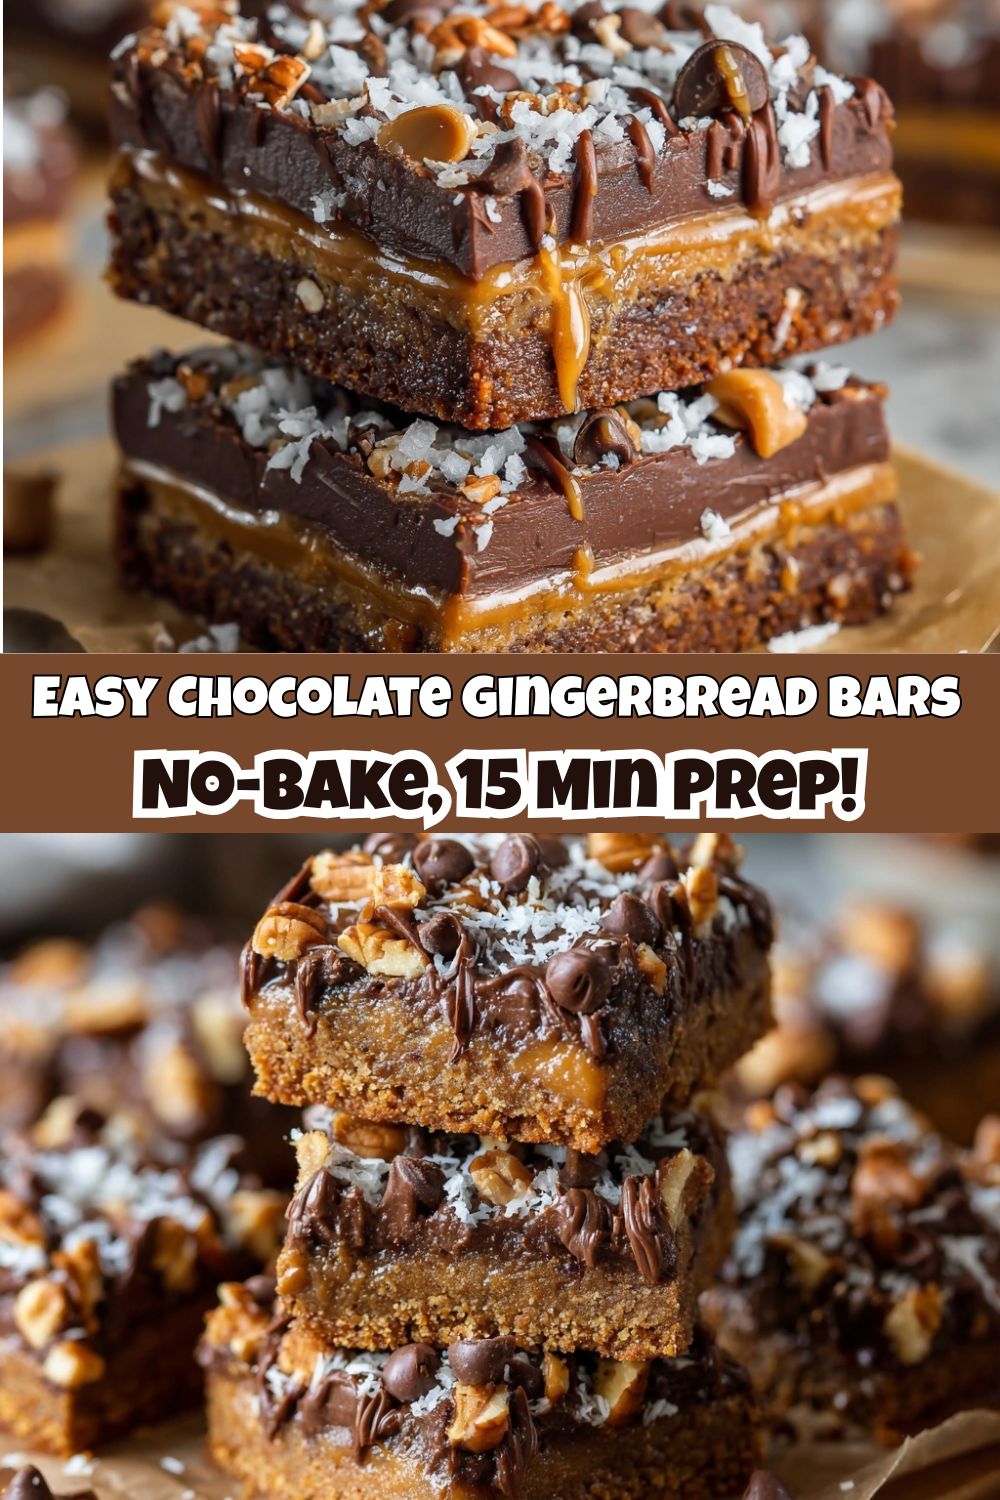
Imagine this: a crunchy, spicy crust made from gingersnap cookies, holding a layer of warm, melted cookie butter. On top of that, a glorious blanket of semi-sweet chocolate and peanut butter chips, all nestled into a bed of sweet, toasty coconut and crunchy pecans. It’s chewy, it’s crispy, it’s rich, and it’s packed with texture and flavor in every single bite. This isn’t just a bar; it’s a flavor experience. It’s the cozy hug of gingerbread and the decadent joy of a chocolate bar, all melded together into one unforgettable, no-mixer-required square of awesome. So, tie on your apron, and let’s cook something awesome together.
The Happy Accident That Started It All
This recipe, like so many of my favorites, was born from a little bit of “what if we tried this?” energy and a whole lot of holiday desperation. A few years back, I was hosting my family’s big holiday gathering. I’d planned this elaborate menu, including four different types of intricately decorated cookies. Spoiler alert: I ran out of time. Big time.
I was staring into my pantry, praying for a baking miracle, when I saw a nearly-full bag of gingersnaps from a cheesecake crust I’d made, a jar of cookie butter a friend had gifted me, and the usual stash of chocolate chips and nuts. In a moment of inspired panic, I just started layering. I crushed the snaps, melted some butter, and pressed it into a pan. I warmed the cookie butter until it was drizzle-able and poured it on. I rained down every chip and nut I could find, popped it in the oven, and crossed my fingers.
What emerged was nothing short of magic. The kitchen smelled incredible, and when I cut into the pan after it cooled, the bars held their shape perfectly. They were a smash hit. My cousin, a notorious cookie critic, said it was the best thing she’d eaten all season. That happy accident taught me a valuable lesson: the most unforgettable food isn’t always the most complicated. Sometimes, it’s just about melding bold, comforting flavors with a whole lot of heart.
Gathering Your Flavor All-Stars
Here’s the beautiful part: you probably have most of this in your pantry already. This is a “melting pot” recipe in the truest sense, where every ingredient plays a crucial role in building that unforgettable texture and taste.
- 2 cups crushed gingersnap cookies: This is our foundation, our crust. We’re not making dough from scratch; we’re letting these store-bought heroes do the work, giving us that deep, warm, molasses-kissed gingerbread flavor instantly. Pro Chef Tip: The easiest way to crush them? Toss them in a zip-top bag and go at them with a rolling pin. It’s strangely therapeutic!
- ½ cup unsalted butter, melted: This is the glue that holds our gingersnap crust together. Using unsalted lets you control the salt level perfectly. If you only have salted, that’s okay! Just know your bars might have a slightly saltier kick.
- ¾ cup cookie butter (like Biscoff or Speculoos): The secret weapon! This stuff is pure magic. It’s like peanut butter’s sophisticated, spiced cousin. It adds a creamy, caramelized, slightly spicy layer that ties the gingerbread crust to the chocolate topping. If you’ve never tried it, you’re in for a treat.
- 1 cup semi-sweet chocolate chips: The classic. They bring that rich, dark chocolate flavor that pairs so perfectly with warm spices. Chef Insight: I like semi-sweet to balance the sweetness, but milk chocolate chips would be a decadent swap if that’s your jam.
- ¾ cup peanut butter chips: Hello, texture and nostalgia! These add a wonderful creaminess and a salty-sweet note that cuts through the richness. They are a non-negotiable for me in this recipe.
- 1 cup sweetened shredded coconut: Don’t skip this, even if you’re on the fence about coconut! It toasts up in the oven, adding a chewy texture and a lovely, nutty sweetness that complements the pecans beautifully.
- ½ cup chopped pecans: Our crunch factor. Toasting them beforehand would take the flavor to an 11, but even straight from the bag, they add that essential earthy, buttery crunch.
- Optional twist: A pinch of cinnamon or nutmeg: Want to turn up the warmth? A little extra spice sprinkled over the top before baking makes the whole kitchen smell like a holiday dream.
Let’s Build These Bars: A Step-by-Step Adventure
See? No mixer in sight. This is where the fun begins. We’re building layers of flavor and texture, and it could not be simpler.
- Preheat & Prep: First things first, get that oven preheating to a cozy 350°F (175°C). Now, grab your 9×13-inch pan. This is my favorite chef hack for easy cleanup and removal: line the pan with a sheet of parchment paper, letting a little overhang on the two long sides. This creates a “sling” that will let you lift the entire slab of bars out in one clean move. You’ll thank me later when you’re slicing them!
- Create the Crust: In a medium bowl, pour your 2 cups of gingersnap crumbs. Drizzle the ½ cup of melted butter right over the top. Now, get in there with a fork or your hands and mix it up until it looks like wet sand and every crumb is coated. Dump this mixture into your prepared pan and press it down firmly and evenly. I mean it—firmly. Use the flat bottom of a measuring cup or a glass to really compact it. A solid crust is key to bars that hold their shape.
- The Cookie Butter Cascade: Now for the magic layer. Scoop your ¾ cup of cookie butter into a microwave-safe bowl. Heat it in 15-second bursts, stirring between each, until it’s warm and easily drizzle-able. It doesn’t need to be liquid, just loose enough to spread. Pour it over the crust and use a spoon or offset spatula to spread it into a beautiful, even layer. You’re building a flavor bridge here!
- The Grand Topping Layer: This is the fun, confetti-like part. Now, evenly sprinkle your 1 cup of chocolate chips, followed by the ¾ cup of peanut butter chips. Next, the 1 cup of shredded coconut, and finally, the ½ cup of chopped pecans. Don’t just dump it all in the middle; try to get an even distribution so every single bar gets a bit of everything. This is where you add that optional pinch of extra cinnamon or nutmeg for a fragrant boost.
- Bake to Golden Perfection: Slide that beautiful, loaded pan into your preheated oven. Bake for 20-25 minutes. You’re looking for the entire top to look set and for the coconut and edges to be a lovely golden brown. Your kitchen is going to smell absolutely incredible. That’s how you know it’s working!
- The Hardest Part: The Cool Down: This is crucial, my friends. I know it’s tempting, but you must let these bars cool completely in the pan before you even think about cutting them. I usually let mine sit on a wire rack for at least an hour, sometimes two. If you try to cut them warm, they’ll be too gooey and fall apart. For the cleanest cuts, you can even pop the whole pan in the fridge for 30 minutes after it’s cooled to room temperature.
How to Serve These Show-Stopping Bars
Once they’re fully cooled and you’ve lifted them out using your parchment paper sling, it’s showtime! Place the giant slab on a cutting board. Using a sharp knife (I like to run it under hot water and wipe it dry for super clean cuts), slice them into bars or squares.
Presentation is part of the fun! You can serve these on a simple platter for a casual family dessert. For a holiday party, I love stacking them on a beautiful cake stand or arranging them on a wooden board with a dusting of powdered sugar for a snowy effect. A little dollop of whipped cream or a scoop of vanilla ice cream on the side takes this from a snack to a full-blown, decadent dessert. And don’t be shy about that “optional” extra sprinkle of sea salt on top right before serving—it makes the chocolate and peanut butter flavors pop!
Make It Your Own: Creative Twists & Swaps
The beauty of this recipe is its flexibility. It’s a fantastic canvas for your own kitchen creativity. Here are a few of my favorite ways to mix it up:
- The “Everything but the Kitchen Sink” Bar: Swap the pecans for walnuts or almonds. Toss in a handful of toffee bits or even crushed pretzels for a salty-sweet crunch. Go wild!
- Nut-Free Nirvana: Have an allergy? No problem! Simply leave out the peanut butter chips and the pecans. The bars will still be delicious with the chocolate, coconut, and cookie butter. You could even add sunflower seeds for a nut-free crunch.
- Double the Chocolate: For the ultimate chocoholic, swap the peanut butter chips for more semi-sweet chocolate chips, or use dark chocolate chips instead. You could even drizzle melted chocolate over the top after they’ve cooled.
- White Chocolate Wonderland: Create a different vibe by using white chocolate chips instead of semi-sweet. The contrast with the dark, spicy crust is just gorgeous.
- Bourbon Caramel Drizzle: Feeling fancy? After the bars are cooled and sliced, warm up some store-bought caramel sauce, stir in a teaspoon of bourbon, and drizzle it artistically over the top. You’re welcome.
Jackson’s Chef Notes & Kitchen Confessions
Over the years, this recipe has become a staple in my holiday lineup, and it’s evolved in little ways. I’ve learned that a heaping cup of pecans is never a bad idea. I’ve also found that using a high-quality, spiced cookie butter can really elevate the entire dish.
One of my favorite kitchen stories involves these bars. I once brought them to a potluck, and a friend’s kid, who was about six years old, took one bite, looked at me with wide, serious eyes, and said, “Mister, did you make this with magic?” I just smiled and said, “Something like that, buddy.” That’s the goal, right? To create those little moments of pure, unadulterated food joy. It’s not just about feeding people; it’s about creating a memory, a feeling. That’s what Food Meld is all about.
Your Questions, Answered!
I’ve made these bars a zillion times, and I’ve heard all your great questions. Here are the most common ones:
Q: My bars are too crumbly when I cut them. What did I do wrong?
A: This almost always comes down to two things: not pressing the crust down firmly enough, or not letting them cool completely. That crust needs to be compacted, and the melted ingredients need time to set up. Patience is key!
Q: I can’t find cookie butter! What can I use instead?
A> Don’t panic! While cookie butter is unique, you can substitute it with a smooth, natural peanut butter or even almond butter. The flavor profile will change, but it will still be delicious. Just make sure to warm it up so it’s easy to spread.
Q: Can I make these gluten-free?
A: Absolutely! The main source of gluten here is the gingersnap cookies. Just find a gluten-free gingersnap brand at your grocery store, and you’re all set. Everything else is typically gluten-free, but always double-check your specific chip and coconut labels to be safe.
Q: How should I store these, and how long do they last?
A: These bars keep like a dream! Store them in an airtight container at room temperature for up to 5 days. They also freeze beautifully. Just layer them between parchment paper in a freezer-safe container, and they’ll be good for up to 3 months. Thaw at room temperature whenever a craving strikes.
A Quick Note on Nutrition
Let’s be real: these are a decadent treat, a celebration in bar form. I’m all about balance, and that means enjoying indulgent desserts without guilt. This is a dessert meant to be savored and shared.
The approximate nutritional info per bar (based on a yield of 20 bars) is around 220 calories, 14g of fat, 22g of carbohydrates, 15g of sugar, and 2g of protein. Remember, this is an estimate and can vary based on the specific brands of ingredients you use. If you’re looking for ways to lighten it up, you could try using a sugar-free cookie butter alternative, reducing the amount of chocolate chips, or using unsweetened coconut. But my personal philosophy? Life’s too short not to enjoy a truly amazing, flavor-packed dessert during the holidays. So, enjoy every single bite!
Your New Go-To Holiday Treat Awaits
And there you have it! From my happy kitchen accident to your family’s new favorite dessert. These Chocolate Gingerbread Bars are proof that you don’t need complicated techniques or a dozen ingredients to create something truly special. All you need is a little boldness, a love for comforting flavors, and the willingness to get a little messy and have fun with it.
I hope this recipe brings as much joy and flavor to your kitchen as it has to mine. It’s more than just a recipe; it’s an invitation to relax, to experiment, and to create those “you’ve gotta try this!” moments with the people you love.
So, what are you waiting for? Go preheat that oven, crush those gingersnaps, and let’s make some memories. And when you do, I’d love to see your creation! Tag me on social @FoodMeld so I can cheer you on. Happy baking, friends!


