Protein Cheesecake Frosting: Your New Secret Weapon for Guilt-Free Desserts
Hey friends, Jackson here from Food Meld. Let’s get real for a second. Who else has ever stared longingly at a beautifully frosted cupcake, only to think, “Man, I wish that wouldn’t completely derail my day?” Or maybe you’re just looking for a way to make your morning pancakes or protein muffins feel a little more… celebratory? I’ve been there more times than I can count. I’m all about bold, comforting flavor, but I’m also about feeling good. That’s why I became obsessed with creating a frosting that doesn’t make you choose.
What if I told you that you could have a frosting that’s creamy, tangy, and seriously satisfying, but is actually packed with protein and crazy low in calories? A frosting you could eat by the spoonful without a shred of guilt? Sounds like a dream, right? Well, pull up a chair, because this Protein Cheesecake Frosting is about to become your new kitchen best friend.
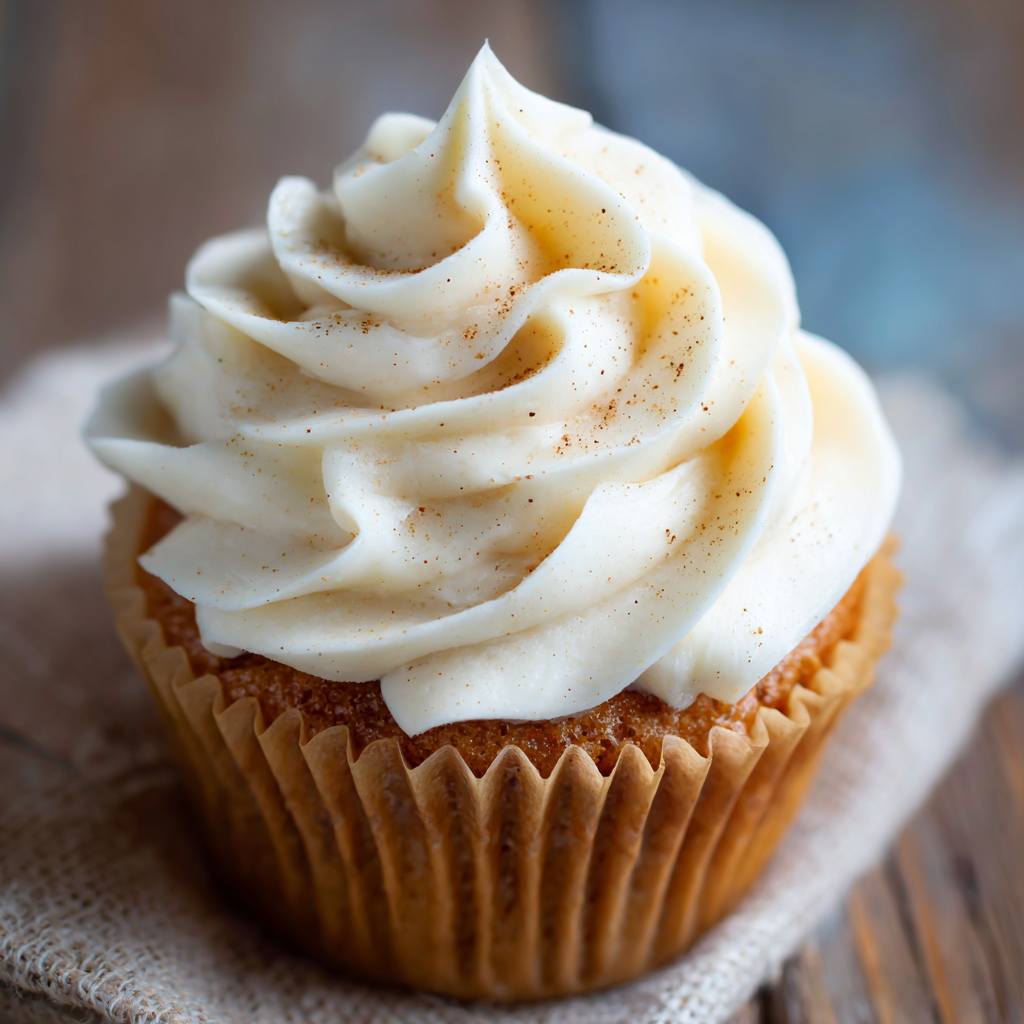
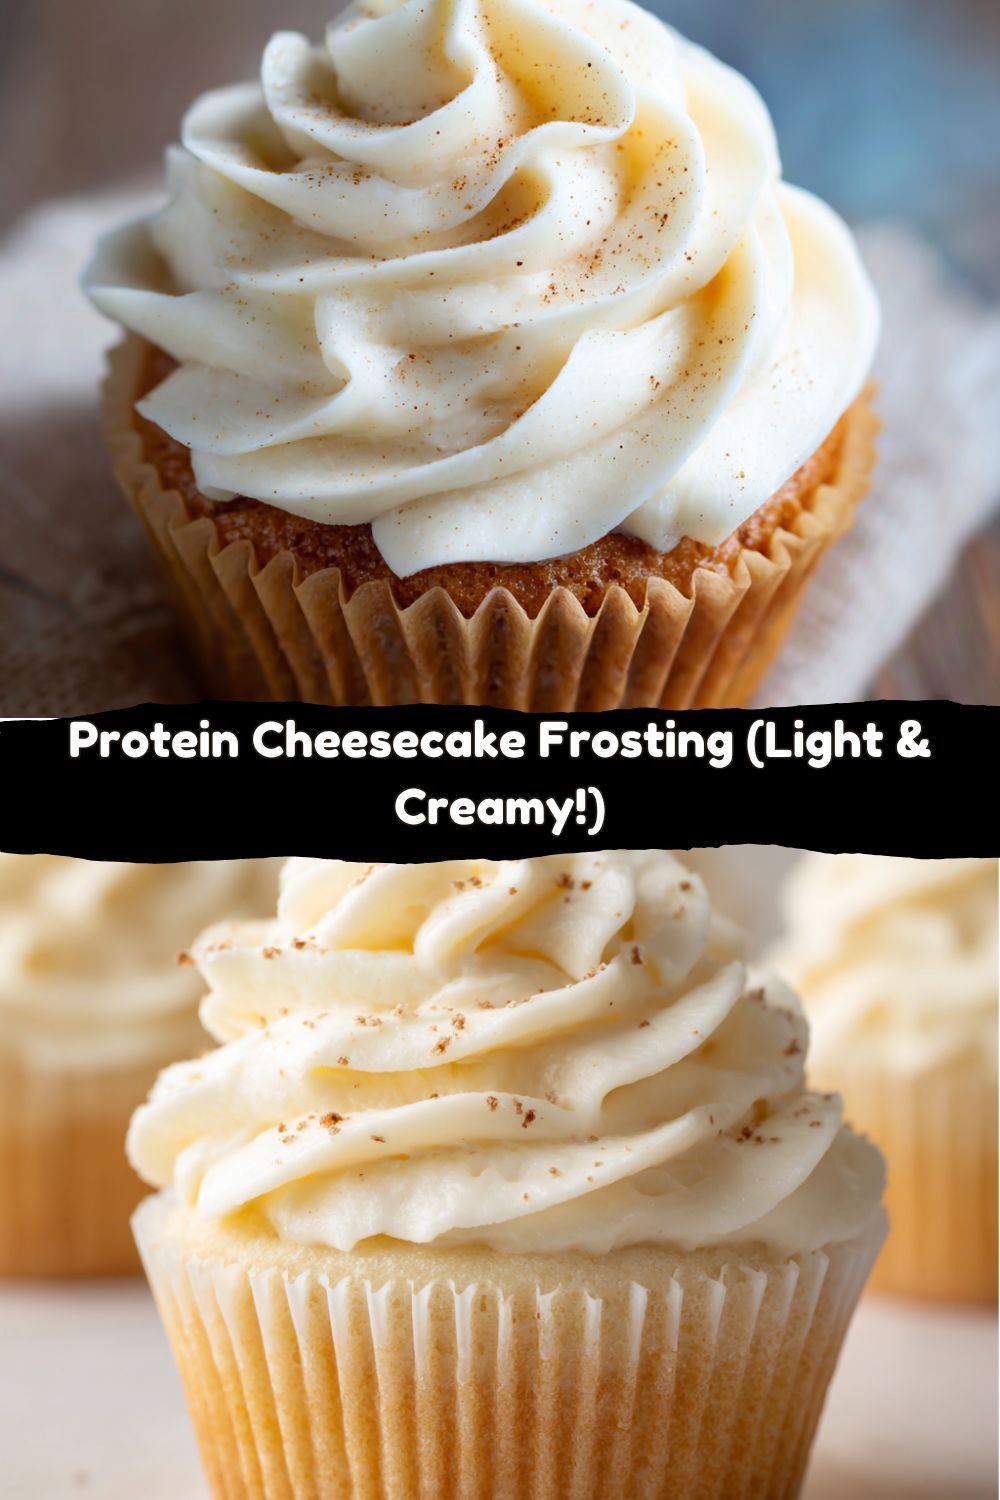
We’re talking about the rich, classic flavor of cheesecake filling, whipped up into a cloud-like frosting that’s perfect for topping just about anything. It’s incredibly simple—we’re blending just four main ingredients into something magical. This isn’t one of those “healthy” recipes that tastes like cardboard and disappointment. Nope. I tested this one over and over (a tough job, but someone had to do it) until it was absolutely unforgettable. So, whether you’re a fitness fanatic, just watching your sugar intake, or simply a dessert lover looking for a lighter option, this one’s for you. Let’s whip up some magic!
The Frosting That Started It All: A Kitchen “Aha!” Moment
This recipe actually has a fun little origin story. It was a few years back, right around my birthday. I was deep into a fitness kick, but my Southern roots were screaming for a proper birthday cake. I’d baked a pretty decent protein-packed carrot cake, but I was staring at a sad, dry slab thinking, “This needs frosting. Badly.” Every traditional buttercream recipe felt like it would undo all my hard work.
So, I did what I always do: I started throwing things into the food processor with a whole lot of “what if we tried this?” energy. I had some Greek yogurt, a tub of cream cheese for my morning bagels, and my trusty vanilla protein powder. I blended it, skeptically dipped a finger in, and my mind was blown. It was tangy, sweet, and had that unmistakable cheesecake vibe. It transformed that humble carrot cake into something spectacular. My friends, who are always my toughest critics, couldn’t believe it wasn’t “real” frosting. That was the moment I knew I had to share it. It’s proof that the best recipes often come from a little kitchen chaos and a willingness to experiment!
Gathering Your A-Team: The Simple Ingredients
See? I told you it was simple. This isn’t one of those recipes with a mile-long list of hard-to-find ingredients. Here’s the lowdown on what you’ll need and why each one is a superstar.
- 220g (about 1 cup) Fat-Free Cream Cheese, softened: This is our base. It gives us that classic, tangy cheesecake flavor and creamy body. Chef’s Insight: I specify fat-free to keep the calories and macros in check, but you can absolutely use reduced-fat (Neufchâtel) or even full-fat if that’s your preference. Just know it will change the nutritional profile. The key is to let it sit on the counter for 30-60 minutes to soften. This is non-negotiable for a silky-smooth texture!
- 227g (1 cup) Plain Nonfat Greek Yogurt: This ingredient is a powerhouse. It adds more protein, a lovely tang, and thins the cream cheese just enough to make it spreadable. Substitution Tip: If you’re not a yogurt fan, an equal amount of low-fat cottage cheese works amazingly well—just be sure to blend it until it’s completely smooth. For a dairy-free version, a thick, plain vegan yogurt (like coconut or soy-based) can work, but the tanginess will be different.
- 60g (about 2 scoops) Vanilla Whey/Casein Blend Protein Powder: This is our flavor and thickening hero. Chef’s Hack: I highly recommend a whey/casein blend. The casein gives it a thicker, pudding-like consistency that’s perfect for frosting. If you only have straight whey, the frosting might be a bit thinner (but still delicious!). Vanilla is ideal, but feel free to experiment with other flavors like cake batter or even a unflavored one.
- 8g (about 2 tsp) Zero-Calorie Sweetener: This fine-tunes the sweetness. Chef’s Insight: I use a powdered version like erythritol or monk fruit blend to avoid any grittiness. You can adjust this to your taste! Start with a little, blend, taste, and add more if you like it sweeter. If you’re not avoiding sugar, a tablespoon of powdered sugar or maple syrup would work, too.
- (Optional) A Splash of Vanilla Extract or Lemon Juice: For an extra flavor boost! A teaspoon of vanilla enhances the warmth, while a squeeze of fresh lemon juice brightens everything up and makes the cheesecake flavor pop even more.
Let’s Make Some Magic: The Foolproof Method
Ready? This is literally one of the easiest things you’ll ever make. But like any good chef, I’ve got some little tips to make it absolutely perfect.
- Prep Your Ingredients: This is the most important step! Take your cream cheese out of the fridge at least 30 minutes before you start. You want it to be soft and pliable. If you’re in a hurry, you can microwave it for 10-15 seconds on low power, but be careful—you don’t want it melted, just softened. Add the cream cheese, Greek yogurt, protein powder, and sweetener to your food processor. Chef’s Hack: If you don’t have a food processor, a stand mixer with the paddle attachment or even a good old-fashioned bowl and a sturdy spatula will work. It’ll just take a bit more elbow grease to get it super smooth.
- Blend on Low: Pop the lid on and start blending on a low speed. We start low to avoid a powdered protein cloud from exploding all over your kitchen! Let it run for about 30-60 seconds until the ingredients start to come together. Chef’s Tip: If you’re using a mixer, start on the lowest setting for the same reason.
- Scrape and Repeat: Stop the machine. Grab a spatula and scrape down the sides and bottom of the bowl. This is crucial for getting every last bit incorporated and ensuring no dry pockets of protein powder remain. This is the secret to a perfectly smooth, lump-free frosting.
- Blend to Perfection: Now, turn the processor back on and let it rip for another 1-2 minutes on medium-high speed. You’ll see the magic happen. The mixture will transform from a bit grainy to incredibly smooth, thick, and whipped. It should hold its shape beautifully. Chef’s Note: If it seems too thick for your liking (like for piping), you can add a teaspoon of milk or water at a time until it reaches your desired consistency. If it’s too thin, add a little more protein powder.
- Taste and Adjust: Always, always taste your creation! This is your chance to make it yours. Want it sweeter? Add a bit more sweetener. Want more tang? A tiny squeeze of lemon juice will do the trick. Blend one last time to incorporate any adjustments.
And that’s it! You’ve just made a protein-packed, delicious frosting in under 5 minutes. You can use it right away or pop it in the fridge to firm up a bit more.
How to Serve Your Masterpiece: Let’s Get Creative!
Okay, the frosting is done. Now for the really fun part—putting it on everything! This stuff is seriously versatile.
The Classic Route: Of course, it’s an incredible frosting for cupcakes, muffins, or a sheet cake. I love it on my Healthy Carrot Cake Muffins or a simple vanilla protein cake. For piping, make sure the frosting is chilled—it will hold its shape much better.
Breakfast Game Changer: This is my favorite way to use it. Swirl a generous dollop on top of your pancakes, waffles, or French toast instead of syrup. It adds protein and flavor, making your breakfast feel like a decadent treat. It’s also amazing mixed into oatmeal or spread on whole-wheat toast.
The Snack Attack: Use it as a dip for apple slices, strawberries, or graham crackers. Or, my personal favorite: layer it in a glass with some berries and granola for an instant, high-protein parfait. It’s like eating cheesecake for a snack—because you are!
Pro-Tip for Plating: If you’re serving this to guests, grate a little bit of lemon zest over the top or add a few fresh berries. It makes it look gorgeous and adds a fresh burst of flavor.
Mix It Up! 5 Flavor Twists to Try
Once you’ve mastered the basic recipe, the flavor world is your oyster. Here are a few of my favorite twists to keep things exciting.
- Chocolate Lover’s: Swap the vanilla protein powder for chocolate. You can also add a tablespoon of unsweetened cocoa powder for an even richer chocolate flavor. A pinch of instant coffee granules will make the chocolate taste even deeper.
- Lemon Blueberry Bliss: Use a vanilla or unflavored protein powder. Add the zest of one lemon and a tablespoon of lemon juice. Gently fold in a handful of fresh or frozen (and thawed) blueberries after blending for little bursts of fruit.
- Peanut Butter Cup: Add two tablespoons of powdered peanut butter (like PBfit) to the mix. This gives you that incredible peanut butter flavor without adding a ton of fat. For a real treat, sprinkle some sugar-free chocolate chips on top.
- Pumpkin Spice (Seasonal Favorite!): Mix in ¼ cup of canned pumpkin puree and a teaspoon of pumpkin pie spice. It’s perfect for fall and adds a wonderful moisture and flavor.
- Strawberry Swirl: After you’ve made the base frosting, gently swirl in two tablespoons of sugar-free strawberry jam or a few mashed fresh strawberries. Don’t overmix—you want those beautiful pink streaks!
Jackson’s Chef’s Notes: A Few Parting Thoughts
This recipe has evolved so much since that first birthday cake experiment. I’ve learned that the type of protein powder is the biggest variable. I once made a batch with a plant-based pea protein that turned out… let’s just say, interestingly textured. It was edible, but not blog-worthy! That’s why I always stress the whey/casein blend—it’s been the most consistent winner in my kitchen.
Also, this frosting firms up a good bit in the fridge. If you make it ahead of time, just let it sit on the counter for 10-15 minutes before you try to spread it. And if you have leftovers (a rare occurrence in my house!), it keeps beautifully in an airtight container in the fridge for up to 5 days. It also freezes well for up to a month. Just thaw it overnight in the fridge and give it a quick stir before using.
FAQs & Troubleshooting: Your Questions, Answered
Q: My frosting is too thin/runny. What did I do wrong?
A: Don’t worry, we can fix this! The most common culprit is the protein powder. Straight whey protein tends to be thinner. Pop the whole batch into the fridge for 30-60 minutes; the cold will help it thicken up significantly. If it’s still too thin, you can blend in another tablespoon of protein powder at a time until it reaches the right consistency.
Q: Can I make this without a food processor?
A: Absolutely! A stand mixer with the paddle attachment is my second choice. If you’re using a hand mixer or even a whisk and a bowl, just make sure your cream cheese is VERY soft. It might take a few extra minutes of mixing and some serious arm muscle to get it perfectly smooth, but it’s totally doable.
Q: Why does it taste a little “chalky” or artificial?
A: This usually comes down to the protein powder or sweetener. Some brands have a stronger aftertaste than others. I recommend sticking with a protein powder you already enjoy the taste of on its own. Masking any slight aftertaste is also why I love the additions of vanilla extract or lemon juice—they work wonders!
Q: Is this frosting keto-friendly?
A> It can be! With only 2g of net carbs per serving, it’s a great option for a keto diet. Just double-check that your protein powder and sweetener are keto-approved, as some might contain maltodextrin or other higher-carb ingredients.
The Nutritional Lowdown (Because Knowledge is Power!)
Here’s a quick look at what you’re getting in each delicious 2-tablespoon (32g) serving. Remember, these values can change slightly based on the specific brands you use, but this is a great guideline.
Per Serving: Calories: 36 | Fat: 0g | Carbohydrates: 2g | Protein: 7g
Let’s break that down. At only 36 calories, this frosting is an incredible way to add a ton of flavor without a ton of guilt. The 0g of fat comes from using fat-free dairy, and the 2g of carbs are minimal. The real star is the 7 grams of protein. That’s a fantastic boost that helps keep you full and satisfied. Compared to traditional cream cheese frosting, which can easily run over 140 calories and 10g of fat per serving, this is a total game-changer for anyone looking to enjoy dessert while sticking to their health goals.
Final Thoughts: Let’s Keep the Fun Going!
Well, there you have it, my friends. My go-to recipe for a frosting that truly feels like a treat, not a compromise. It’s proof that eating well doesn’t mean giving up on flavor or fun in the kitchen. This Protein Cheesecake Frosting is simple, versatile, and packed with the kind of “you’ve gotta try this” energy that I live for at Food Meld.
I really hope you love this recipe as much as I do. Give it a try, get creative with the flavors, and make it yours. And I’d love to hear from you! Tag me on social @FoodMeld when you make it and show me your creations. What did you put it on? What flavor twist was your favorite? Let’s keep the conversation going.
Until next time, keep cooking something awesome!
– Jackson


