Peppermint Meltaway Cookies: Your New Favorite Holiday Bite
Hey there, Food Meld family! Jackson here. Can you smell it? That crisp, chilly air mixed with the scent of pine, a crackling fireplace, and… is that butter and sugar I smell? You bet it is. We’re diving headfirst into the most wonderful time of the year, and I’m not just talking about the decorations. I’m talking about the heart of the holiday season: the cookie tray.
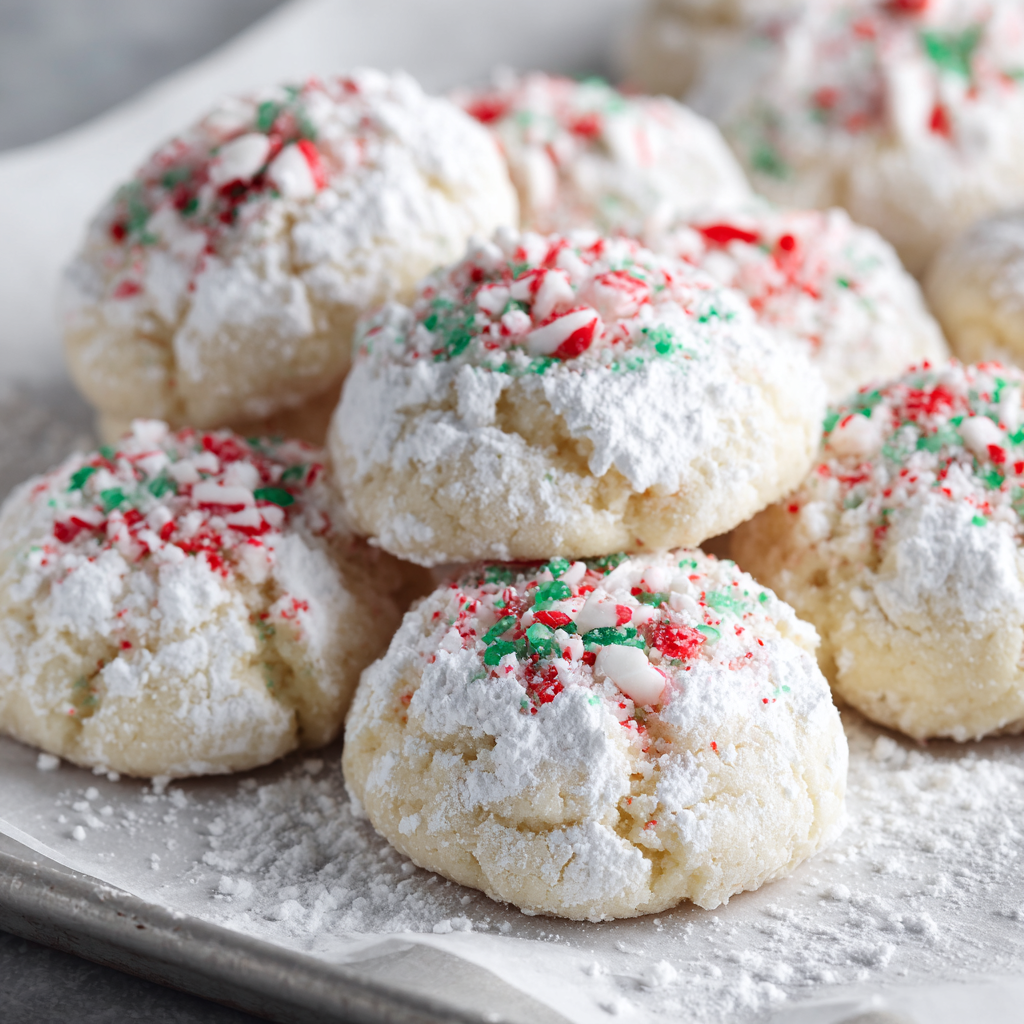
Now, we all have our favorites. The classic chocolate chip, the sturdy gingerbread man, the jam-filled thumbprint. But I’m here to make a case for the unsung hero of the holiday spread: the Peppermint Meltaway Cookie. These aren’t your average, crunchy sugar cookies. Oh no. These little clouds of joy are something truly special. They’re delicately soft, incredibly buttery, and they live up to their name by literally melting the moment they hit your tongue. A cool burst of peppermint follows, and that final dusting of powdered sugar? That’s the edible equivalent of a fresh blanket of snow.
Best of all, these cookies are deceptively simple. If you can cream butter and sugar, you can make these. They’re the perfect project for a cozy afternoon, a fun bake with the kids, or your secret weapon for that holiday potluck. They look elegant and taste like a million bucks, but they come together with a “what if we tried this?” level of ease. So, tie on your favorite apron, preheat that oven, and let’s cook something awesome together. We’re about to make your kitchen smell like a North Pole bakery.

A Snowy Day and a Tin Full of Magic
This recipe takes me right back to my grandma’s kitchen in Tennessee. It wasn’t Christmas until her big, slightly dented cookie tin came out of the pantry. It was always a treasure hunt. You’d lift that lid not knowing what you’d find—maybe a spritz cookie shaped like a tree, a date-filled pinwheel, or a sand tart sparkling with sugar.
But for me, the holy grail was always her “snowball” cookies. I’d sneak one (or three) when she wasn’t looking, and the way that powdery, nutty, buttery cookie just dissolved was pure magic. One particularly snowy December, I decided I wanted to put my own spin on her classic. I was feeling festive, and a bottle of peppermint extract was calling my name. I swapped out the nuts for a cool peppermint kick and added a tiny drop of green food coloring for fun. The result? A cookie that tasted like Christmas morning. It had the same magical, melt-in-your-mouth texture I loved, but with a bright, festive flavor that felt entirely new. That “what if” moment is the soul of Food Meld, and it’s how these Peppermint Meltaways were born.
Gathering Your Flavor Arsenal
Part of what makes these cookies so great is the short, simple ingredient list. Every component has a job to do. Here’s what you’ll need to make about 36 little bites of heaven.
For the Cookies:
- 1 cup (2 sticks) unsalted butter, softened: This is the star of the show, folks. The butter is what creates that incredible meltaway texture. I always use unsalted so I can control the salt level myself. Chef’s Insight: “Softened” is key! It should be cool to the touch but yield easily when you press it. Leave it on the counter for about an hour. If you’re in a pinch, you can gently soften it in the microwave for 5-10 second bursts, but be careful—melted butter will change the texture completely.
- ½ cup powdered sugar: We’re using powdered sugar in the dough instead of granulated. Its fine texture and a bit of cornstarch help keep the cookies tender and delicate. No graininess here!
- 1 tsp peppermint extract: This gives us that classic, cool peppermint flavor. Substitution Tip: If you only have peppermint oil, use just ¼ to ½ teaspoon, as it’s much more concentrated. You can always add more to taste!
- A few drops green food coloring (optional): This is purely for festive fun! It gives the cookies a lovely, subtle minty hue. Feel free to skip it, use red, or even split the dough and do both!
- 2¼ cups all-purpose flour: The backbone of our cookie. I use regular all-purpose flour for the perfect structure.
- ¼ tsp salt: Don’t forget the salt! It’s not there to make things salty; it’s a flavor enhancer that makes the butter and peppermint pop. It balances the sweetness perfectly.
For the Decoration:
- 1 cup powdered sugar (for coating): This is our “snowy” finish. We’ll roll the warm cookies in it once, let them cool, and then give them a second roll for that perfect, winter-wonderland look.
Let’s Make Some Magic: The Step-by-Step
Ready? This is where the fun begins. Follow these steps, and you’ll be a meltaway master in no time.
- Preheat and Prep: First things first, get that oven preheated to 350°F (175°C). This ensures it’s perfectly hot and ready when your cookie dough is. Then, line your baking sheets with parchment paper. Chef’s Hack: Parchment paper is a lifesaver. It prevents sticking and makes cleanup a breeze. No parchment? A silicone baking mat works great, too.
- The Creaming Method is Key: In a large bowl, we’re going to cream together the softened butter and that ½ cup of powdered sugar. Now, “cream” doesn’t just mean mix. We want to beat it on medium-high speed for a good 2-3 minutes until it’s light, fluffy, and almost pale in color. This step is crucial because we’re incorporating air into the butter, which helps give the cookies their lift and tender crumb. Don’t rush this!
- Flavor and Color: Now, mix in the peppermint extract. Give it a taste! Want more peppermint punch? Add another ¼ teaspoon. If you’re using the food coloring, add a few drops now and mix until the color is even. A little goes a long way!
- Bringing It All Together: Time for the dry ingredients. Add the flour and salt to the bowl. I like to mix on low speed just until the flour is incorporated and a soft dough forms. Chef’s Pro-Tip: Be careful not to overmix at this stage! Overworking the flour can develop the gluten and make the cookies tough instead of tender. As soon as you don’t see any dry streaks of flour, stop the mixer.
- Shape Those Balls: Now for the fun, hands-on part. Scoop up about a tablespoon of dough and roll it between your palms into a smooth, 1-inch ball. Place them about 1 inch apart on your prepared baking sheets. They don’t spread a ton, but they need a little room to breathe.
- Bake to Perfection: Slide those sheets into your preheated oven and bake for 10-12 minutes. You’re looking for the bottoms to be just lightly golden. The tops will still look soft and pale, and that’s exactly what we want. Watch closely! They can go from perfectly baked to overdone in a minute. We want meltaways, not crunchaways.
- The Double-Dust Secret: Here’s the most important step! While the cookies are still warm (but not scorching hot), gently roll them in the reserved cup of powdered sugar. The warmth helps the first layer of sugar adhere. Then, let them cool completely on a wire rack. Once they’re cool, give them a second roll in the powdered sugar. This double coating gives them that beautiful, snow-dusted finish that won’t just soak into the cookie.
How to Serve These Snowy Gems
Presentation is part of the fun! I love piling these Peppermint Meltaways high on a vintage cake stand or a simple wooden board. They look stunning all on their own. For a real showstopper, arrange them next to some dark chocolate crinkle cookies and some classic shortbread—the contrast in colors and textures is just gorgeous.
These are the ultimate cookie for gifting. Tuck a dozen into a cute cellophane bag tied with a festive ribbon, or layer them carefully in a holiday tin. Pair them with a mug of rich hot chocolate or a strong cup of coffee—the cool peppermint is a fantastic contrast to the warm, deep flavors. They’re also the perfect sweet treat to leave out for Santa (though I won’t tell if you sneak a few for yourself first).
Mix It Up: Creative Twists on the Classic
Once you’ve mastered the basic recipe, it’s time to get creative! Here are a few of my favorite ways to mix it up.
- Chocolate-Dipped Delight: Melt some dark or semi-sweet chocolate and dip half of the cooled, sugar-dusted cookie into it. Place them on parchment paper to let the chocolate set. The combination of peppermint and chocolate is a classic for a reason!
- Peppermint Patty Style: Sandwich two cookies together with a layer of simple vanilla or chocolate buttercream. It’s like a homemade, melt-in-your-mouth peppermint patty!
- Citrus Swap: Not a huge peppermint fan? Swap the peppermint extract for 1 teaspoon of vanilla extract and the zest of one lemon or orange for a bright, citrusy meltaway.
- Nutty Crunch: Fold in ½ cup of very finely chopped pecans or almonds into the dough for a little texture. It’s a nod to the traditional snowball cookie but with that peppermint twist.
- “Grinch” Cookies: For a fun twist for the kids, use red food coloring and leave out the peppermint extract. You’ll have adorable, festive red cookies that are pure vanilla goodness.
Jackson’s Chef Notes & Kitchen Stories
This recipe has become a non-negotiable part of my holiday baking. I’ve made them so many times I could probably do it in my sleep! One year, I decided to get fancy and add a tiny bit of crushed candy cane to the dough. Let’s just say it was a well-intentioned mess—the candy melted and created colorful, sticky pools. Lesson learned: save the crunch for a garnish on top of that chocolate dip!
The beauty of this recipe is in its simplicity. It’s a blank canvas. Over time, I’ve learned that the real secret is patience—patience to let the butter soften, patience to cream it properly, and patience to let the cookies cool before that second sugar coating. Trust me, it’s worth the wait. These cookies are a little piece of my kitchen story, and I hope they become a part of yours, too.
FAQs & Troubleshooting
Q: My dough is too crumbly and won’t roll into balls. What happened?
A: This usually means the dough is a bit too dry. This can happen if you measured the flour by scooping the cup directly into the bag, which packs it down. Next time, spoon the flour into your measuring cup and level it off. For now, try adding a teaspoon of very cold water at a time until the dough just comes together.
Q: Why are my cookies flat and spreading too much?
A: The most common culprit is butter that’s too warm. If the butter was melted or even very soft, the cookies will spread. Make sure your butter is just softened. Also, double-check that your oven is fully preheated before baking.
Q: Can I make these cookies ahead of time?
A: Absolutely! You can make the dough, roll it into balls, and freeze them on a baking sheet. Once frozen solid, transfer them to a freezer bag. When you’re ready to bake, just place the frozen balls on a parchment-lined sheet and add a minute or two to the baking time. You can also bake them and store the fully cooled cookies in an airtight container at room temperature for up to 5 days.
Q: The powdered sugar coating seems to disappear after a day. How can I prevent this?
A> This is totally normal! The cookies are so tender and buttery that they absorb the first coating. That’s exactly why we do the double-dust method—the second roll right before serving ensures they have that beautiful snowy look. Just give them a fresh roll in powdered sugar before you plate them.
Nutritional Information*
Okay, let’s be real—these are a treat, and we’re here to enjoy every buttery, sugary bite! But for those who like to keep track, here’s a general breakdown per cookie (assuming the recipe yields 36 cookies).
Calories: 110 | Fat: 7g | Carbs: 11g | Sugar: 4g | Protein: 1g
*Please note that this is an estimate based on the ingredients used. Actual values may vary depending on specific brands and measurements.
Prep Time: 15 mins | Bake Time: 10-12 mins | Total Time: ~30 mins
Final Thoughts: Let’s Keep the Fun Going!
And there you have it! My go-to recipe for the most irresistible, melt-in-your-mouth, holiday-spirited cookie around. I hope these Peppermint Meltaways bring as much joy to your kitchen as they have to mine. Remember, cooking and baking are all about having fun, making a happy mess, and sharing the results with people you love.
I’d love to see your creations! Did you add a twist? Dip them in chocolate? Make a huge batch for your cookie exchange? Tag me on social @FoodMeld and use the hashtag #FoodMeld so I can see your awesome work. From my kitchen to yours, happy baking! Let’s make this holiday season the most flavorful one yet.


