Let’s Make Some Magic: Soft Christmas Peppermints
Hey there, friend! Jackson from Food Meld here. Is there anything that screams “holidays” quite like the cool, sweet kiss of a peppermint? I’m not talking about the hard, cellophane-wrapped canes (though I’ll never say no to those). I’m talking about the old-school, melt-in-your-mouth, impossibly soft butter mints that used to grace every holiday table and fill every candy dish at Grandma’s house. The kind that literally dissolve on your tongue in a cloud of buttery, pepperminty bliss. That’s the magic we’re bringing to your kitchen today.
I’m a huge believer that the best holiday traditions are the ones you can make with your own two hands, and these Soft Christmas Peppermints are the perfect place to start. They require zero baking, no fancy equipment, and they come together faster than you can wrap a present. We’re talking about a simple, no-fuss recipe that delivers a huge payoff in flavor and nostalgia. Whether you’re looking for a heartfelt homemade gift, a stunning addition to your dessert platter, or just a fun kitchen project to do with the family, these mints are your answer. So, let’s ditch the complicated stuff and dive into something simple, real, and packed with the kind of flavor that makes people’s eyes light up. Let’s cook—or, well, mix—something awesome together.

A Spoonful of Sweet Memories
This recipe takes me right back to my Great-Aunt Shirley’s linoleum-floored kitchen in Mississippi. Every December, without fail, her counter would be taken over by a dusting of powdered sugar and little balls of pale pink and white dough. My job, as the official “sugar roller,” was to take the little pieces she’d pinch off and coat them in granulated sugar until they sparkled. I took my job very seriously, mostly because the pay was in stolen bites of dough. The air would be thick with the scent of peppermint and butter, a fragrance that, to this day, is the absolute essence of Christmas for me.
She never wrote the recipe down; it was all in her head and in her hands. It took me years of tweaking and testing to get it just right—that perfect balance of creamy richness and cool peppermint that literally melts on your tongue. Every time I make these, I’m seven years old again, covered in sugar, and listening to Aunt Shirley hum Christmas carols. That’s the power of food, y’all. It’s not just fuel; it’s a time machine. And this recipe? It’s one of my favorite trips.
Gathering Your Minty Marvels
The beauty of this recipe is in its simplicity. You only need a handful of pantry staples to create something truly special. Here’s what you’ll need to gather:
- ½ cup unsalted butter, softened: This is the soul of the “butter mint.” Unsalted lets you control the salt level. Chef’s Insight: Get it truly soft at room temp for 1-2 hours. This makes creaming it effortless and ensures a smooth, not gritty, final texture.
- ¼ cup sweetened condensed milk: This is our secret weapon! It adds a creamy, rich depth and helps bind everything together while keeping the mints irresistibly soft. Sub Tip: In a pinch, you could use heavy cream or full-fat coconut milk, but the condensed milk gives that classic, nostalgic flavor and texture.
- 4 cups powdered sugar (plus extra if needed): The base of our candy. It creates that fine, melt-away texture we’re after. Chef’s Hack: Sift it! I know it’s an extra step, but it prevents lumps and makes for a supremely smooth dough.
- 1 teaspoon peppermint extract: The star of the show! Use a high-quality extract for the best, brightest flavor. Pro Move: Start with ¾ tsp, taste the dough, and add more if you want a stronger kick. It’s easier to add than to subtract!
- Pinch of salt: Don’t you dare skip this! Salt is a flavor enhancer. It cuts the sweetness and makes the butter and peppermint flavors pop beautifully.
- Red food coloring (optional, for swirl or tint): For that classic festive look. Gel food coloring is best as it won’t add extra liquid to your dough.
- Granulated sugar (for rolling): This gives the mints their classic, sparkling crunch and prevents them from sticking together.
Crafting Your Candy Masterpiece: Step-by-Step
Alright, let’s get our hands dirty! This is the fun part. Put on some Christmas tunes, and let’s make some candy.
- Cream the Butter: In a large mixing bowl, beat your softened butter with a hand mixer (or a stand mixer with the paddle attachment) on medium speed for about 1-2 minutes until it’s light, pale yellow, and creamy. You’re incorporating air, which makes the final texture divine. Little Chef Hack: Scrape down the sides of the bowl with a spatula halfway through to make sure everything is evenly mixed.
- Add the Wet Team: To the beautifully creamed butter, add the sweetened condensed milk, peppermint extract, and that all-important pinch of salt. Mix on low speed until everything is just combined. It might look a little curdled at first—that’s totally normal! Just keep mixing until it smooths out.
- Incorporate the Sugar: Now, with your mixer on the lowest possible setting, gradually add the powdered sugar, one cup at a time. Pro Tip Alert! I cover the bowl with a clean kitchen towel for the first minute to avoid a powdered sugar mushroom cloud. Trust me, your kitchen will thank you. Once most of the sugar is incorporated, you can increase the speed slightly. The dough is ready when it pulls away from the sides of the bowl and is soft but not sticky. If it’s still sticky, add more powdered sugar, a tablespoon at a time, until it’s workable with your hands.
- Color & Swirl (Optional): This is where you get creative! Divide the dough if you want to color a portion. Add a drop or two of gel food coloring and knead it in with your hands until the color is uniform. For a cool marbled effect, press a pink and a white piece of dough together, twist gently, and then roll it into a log before pinching off pieces.
- Shape and Sugar: Pinch off small pieces of dough (about a teaspoon-sized amount) and roll them into smooth balls. Then, roll each ball in a small bowl of granulated sugar until it’s completely coated. You can leave them as balls or gently press them with a fork to make classic disc shapes. Family Fun: This is the perfect step to hand off to helpers of all ages!
- The Patience Part: Place your beautiful, sugar-sparkled mints on a baking sheet lined with parchment paper. Let them sit out, uncovered, for about 1 hour to dry slightly. This just helps them firm up on the outside so they don’t stick together when you store them.
How to Serve These Sweet Little Gems
Presentation is part of the fun! These mints are incredibly versatile. For a classic look, pile them high in a beautiful crystal or vintage glass candy dish. They instantly elevate any side table or holiday spread.
Thinking about gifting? They make the most thoughtful homemade present. Layer different colors in a clean mason jar, tie a ribbon around it, and attach a handwritten tag. It’s a gift from the heart that everyone truly appreciates. You can also create a holiday candy platter: arrange these mints alongside some dark chocolate truffles, homemade fudge, and maybe a few store-bought chocolates for a stunning and delicious dessert centerpiece that requires almost no effort.
Mix It Up! Creative Flavor Twists
Once you’ve mastered the classic, why not play around? Here are a few of my favorite ways to mix up this recipe:
- Chocolate Peppermint Swirl: Divide the dough. To one half, add 2 tablespoons of sifted unsweetened cocoa powder along with the powdered sugar. Marble the chocolate and peppermint doughs together for a classic flavor combo.
- Orange-Mint Delight: Replace the peppermint extract with ½ teaspoon peppermint extract and ½ teaspoon orange extract. It’s a surprisingly refreshing and complex combination!
- Lemon Butter Mints: Swap the peppermint for lemon extract and use yellow food coloring. Perfect for a spring party or a burst of sunshine in the winter.
- Vegan-Friendly Version: Use a high-quality vegan butter stick and replace the sweetened condensed milk with full-fat, well-stirred coconut cream. The flavor will be slightly different but still deliciously rich.
- Holiday Sprinkles: Roll the shaped mints in red and green sanding sugar or nonpareils instead of plain granulated sugar for an extra festive crunch.
Jackson’s Chef Notes & Kitchen Stories
This recipe is a testament to the idea that the best things don’t need to be complicated. Over the years, I’ve learned that the key is truly in the texture of the dough. If it’s too sticky, add a bit more sugar. If it’s too dry and crumbly, a tiny, tiny splash of cream or more condensed milk will fix it. Don’t be afraid to get your hands in there and feel the dough—that’s how you learn!
I once made a double batch for a holiday party and, in a hurry, forgot the salt. They were still good, but they were missing that certain *something*. They tasted flat and one-dimensionally sweet. It was a great reminder that even the smallest ingredients play a huge role. Now, I measure my salt into my hand before adding it, just to make sure I never forget it again. Little lessons in a big, sugary kitchen!
FAQs & Quick Fixes
Q: My dough is too sticky! What do I do?
A: No worries! This is common. Just add more powdered sugar, a tablespoon at a time, and knead it in with your hands until the dough is smooth and no longer sticks to your fingers.
Q: Can I use milk instead of sweetened condensed milk?
A: I wouldn’t recommend it. Sweetened condensed milk is thick and sweet, which is crucial for the right texture and flavor. Milk will make the dough too wet and require a ton more sugar, altering the final result. Stick with the condensed milk for the best outcome.
Q: How long do these soft peppermints last, and how should I store them?
A: Store them in an airtight container at room temperature. They will stay perfectly soft and delicious for up to 2 weeks! If you layer them, place a piece of parchment paper between layers so they don’t stick.
Q: Why did my mints turn out gritty?
A: This usually happens if the butter wasn’t fully softened or if the powdered sugar wasn’t sifted. Ensuring your butter is at room temp and taking the time to sift your sugar will guarantee a silky-smooth melt-in-your-mouth texture.

Soft Christmas Peppermints (Old-Fashioned Butter Mints)
- Total Time: 1 hour 10 minutes
- Yield: 30 - 40 mints 1x
Description
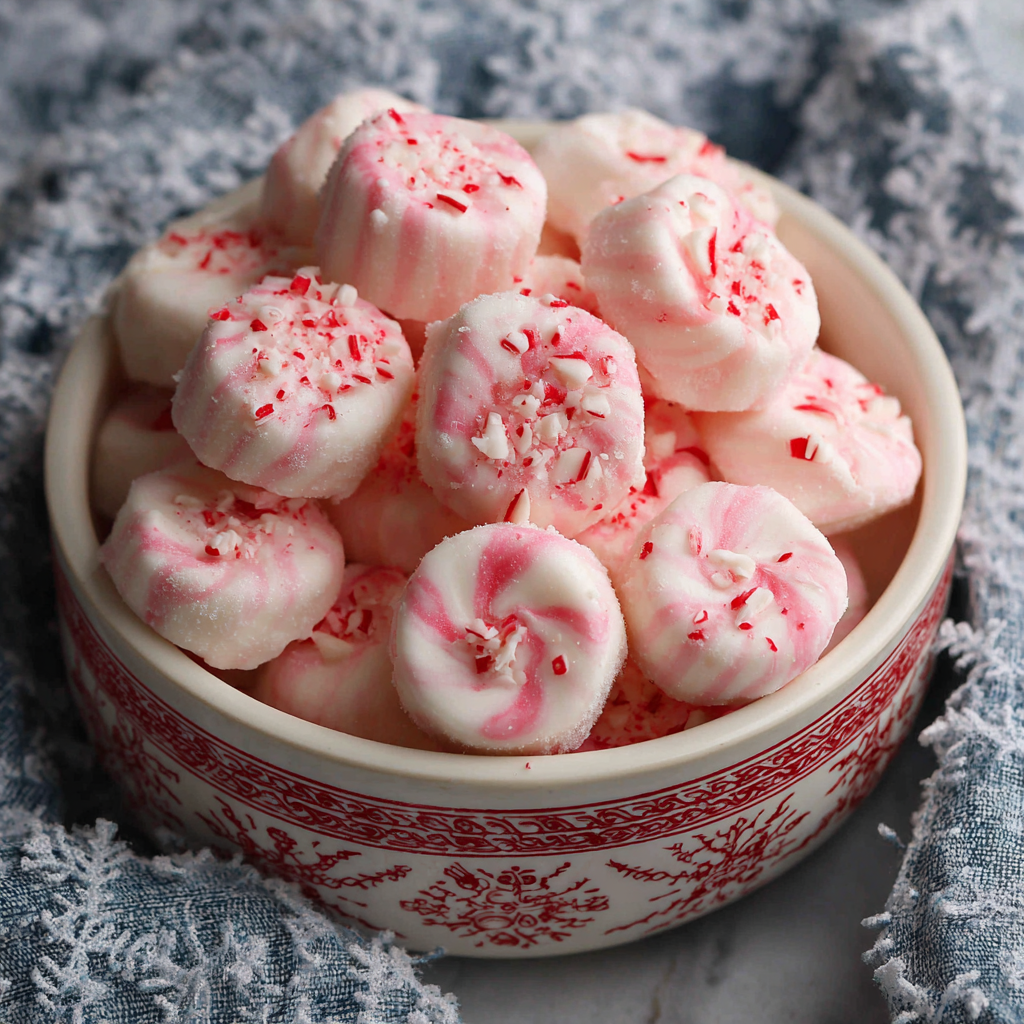
These Soft Christmas Peppermints are a nostalgic holiday delight with a rich, buttery base and a cool peppermint finish. They’re smooth, sweet, and literally melt in your mouth—bringing back memories of candy dishes from Grandma’s house. Whether gifted in a jar or served on a holiday platter, they’re simple, stunning, and totally irresistible.
Ingredients
½ cup unsalted butter, softened
¼ cup sweetened condensed milk
4 cups powdered sugar (plus extra if needed)
1 teaspoon peppermint extract
Pinch of salt
Red food coloring (optional, for swirl or tint)
Granulated sugar (for rolling)
Instructions
In a mixing bowl, beat softened butter until light and creamy.
Add sweetened condensed milk, peppermint extract, and salt. Mix to combine.
Gradually mix in powdered sugar until a soft, non-sticky dough forms. You may need a little extra sugar if it’s too sticky.
If desired, divide dough and tint portions with red food coloring. Swirl together for a festive look.
Roll into small balls or shape into discs. Roll each in granulated sugar for that classic candy sparkle.
Place mints on parchment paper and let air dry for 1 hour to slightly firm up. Store in an airtight container.
- Prep Time: 10 minutes
- Drying Time: 1 hour
Nutrition
- Calories: 55 / Mint
- Sugar: 9g / Mint
- Fat: 2g / Mint
- Carbohydrates: 10g / Mint
Nutritional Information (Approximate)
Alright, let’s keep it real—these are a candy, a treat, a holiday indulgence. They’re meant to be enjoyed in moments of joy! This nutritional info is per mint (based on a batch of 40).
Yield: 30-40 mints
Prep Time: 10 minutes
Drying Time: 1 hour
Total Time: 1 hour 10 minutes
Diet: Vegetarian
Per mint:
Calories: 55 | Fat: 2g | Carbs: 10g | Sugar: 9g | Protein: 0g
Your New Holiday Tradition
And there you have it! Your guide to creating the most delicious, melt-in-your-mouth, memory-filled Soft Christmas Peppermints. This isn’t just a recipe; it’s an invitation to slow down, create something with your hands, and share a piece of sweet, buttery joy with the people you love.
I hope this recipe becomes a part of your holiday hustle, a moment of calm in the chaos, and a new tradition in your home. Remember, cooking—and candy-making—should be fun, a little messy, and always, always full of flavor. So tell me, when you make these, tag me on social @foodmeld! I’d love to see your creations. From my kitchen to yours, happy holidays and happy mixing!
Jackson


