
Your New Favorite No-Bake Treat: Salted Caramel Pretzel Bark
Hey friends, Jackson from Food Meld here. Let’s be real for a second. We’ve all been there. It’s 9 PM, the craving for something good hits hard, but the last thing you want to do is spend an hour baking and cleaning up. Or maybe you’ve got a party tomorrow and you totally blanked on bringing a homemade treat. I see you, I’ve been you, and I’m here to tell you that this Salted Caramel Pretzel Bark is your culinary superhero.
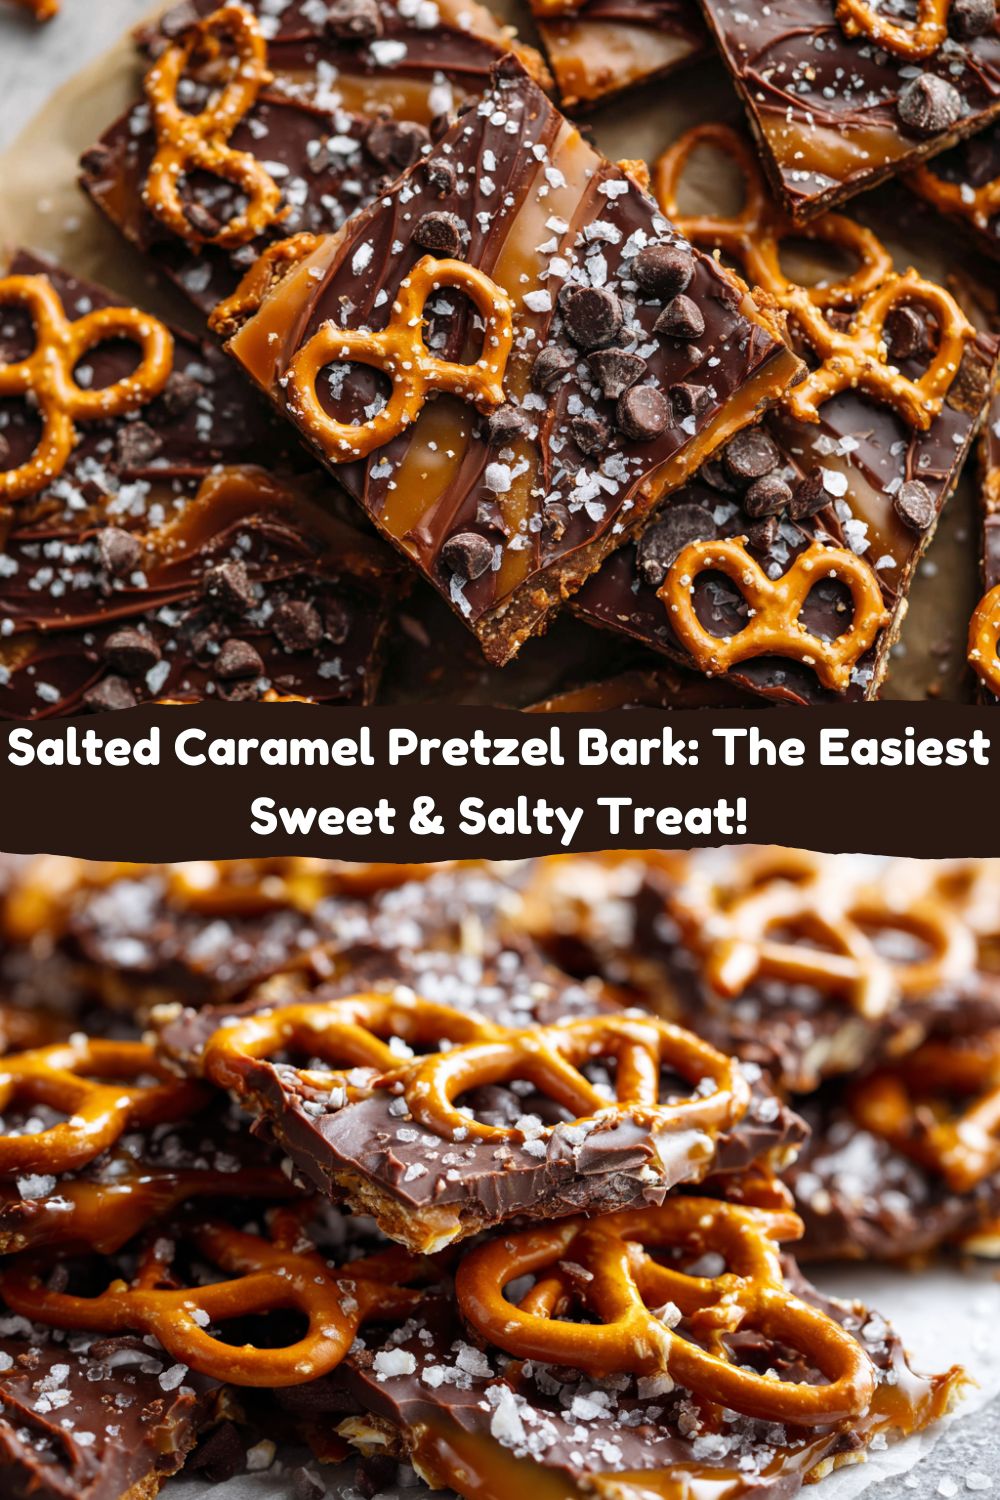
This isn’t just a recipe; it’s a flavor experience. We’re talking a serious party in your mouth where everyone’s invited: the salty, crunchy pretzels, the deep, buttery caramel, the rich, melty chocolate, and that final, glorious sprinkle of flaky sea salt that makes everything pop. It’s the perfect combination of sweet and salty, soft and crunchy, fancy and ridiculously easy. The best part? You probably have most of these ingredients in your pantry right now. No fancy equipment, no complicated techniques—just pure, unadulterated deliciousness. So, grab a saucepan and let’s turn a few simple ingredients into something absolutely unforgettable.
The Kitchen Accident That Started It All
This recipe always takes me back to my first apartment after culinary school. My budget was tight, but my desire to entertain was huge. One night, I was trying to impress a date with homemade caramel candies. Long story short, I got distracted, the caramel got a little too dark, and I panicked. I literally grabbed the nearest things to salvage it: a bag of pretzels and a bar of chocolate from the cupboard. I poured the slightly-toasted caramel over the pretzels, dumped the chocolate on top, and threw the whole messy sheet pan into the freezer while we ordered pizza.
Later that night, we broke into this Frankenstein dessert. It was a revelation! The “mistake” caramel had a deeper flavor, the pretzels gave an amazing crunch, and the chocolate tied it all together. That happy accident became my go-to potluck dish for years, and it eventually evolved into this perfected bark. It’s a reminder that some of the best things in life (and in the kitchen) aren’t perfect—they’re just perfectly delicious.
Gathering Your Flavor Squad
Here’s the beautiful shortlist of everything you’ll need. This is where the magic starts!
- 2 cups mini pretzels: The salty, crunchy foundation. I like the minis because they create a more even layer, but feel free to break up standard pretzels if that’s what you have! Chef’s Insight: Stale pretzels work perfectly here, so it’s a great way to use up that last bit in the bag.
- 1 cup (2 sticks) unsalted butter: For a rich, luxurious caramel. Using unsalted lets us control the salt level perfectly. Substitution Tip: If you only have salted butter, that’s okay! Just reduce or omit the flaky sea salt at the end to avoid over-salting.
- 1 cup packed light brown sugar: Pack it down firmly in your measuring cup! The molasses in brown sugar gives the caramel its classic, warm flavor and chewy texture. Substitution Tip: Dark brown sugar will work in a pinch and will give you an even deeper, more molasses-forward caramel.
- 12 oz semi-sweet chocolate chips: The classic choice. They melt beautifully and provide a bitter-sweet balance to the sweet caramel. Chef’s Insight: Don’t limit yourself! This is your canvas. Milk chocolate will make it sweeter, and dark chocolate will make it more sophisticated.
- Flaky sea salt (like Maldon): The “it” factor. This isn’t just regular salt; the delicate flakes provide little bursts of salinity that elevate every single bite. Do not skip this!
Let’s Build Some Bark: Your Step-by-Step Guide
Follow these steps, and you really can’t go wrong. I’ve sprinkled in my best hacks to make you look like a pro.
Step 1: Prep Your Pan & Preheat
Preheat your oven to 350°F (175°C). Now, grab a standard-sized baking sheet (around 13×18 inches) and line it with parchment paper. Not foil, not wax paper—parchment paper. This is non-negotiable for easy cleanup and release. Give the paper a very light spritz of cooking spray for extra insurance. Arrange your mini pretzels in a single, even layer covering the entire bottom of the pan. It’s okay if they overlap a tiny bit; we’re going for full coverage.
Step 2: Create the Golden Caramel
In a medium saucepan, combine your unsalted butter and packed brown sugar. Place it over medium heat and start stirring. I like to use a whisk here to help break up the sugar clumps. Bring the mixture to a boil. Once it’s bubbling all over, set a timer and let it boil for exactly 3-4 minutes, stirring constantly. You’ll see it transform from grainy to smooth and thicken slightly. This is your caramel! It should be a beautiful golden-brown color and smell incredible. Chef’s Hack: Don’t walk away! Caramel can go from perfect to burnt in seconds.
Step 3: The Caramel Pour & Bake
Immediately and carefully pour the hot caramel over your pretzel layer. Work quickly to spread it into an even layer using an offset spatula or the back of a spoon. It might shift the pretzels a bit, and that’s totally fine. Pop the whole sheet into your preheated oven and bake for 5 minutes. This step helps the caramel set and bind everything together.
Step 4: The Chocolate Blanket
Pull the hot pan out of the oven (oven mitts, please!). Immediately sprinkle the entire bag of chocolate chips evenly over the bubbling caramel. Now, walk away. Seriously, let it sit for 2-3 minutes. The residual heat will melt the chocolate perfectly. After it’s had a minute to relax, use a clean offset spatula or the back of a spoon to gently spread the now-melted chocolate into a smooth, gorgeous layer.
Step 5: The Salty Finale & Chill
Right after you spread the chocolate, while it’s still warm and shiny, generously sprinkle that flaky sea salt all over the top. This is where the magic happens! Now, transfer the entire pan to your refrigerator. Let it chill for at least 30 minutes, or until the chocolate is completely firm. Chef’s Hack: For a super-clean break, score the bark lightly with a knife after about 10 minutes in the fridge, before it gets rock hard.
Step 6: Break It Up!
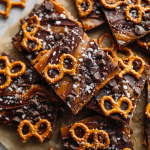
Once it’s fully set, grab the edges of the parchment paper and lift the entire sheet of bark out of the pan. Place it on a cutting board and break it into rustic, uneven pieces with your hands. Alternatively, use a knife to cut it into neat squares. Your choice! The messy break feels more authentic to me.
How to Serve This Masterpiece
This bark is a star all on its own, but a little presentation goes a long way. Pile the pieces high on a beautiful wooden board or a sleek white platter to really show off those layers. It’s the ultimate shareable dessert for game day, holidays, or a girls’ night in. For gifting, grab some clear cellophane bags, tie them with a cute ribbon, and you’ve got a heartfelt, homemade present that beats anything from a mall. It pairs amazingly with a cold glass of milk, a bold cup of coffee, or even a nice dessert wine. Honestly, I’ve been known to eat it straight from the fridge at midnight, no plate required. No judgment here.
Make It Your Own: Creative Twists
The fun doesn’t stop with the classic recipe. Here are a few of my favorite ways to mix it up:
- The Nutty Professor: Sprinkle a 1/2 cup of chopped pecans, walnuts, or peanuts over the caramel layer right before you add the chocolate. The extra toastiness is incredible.
- Peanut Butter Cup: Swirl 1/4 cup of melted peanut butter into the melted chocolate before you spread it. Thank me later.
- The Candy Craver: After spreading the chocolate, press in a handful of crushed toffee bits, mini M&Ms, or even crushed potato chips for an extra salty kick!
- White Chocolate Wonderland: Swap the semi-sweet chips for white chocolate and use a coarse black lava salt for a stunning and delicious contrast.
- Vegan-Friendly Swap: Use vegan butter and a high-quality dairy-free chocolate chip. The recipe works like a charm!
Jackson’s Chef Notes & Kitchen Stories
This recipe is a living thing in my kitchen. I’ve made it in a blizzard when the power was out using a gas stove and a flashlight (true story). I’ve made it with my niece, who is a champion pretzel arranger. The biggest evolution was learning the scoring trick. I used to just whack the chilled bark on the counter, sending chocolate shards flying everywhere. My dog loved it, but my kitchen floor did not. Scoring it lightly while it’s still slightly soft gives you much more control over the size of your pieces. Also, a little caramel on your spoon is the cook’ treat. That’s just a rule.
FAQs: Your Questions, Answered
Q: My caramel turned out grainy. What did I do wrong?
A: Graininess usually means the sugar didn’t fully dissolve. Next time, make sure you’re stirring constantly as the butter and sugar melt together before it comes to a boil. Once it boils, keep stirring for the full 3-4 minutes to ensure everything is perfectly incorporated.
Q: Can I use dark corn syrup instead of brown sugar?
A: I don’t recommend it. Brown sugar is essential for that classic caramel flavor and chewy texture. Corn syrup will make it chewy but won’t provide the same deep, molasses-like taste.
Q: How do I store this, and how long does it last?
A: Keep it in an airtight container in the refrigerator. It will stay perfectly delicious for up to 2 weeks… if it lasts that long! The cold also keeps the bark nice and snappy.
Q: My chocolate seized when I tried to spread it. Help!
A: This usually happens if the caramel layer is too hot. If you pull the pan out and the caramel is still bubbling violently, give it just a minute before sprinking the chocolate chips. The residual heat is plenty to melt them.
Salted Caramel Pretzel Bark
- Total Time: 50 minutes
- Yield: ~20 pieces
Description
This Salted Caramel Pretzel Bark is the perfect combo of sweet, salty, crunchy, and gooey. With layers of crisp pretzels, buttery caramel, rich chocolate, and a sprinkle of flaky sea salt, it’s a no-fuss holiday favorite that disappears fast. Perfect for parties, gifts, or a midnight snack.
Ingredients
2 cups mini pretzels
1 cup unsalted butter
1 cup brown sugar
12 oz semi-sweet chocolate chips
Flaky sea salt
Instructions
Preheat oven to 350°F and line a baking sheet with parchment.
Arrange pretzels in a single layer to cover the sheet.
In a saucepan, melt butter and brown sugar over medium heat. Bring to a boil and stir for 3–4 minutes until thickened.
Pour hot caramel over the pretzels and spread evenly.
Bake for 5 minutes. Remove from oven and immediately sprinkle chocolate chips over the top.
Let sit for 1–2 minutes to melt, then spread the chocolate evenly.
Sprinkle with sea salt. Chill for 30 minutes, then break into pieces.
- Prep Time: 10 minutes
- Chill Time: 30 minutes
- Cook Time: 10 minutes
Nutrition
- Calories: 190 / Piece
- Sugar: 17g / Piece
- Sodium: 140mg / Piece
- Fat: 11g / Piece
- Carbohydrates: 24g / Piece
- Protein: 1g / Piece
Nutritional Information*
Okay, let’s keep it real. This is a dessert, meant to be enjoyed in all its indulgent glory. But for those who are curious, here’s a rough breakdown per piece (assuming you get about 20 pieces from the batch).
- Calories: 190
- Total Fat: 11g
- Carbohydrates: 24g
- Sugar: 17g
- Protein: 1g
- Sodium: 140mg
*Please note: This is an estimate based on the specific ingredients I used. Values can vary depending on your brands and any substitutions you make.
Final Thoughts
And that’s it, folks! You’re now armed and ready to create the easiest, most crowd-pleasing dessert on the planet. This Salted Caramel Pretzel Bark is more than just a recipe; it’s a reminder that cooking should be fun, flexible, and full of flavor. It’s about taking simple things and turning them into something special. I hope this recipe becomes a staple in your home, creating its own messy, delicious memories. Now, I wanna see your creations! Tag me on Instagram @FoodMeld with your bark photos. Let’s cook something awesome together!


