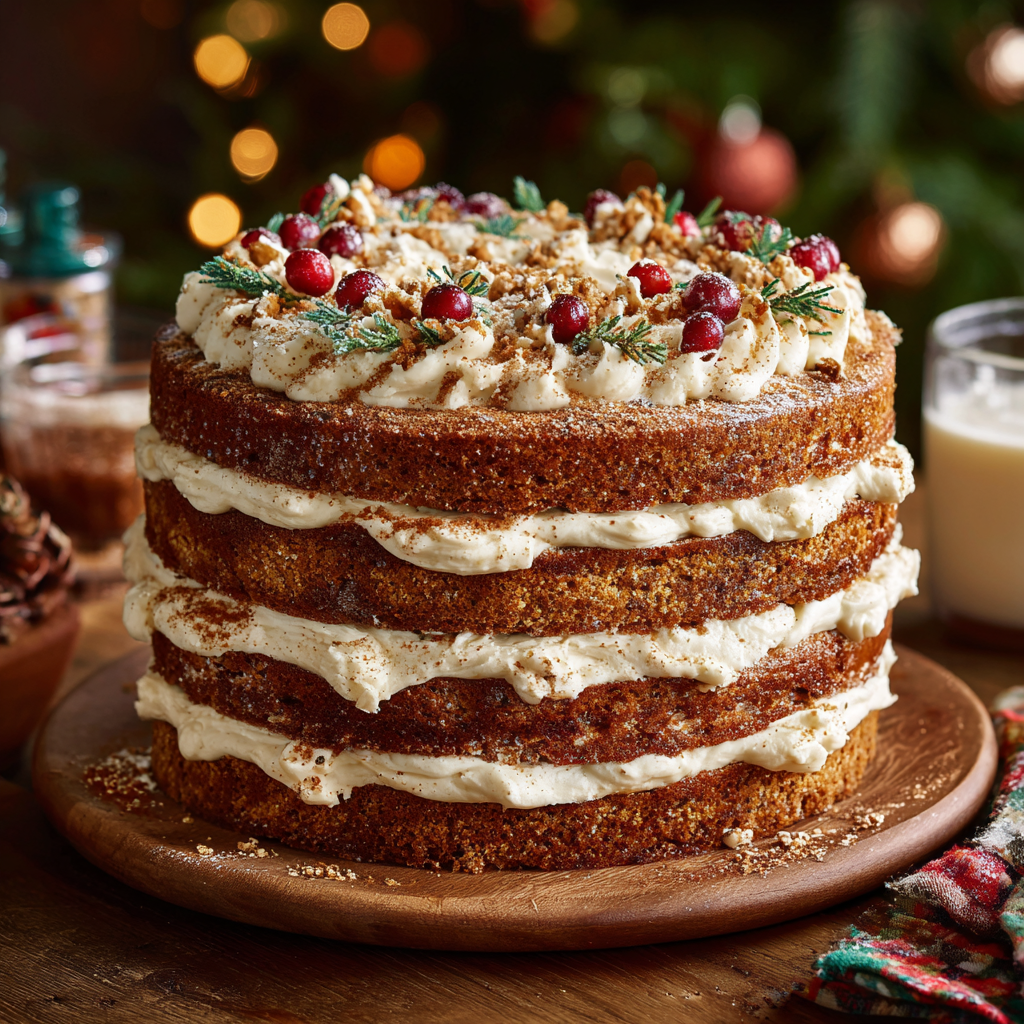
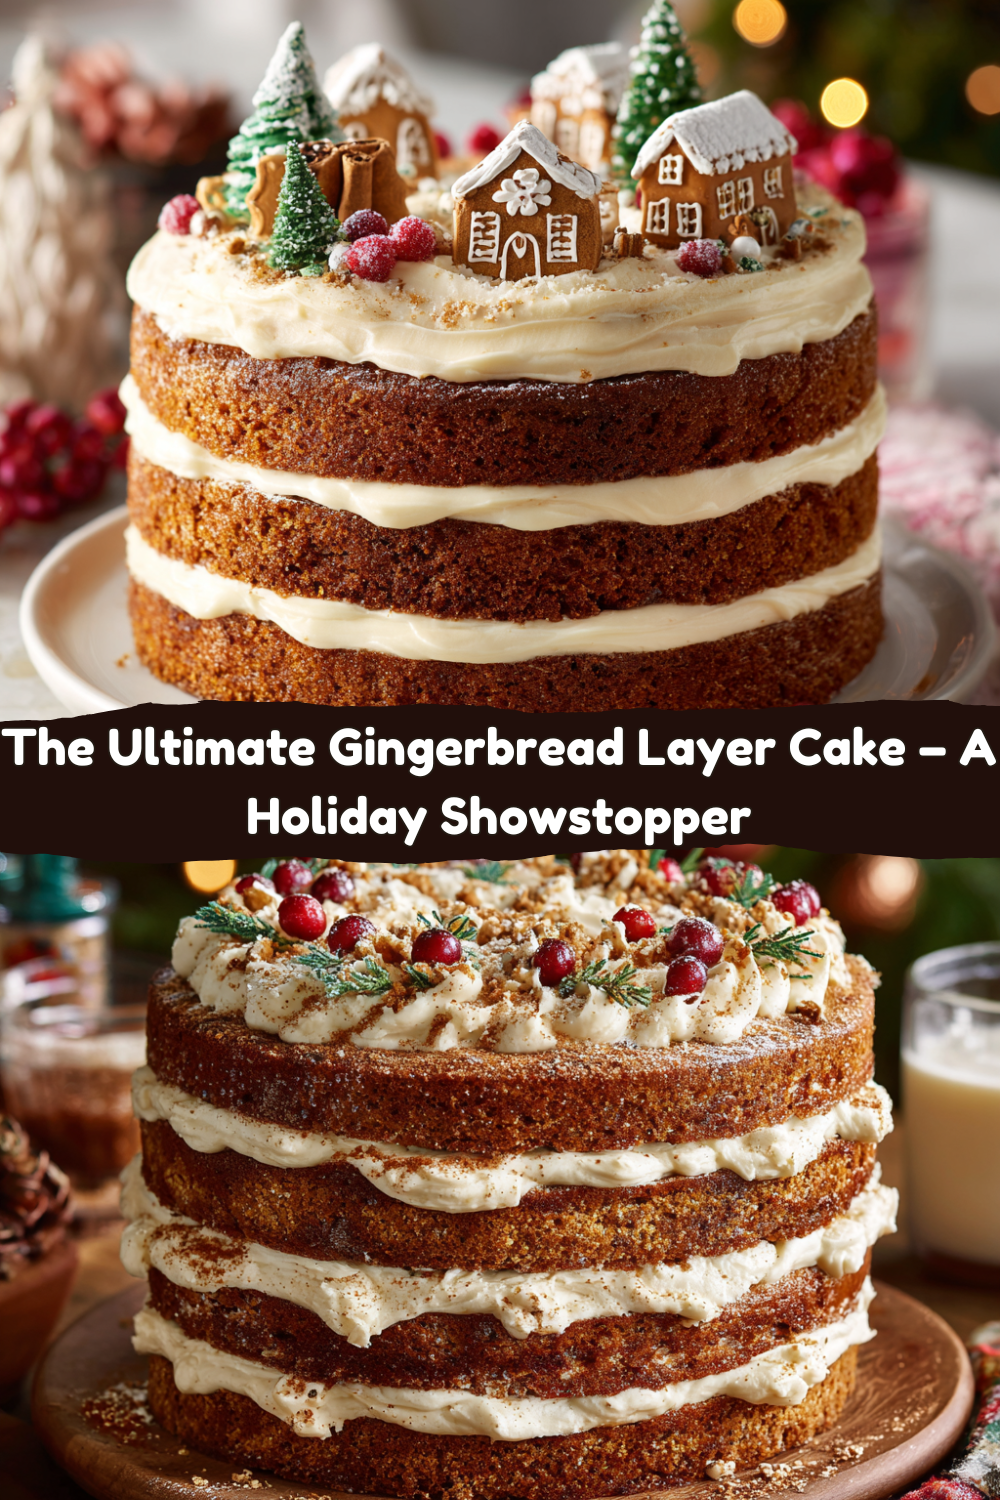
Your New Holiday Showstopper: The Ultimate Gingerbread Layer Cake
Hey friends, Jackson from Food Meld here. Let’s talk about the star of the holiday table. You know the one. It’s not just a dessert; it’s a mood. It’s the cake that makes the whole house smell like a cozy, spiced-up hug. It’s the slice everyone quietly hopes there’s leftover of. I’m talking about a Gingerbread Layer Cake, but not just any gingerbread cake—this is the ultimate version. We’re talking tall, incredibly moist, and packed with all the warm, spicy, deeply molasses-kissed flavor you crave. And then we smother it in a cloud of cinnamon-spiked cream cheese frosting that’s so good, you might just catch someone sneaking a spoonful straight from the bowl (no judgment here, I’ve been that someone). This isn’t a shy, humble cake. This is a centerpiece, a conversation starter, the kind of bake that has people asking for the recipe before they’ve even finished their first bite. So, preheat those ovens, grab your favorite mixing bowl, and let’s cook something awesome together.
The Cake That Started It All
This cake recipe? It has roots. Deep, nostalgic, slightly messy roots in my grandma’s kitchen. Every December, she’d bake her famous gingerbread, but it was a single, dense loaf, served warm with a dollop of whipped cream. I loved it, but my young, ambitious brain always thought, “What if we tried this?” What if we made it taller, layered it, and turned it into a full-blown celebration cake? One particularly snowy year, I decided to experiment. I took her core flavors—the molasses, the ginger, the cloves—and scaled them up, way up. I remember the chaos: flour on the ceiling, a molasses spill that I’m still finding traces of, and a kitchen that smelled like pure magic. The result was a lopsided, generously frosted tower of spiced cake that was an instant hit. It’s evolved since then (thankfully, it’s less lopsided), but that spirit of “what if?” and the memory of my grandma’s approving smile is baked right into every single layer. It’s my holiday tradition now, and I’m so excited to share it with you.
Gathering Your Flavor Arsenal
Here’s everything you’ll need to build this flavor masterpiece. Don’t be intimidated by the list—a lot of this is pantry stuff, and I’ve got plenty of tips to make it work for you.
For the Gingerbread Cake Layers:
- 6 cups all-purpose flour: The sturdy foundation of our cake. For a slightly lighter crumb, you can swap 2 cups for cake flour.
- 3 cups granulated sugar & 2½ cups dark brown sugar: The white sugar adds sweetness and structure, while the dark brown sugar brings that deep, almost caramel-like molasses flavor and moisture. Light brown sugar works in a pinch, but dark is best!
- 4 Tbsp ground ginger, 2 Tbsp cinnamon, 1 tsp ground cloves: The holy trinity of gingerbread spice. Feel the love! For a real kick, add ½ tsp of black pepper—it’s a chef’s secret that makes the spice flavors pop.
- 5 tsp baking powder, 2 tsp salt: Baking powder is our leavening lift-off. Salt is non-negotiable—it balances all the sweetness and enhances every other flavor in the bowl.
- 1 tsp nutmeg (optional), 2 Tbsp orange zest (optional): My “creative twist.” The nutmeg adds warmth, and the orange zest introduces a bright, citrusy note that cuts through the richness beautifully.
- 1 cup unsalted butter, softened: For richness and that classic tender cake texture. Salted butter works too, just maybe ease back on the added salt a tiny bit.
- 8 large egg whites (or 2 cups carton whites): Using whites instead of whole eggs gives us a lighter, brighter crumb and a gorgeous pale color that lets the molasses and spices shine.
- 3 cups sour cream: The SECRET WEAPON for unbelievable moisture. Full-fat Greek yogurt is a great substitute if that’s what you have.
- 1 cup vegetable oil: Another moisture MVP. It ensures this cake stays soft and delicious for days.
- ½ cup molasses: The soul of the gingerbread. Use robust or dark molasses for the most intense flavor.
- 2 tsp vanilla extract: The flavor booster that ties everything together.
For the Cinnamon Cream Cheese Frosting:
- 4 cups (8 sticks) unsalted butter, softened: Yes, it’s a lot. This is a big, beautiful cake! It makes the frosting light, fluffy, and perfectly spreadable.
- 2 cups (16 oz) full-fat cream cheese, chilled: Use it cold right from the fridge. It helps keep the frosting stable and prevents it from getting too soft.
- 2 Tbsp vanilla extract, 1 tsp salt: Vanilla for aroma, salt to balance the insane sweetness of the powdered sugar.
- 20 cups powdered sugar: I know it looks wild, but trust the process. We’ll add it slowly.
- ⅔ cup heavy cream: For thinning the frosting to the perfect, silky consistency.
- 1 tsp cinnamon (optional): A little extra spice in the frosting? Always a yes.
- Red or brown food coloring (optional): For a festive touch! A swirl of red or a tan hue makes it look extra special.
Let’s Build This Beauty: Step-by-Step
Okay, team. Let’s get mixing. Read through these steps first—it’s like a little kitchen roadmap to success.
- Preheat & Prep: Fire up your oven to 350°F (175°C). This is non-negotiable for even baking. Now, grab your four 8-inch round cake pans. Grease the living daylights out of them with butter or non-stick spray, then line the bottoms with parchment paper rounds. This double insurance policy guarantees your cakes will release like a dream. Trust me on this.
- Combine the Dry Goods: In a seriously large bowl—I’m talking your biggest mixing bowl—whisk together the flour, both sugars, ginger, cinnamon, cloves, baking powder, salt, and (if using) nutmeg. Whisk it all until it’s one uniform, fragrant mixture. No one wants a pocket of plain flour in their slice! Take a deep breath. Smells like the holidays, right?
- Mix the Wet Team: In another large bowl (told you we were going big), combine the softened butter, egg whites, sour cream, vegetable oil, molasses, and vanilla. If you’re using the orange zest, throw it in here! Use an electric hand mixer or a stand mixer with the paddle attachment to beat this on medium speed until it’s mostly smooth. It might look a little curdled because of the butter, but that’s A-okay. We’re about to bring it all together.
- The Grand Meld: Here’s the key: gradually add the dry ingredients to the wet ingredients. I do it in about three additions, mixing on low speed after each until just combined. The second you see no more dry flour, STOP MIXING. Over-mixing is the enemy of a tender cake—it develops gluten and makes things tough. We want fluffy and soft. A few little lumps are perfectly fine.
- Divide and Conquer: This is where a kitchen scale is your best friend for perfectly even layers. No scale? Spoon the batter equally into your four prepared pans. Use a spatula to smooth the tops so they bake evenly.
- Bake to Perfection: Slide those pans into your preheated oven and bake for 32-35 minutes. Rotate the pans halfway through for even browning. You’ll know they’re done when the tops are springy to the touch and a toothpick inserted into the center comes out with a few moist crumbs (not wet batter).
- The Cool Down: This is the hardest part: patience. Let the cakes cool in their pans for about 15-20 minutes. Then, run a knife around the edge, invert them onto a wire rack, and peel off the parchment paper. Let them cool completely, and I mean completely, before you even think about frosting. A warm cake will melt your frosting into a sad puddle.
- Make the Frosting: While the cakes cool, let’s make that glorious frosting. In your stand mixer with the paddle attachment, beat the softened butter on medium-high speed for a good 3-4 minutes until it’s pale and super fluffy. Add the cold cream cheese and beat for another minute until combined. Add the vanilla and salt. Now, with the mixer on low, gradually add the powdered sugar. Once it’s all in, pour in the heavy cream and optional cinnamon. Now, turn the mixer to medium-high and beat for a full 2-3 minutes. Watch it transform into a light, whipped, spreadable dream. If using food coloring, add it now and mix until combined.
- Frost & Stack: Place your first cake layer on a plate or cake stand. Dollop a generous amount of frosting on top and spread it evenly to the edges. Repeat with the remaining layers. Once stacked, apply a thin “crumb coat” of frosting all over the cake. Pop it in the fridge for 15 minutes to set. This traps any loose crumbs. Then, pile on the rest of the frosting and swirl it into beautiful peaks and waves. Have fun with it!
- Chill Out: For the cleanest slices, refrigerate the whole frosted cake for at least 30 minutes (or up to an hour) before serving. This sets the frosting and makes slicing a breeze.
How to Serve This Masterpiece
This cake is a star all on its own, but a little styling goes a long way. For a classic look, I use an offset spatula to create smooth sides and a beautiful swirled top. For a more rustic, “I’m a cool chef” vibe, use the back of a spoon to create big, dramatic waves in the frosting. Garnish is everything! A simple crown of crushed gingerbread cookies, a dusting of cinnamon, a few curls of orange zest, or even a ring of sugared cranberries around the base makes it look straight out of a magazine. Slice it with a sharp knife that you dip in hot water and wipe dry between cuts for those pristine, perfect layers in every serving.
Mix It Up: Creative Twists
This recipe is your canvas. Here’s how to make it yours:
- Chocolate Swirl: Add 1 cup of melted and cooled dark chocolate to one cup of your batter. Layer it with the plain batter in the pans for a marbled effect.
- Boozy & Bold: Soak the cooled cake layers with a simple syrup made from ½ cup water, ¼ cup sugar, and 2 tablespoons of bourbon or dark rum before frosting.
- Fruity Fusion: Spread a thin layer of tart raspberry or apricot jam between the cake layers along with the frosting for a sweet-and-spicy surprise.
- Cupcake Crew: Turn this into about 48 cupcakes! Line muffin tins, fill cups 2/3 full, and bake for 18-22 minutes. Frost and decorate each one individually.
- Dairy-Free Delight: Use plant-based butter and cream cheese, coconut yogurt instead of sour cream, and a oat or coconut milk instead of heavy cream. The spice will still carry the day!
Jackson’s Chef Notes
This recipe has evolved from that first lopsided experiment. The biggest game-changer was using egg whites instead of whole eggs—it made the cake so much lighter and let the molasses flavor really stand front and center. The orange zest was a happy accident; I zested an orange over the bowl and some fell in, and it was a revelation. The funniest disaster? I once forgot the baking powder. Let’s just say we had four very expensive, very dense gingerbread frisbees. We crumbled them up and made parfaits with the frosting and called it a “deconstructed cake.” No bake is ever a true failure if you’re willing to get creative!
FAQs & Troubleshooting
Q: My cake is dense. What happened?
A: The most common culprits are over-mixing the batter (which develops too much gluten) or old baking powder. Make sure your leavener is fresh and mix until the ingredients are *just* combined.
Q: Can I make this ahead of time?
A: Absolutely! The baked, cooled, and unfrosted cake layers wrap tightly in plastic wrap and freeze beautifully for up to 2 months. Thaw in the fridge overnight before frosting. The frosted cake keeps wonderfully in the fridge for up to 5 days.
Q: My frosting is too runny! Help!
A: This usually happens if the butter or cream cheese was too warm. Pop the whole bowl of frosting into the fridge for 20-30 minutes to firm up, then re-whip it. If it’s still soft, you can carefully add a little more powdered sugar.
Q: I don’t have four 8-inch pans. Can I still make it?
A> Yes! You can bake the batter in two 9×13-inch pans for a sheet cake, or even in a bundt pan (just be sure to grease it EXTREMELY well). The baking time will need to be adjusted; start checking for doneness around the 45-minute mark.
Ultimate Gingerbread Layer Cake
- Total Time: 1 hour 5 minutes
- Yield: 48 1x
Description
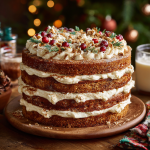
This tall, warmly spiced gingerbread cake is made for holiday centerpieces—rich, moist, and layered with cinnamon-kissed cream cheese frosting. We doubled the batch for party-perfect servings and added citrus and spice for a festive twist.
Ingredients
Cake Layers:
6 cups flour
3 cups granulated sugar
2½ cups dark brown sugar
4 Tbsp ground ginger
2 Tbsp cinnamon, 1 tsp cloves
5 tsp baking powder, 2 tsp salt
1 tsp nutmeg (optional), 2 Tbsp orange zest (optional)
1 cup unsalted butter
8 egg whites (or 2 cups carton whites)
3 cups sour cream
1 cup vegetable oil
½ cup molasses
2 tsp vanilla
Frosting:
4 cups butter
2 cups cream cheese
2 Tbsp vanilla, 1 tsp salt
20 cups powdered sugar
⅔ cup heavy cream
1 tsp cinnamon (optional)
Red/brown food coloring (optional)
- Prep Time: 30 minutes
- Cook Time: 30 minutes
Nutrition
- Calories: 671 / Slice
- Sugar: 55g / Slice
- Sodium: 260mg / Slice
- Fat: 38g / Slice
- Saturated Fat: 23g / Slice
- Carbohydrates: 78g / Slice
- Protein: 4g / Slice
Nutritional Information*
Per Serving (1 slice):
Calories: 671 | Total Fat: 38g | Saturated Fat: 23g | Cholesterol: 100mg | Sodium: 260mg | Total Carbohydrates: 78g | Dietary Fiber: 1g | Sugars: 55g | Protein: 4g
*Please note: This is an estimated nutritional breakdown provided by an online calculator. It will vary based on specific brands and exact quantities used. This is a rich, celebratory dessert meant to be enjoyed in moderation as part of a balanced diet.
Final Thoughts
There you have it, friends. The Ultimate Gingerbread Layer Cake. It might look like a project, but I promise, every single step is worth it. This cake is more than just sugar and spice; it’s a labor of love, a centerpiece for your celebrations, and a guaranteed way to make some new delicious memories. Don’t stress about it being perfect. Embrace the messy, fun process. Lick the spoon, get frosting on your nose, and enjoy the incredible smell that will fill your kitchen. I can’t wait for you to try it. When you do, tag me @FoodMeld—I love seeing your creations! Now, let’s go cook something awesome.
Happy Baking,
Jackson