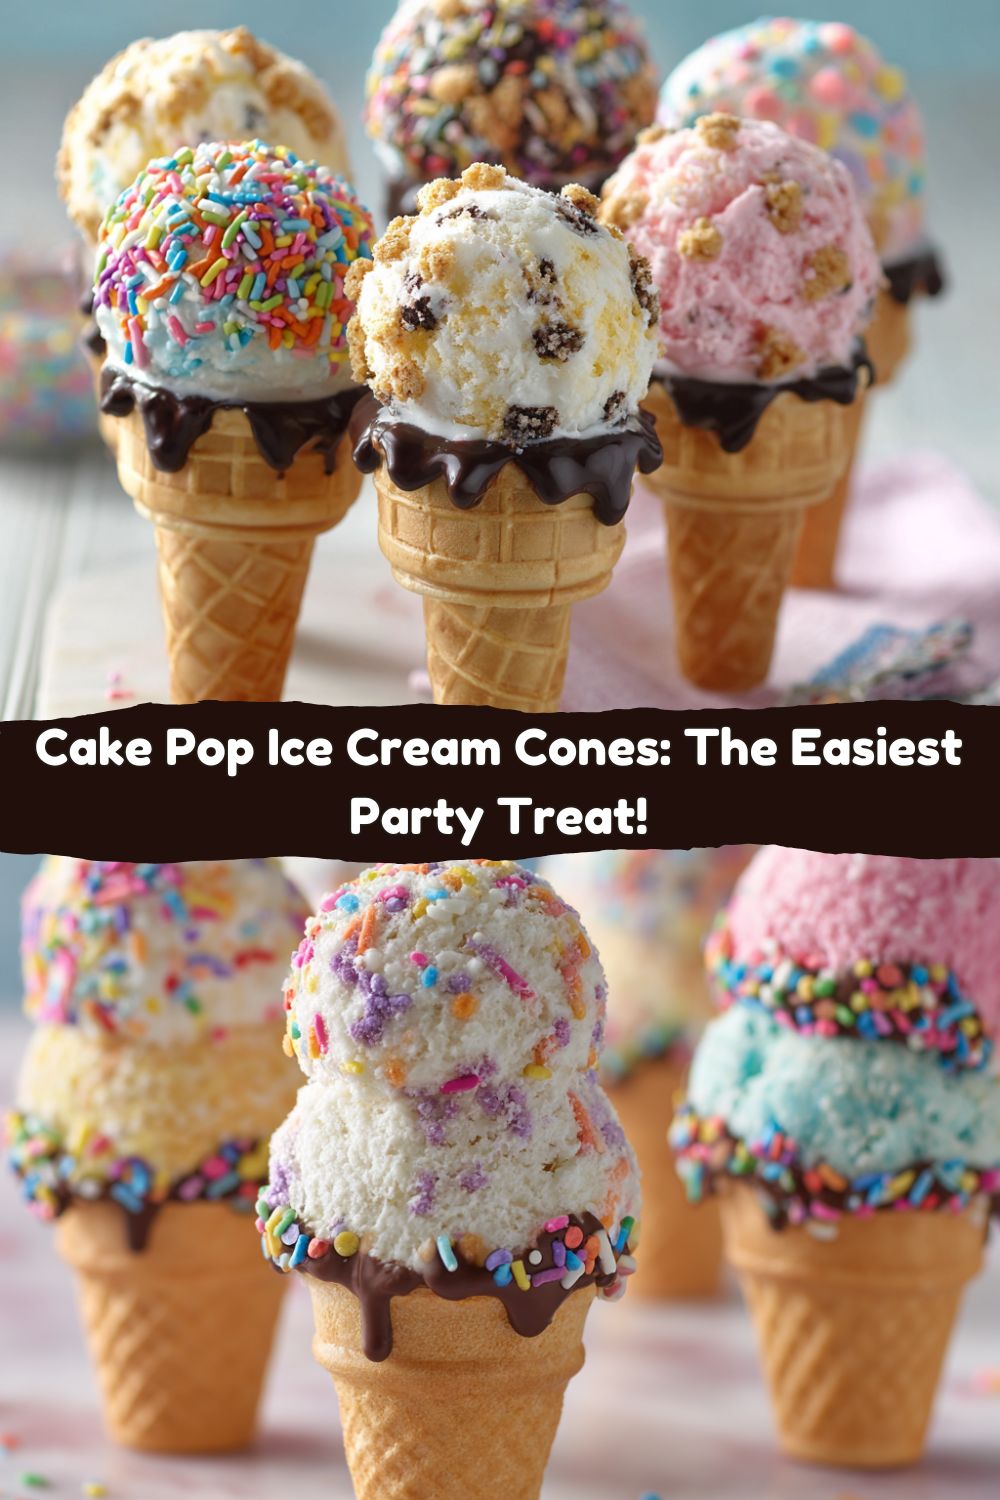
Let’s Make Some Magic: Cake Pop Ice Cream Cones!
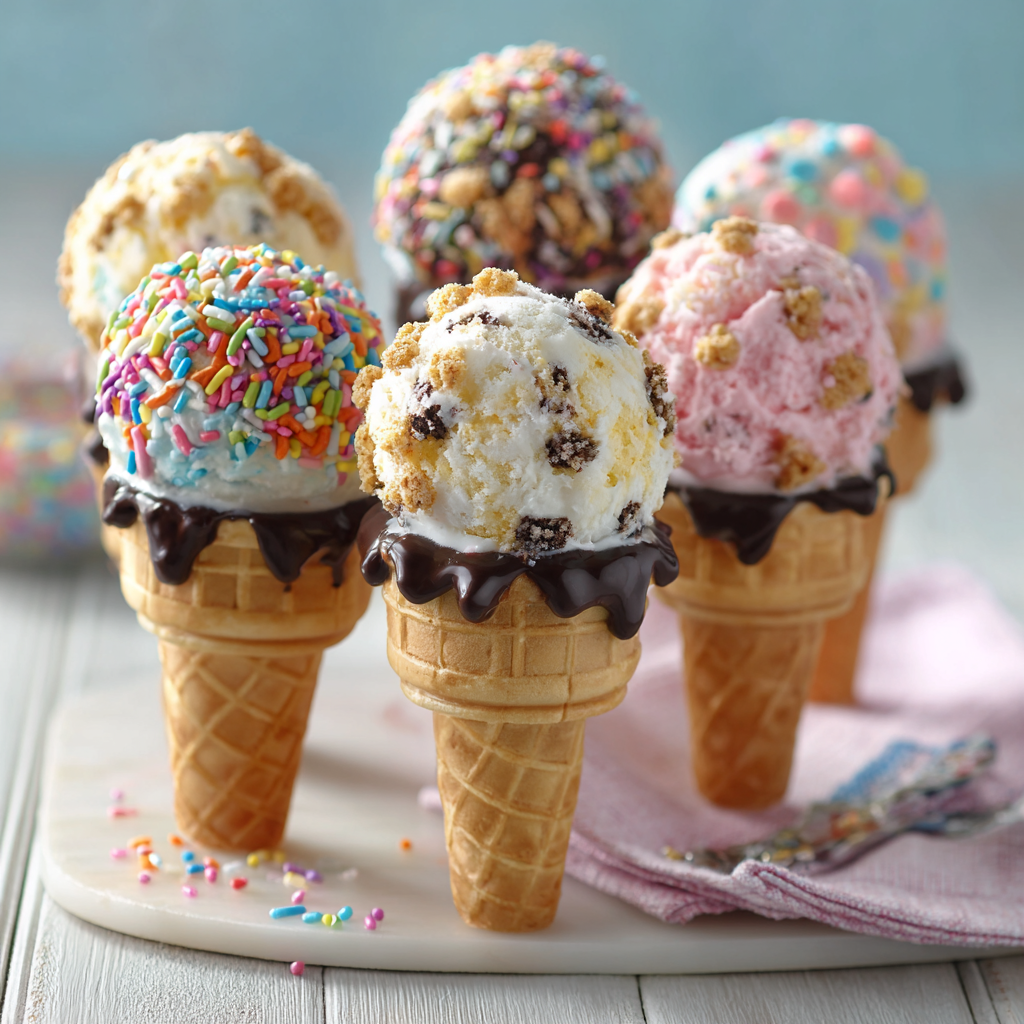
Hey there, Food Meld family! Jackson here, coming at you from a kitchen that currently smells like a happy mix of vanilla cake and melting chocolate. If you’ve been scrolling through social media lately, you’ve probably seen them—those utterly adorable, almost-too-cute-to-eat treats that look like a tiny scoop of ice cream perched perfectly on a cone. I’m talking about Cake Pop Ice Cream Cones, and let me tell you, they are every bit as fun to make as they are to devour.
I’m a huge believer that the best recipes are the ones that bring people together, that spark a little joy, and that don’t require a culinary degree to pull off. These little guys are the absolute trifecta. They’re the star of the birthday party, the showstopper at the bake sale, and the secret weapon for when you want to see your kids’ (or your partner’s!) eyes light up. They combine the soft, familiar comfort of cake with the playful, festive energy of an ice cream cone, all dipped in a glorious shell of chocolate and sprinkles. So, are you ready to roll up your sleeves, make a little happy mess, and create something unforgettable? I knew you were. Let’s get mixing!
A Sweet Slice of Nostalgia
This recipe takes me right back to my grandma’s kitchen table. She wasn’t a fancy pastry chef; she was a “measure with your heart” kind of cook. Her signature move was taking a simple boxed cake mix and turning it into something magical. One sweltering summer afternoon, trying to keep my cousins and me entertained, she had a brilliant idea. Instead of baking a whole sheet cake, she crumbled a leftover chocolate cake, mixed it with some strawberry frosting, and let us roll it into messy, lopsided balls. We didn’t have sticks, so we just ate them with our hands, laughing as chocolate smeared across our cheeks. They were our secret “cake truffles.”
These cake pop cones are the evolved, party-ready version of my grandma’s kitchen hack. They capture that same spirit of playful improvisation—that “what if we tried this?” energy I love so much. By popping them on a cone, we’re not just making a treat; we’re creating an experience. It’s a little nod to the past and a big, delicious high-five to the present. Every time I make them, I can’t help but smile, thinking about her and that simple, joyful mess. Now, let’s create some new memories in your kitchen.
Gathering Your Flavor Party
Here’s the beautiful part: you don’t need a ton of fancy ingredients to make these showstoppers. This is about creativity and convenience. Here’s what you’ll need to gather:
- 1 box cake mix (any flavor) – This is our brilliant shortcut. I’m using classic vanilla today to be a perfect canvas for colors, but chocolate, funfetti, or strawberry are all awesome choices. Chef’s Insight: Bake the cake a day ahead to save time! A cool cake is much easier to crumble.
- Ingredients listed on the cake mix box – Usually eggs, oil, and water. We’re playing by the box’s rules for this first step.
- ½ cup frosting (store-bought or homemade) – This is the “glue” that holds our cake pops together. Cream cheese frosting is my MVP for vanilla or red velvet cakes, while chocolate frosting is a no-brainer for a chocolate base. Substitution Tip: If you’re watching sugar, you can slightly reduce this or use a whipped cream cheese for a tangier, less sweet bind.
- 20 mini ice cream cones – The all-important base! You can find these in the ice cream aisle at most grocery stores.
- 10 oz candy melts or chocolate coating – This is key for that signature smooth, hard shell. Candy melts (like Wilton or Candy Melts) come in every color under the sun and are designed to melt smoothly. Substitution Tip: You can absolutely use high-quality chocolate chips mixed with a teaspoon of coconut oil to help it thin out for dipping.
- Sprinkles, crushed cookies, or mini candies for topping – This is where your personality shines! Rainbow jimmies, sanding sugar, crushed Oreos, or even tiny M&Ms make for incredible texture and flavor.
Let’s Build Some Cones: A Step-by-Step Guide
Okay, team! Let’s do this. Read through all the steps first—it’s like reading a map before a road trip. It makes the journey so much smoother.
Step 1: Bake & Crumble
First, bake your cake according to the package directions in a 9×13” pan. Let it cool completely. I mean it—completely. If you try to crumble a warm cake, you’ll end up with a gummy, mushy paste. Not ideal. Once it’s cool, crumble it into a large bowl into fine, even crumbs. Your hands are the best tool for this job! It’s weirdly therapeutic.
Step 2: The Meld
Now, add your ½ cup of frosting to the crumbs. Start by mixing it with a spoon, but don’t be afraid to dive in and use your hands again. You’re looking for a consistency that holds together when you squeeze it—like a soft, pliable Play-Doh. If it’s too dry and crumbly, add a tiny bit more frosting, a teaspoon at a time. Pro Chef Hack: You can mix in some of your toppings here too! Fold in some sprinkles or crushed cookies for a funfetti effect inside.
Step 3: Roll & Cone
Pinch off pieces of your cake “dough” and roll them into tight, smooth balls, about 1 inch in diameter. You want them to be slightly larger than a regular cake pop ball because they sit on top of the cone. Now, take a mini cone and gently press a cake ball onto the top, flattening the bottom of the ball slightly so it sits securely. Don’t smash it on there—just a gentle press to adhere.
Step 4: The Big Chill
This step is non-negotiable, my friends. Place your assembled cones on a baking sheet lined with parchment paper and pop them in the freezer for 20-30 minutes, or in the fridge for at least an hour. This firms everything up and makes the dipping process a million times easier. A cold cake pop will set the coating quickly and cleanly.
Step 5: Melt & Dip
While your cones are chilling, melt your coating. Do this in a microwave-safe bowl in 30-second bursts, stirring well between each one. overheating is the enemy here—it will seize up and become a thick, clumpy mess. You want it smooth and lava-like. Pro Chef Hack: If your coating is too thick, add a tiny splash of paramount crystals or coconut oil to thin it out for perfect dipping consistency.
Step 6: Decorate & Set
Now for the fun part! Take one chilled cone and dip the cake ball straight down into the melted coating, swirling it slightly to cover completely. Lift it straight up, let the excess drip off for a few seconds, and then immediately shower it with your toppings. The key is to decorate while the coating is still wet so everything sticks. To let them set, stand them upright. I poke holes in a cardboard box or use a piece of styrofoam—it’s a perfect DIY stand.
How to Serve These Little Masterpieces
Presentation is part of the fun! You’ve put in the work, now let’s show these treats off. For a party, I love standing them up in a tall glass filled with colorful candy or coffee beans to hold them steady. It creates a gorgeous, whimsical centerpiece. For a kids’ party, line them up on a platter that looks like a Ferris wheel of treats. They’re best served at room temperature so the cake inside is soft. If you’ve stored them in the fridge, let them sit out for 15-20 minutes before serving for the best texture and flavor. Pair them with a cold glass of milk, a hot coffee, or just a big ol’ smile.
Mix It Up: Creative Twists
Don’t stop at vanilla! The whole point of Food Meld is to play with flavors. Here are a few of my favorite riffs on this classic:
- Cookies & Cream: Use chocolate cake, mix with vanilla frosting, roll the balls in crushed Oreo crumbs before chilling, and dip in white candy melts.
- Strawberry Shortcake: Use strawberry cake, mix with cream cheese frosting, and dip in pink vanilla coating. Roll in crushed graham crackers for that “shortcake” crunch.
- Piña Colada: Use vanilla cake, mix with a tablespoon of coconut cream and crushed dried pineapple, dip in white chocolate, and garnish with toasted coconut.
- Dairy-Free Delight: Use a vegan cake mix, vegan frosting, and dairy-free chocolate chips for melting. It works like a charm!
- “Dirt Cup” Fun: Use chocolate cake and chocolate frosting. Dip in chocolate coating and immediately roll in crushed chocolate sandwich cookies and a few gummy worms!
Jackson’s Chef Notes
This recipe has seen some things in my test kitchen. The first time I made them, I was so impatient I didn’t chill the cake balls. Let’s just say I had a few “cake dip cones” instead of cake pop cones—they slid right off into the chocolate! It was a delicious disaster. I’ve also learned that if your coating is too thick, it will overwhelm the delicate cake. Thinning it out is a game-changer. This recipe is resilient, so don’t stress. Even the “ugly” ones taste incredible. The goal is to have fun and end up with something delicious. Mission accomplished.
FAQs & Troubleshooting
Q: My cake balls are falling off the cones! What did I do wrong?
A: This almost always means they weren’t chilled enough before dipping. The cold helps the coating set almost instantly, acting like a glue that locks the cake to the cone. Also, ensure you’re pressing the cake ball onto the cone firmly enough to create a good connection.
Q: Why is my chocolate coating clumpy and thick?
A: You likely overheated it. Chocolate and candy melts are delicate. Low and slow is the way to go. If it’s seized, sadly, it’s hard to come back from. You can try adding a little fat (like coconut oil or vegetable shortening) and stirring vigorously to see if it smooths out, but prevention is the best medicine!
Q: Can I make these ahead of time?
A: Absolutely! They are perfect for making ahead. Once fully set, store them in a single layer in an airtight container in the fridge for up to 5 days. You can also freeze them for up to a month! Just thaw in the refrigerator before serving.
Q: What’s the best way to melt candy melts?
A: I’m a microwave guy for simplicity. 30 seconds, stir, another 30 seconds, stir. Usually that’s enough. If you have one, a double boiler gives you more control and prevents overheating.
Nutritional Information*
Okay, let’s be real: these are a treat, through and through. But here’s a rough breakdown per cake pop cone (assuming a yield of 20, using vanilla cake mix, vanilla frosting, and candy melts).
Calories: ~160 | Fat: 6g | Saturated Fat: 3g | Carbohydrates: 24g | Sugar: 17g | Protein: 1g
*Please note: This is an estimate based on the ingredients used and can vary significantly based on specific brands, how much coating you use, and your chosen toppings. For precise information, I recommend using a nutritional calculator with your exact ingredients.
Your New Go-To Party Trick
And there you have it! You’re now armed with the knowledge to create the most delightful, conversation-starting treat on the block. These Cake Pop Ice Cream Cones are proof that you don’t need complicated techniques to make something extraordinary. It’s about a little creativity, a couple of smart shortcuts, and a whole lot of love.
I hope you have a blast making these. Tag me on Instagram @FoodMeld when you do—I live for seeing your kitchen creations! It makes my day to see the unique twists and happy smiles you bring to these recipes. Now, go forth, get a little messy, and melt some flavors together. Until next time, happy cooking!
Jackson


