Who Needs a Reason for Sprinkles?
Hey friends, Jackson from Food Meld here. Let’s talk about pure, unadulterated joy for a second. You know what I’m talking about. It’s that feeling you get when you see a piñata, find an extra fry at the bottom of the bag, or bite into something that’s just… fun. That’s exactly the vibe we’re chasing today with these unbelievably easy 3-Ingredient Funfetti Cake Pops.
I see you over there, thinking, “Cake pops? Those fancy coffee shop treats? They look so complicated.” I’m here to pull back the curtain and let you in on a little secret: they are one of the simplest, most forgiving desserts you can possibly make. We’re throwing perfection out the window and embracing the messy, creative, and downright delicious process of turning a simple boxed cake mix into magical little bites of celebration.
This recipe is my go-to when I need a last-minute dessert that wows a crowd, when my nieces and nephews are coming over and we need a kitchen project, or when I just deserve a dang pop of sweetness. They’re creamy, they’re colorful, and they prove that you don’t need a pantry full of fancy ingredients to make something unforgettable. So, grab your favorite mixing bowl and let’s bring a little bit of that “party never ends” energy into your kitchen. Ready to melt, mix, and roll with me?
The Cake Pop That Started It All
I’ll never forget the first time I truly appreciated a cake pop. It wasn’t in a bakery or at a wedding. It was at my niece Chloe’s 5th birthday party. She had decided on a “Unicorn Princess” theme, which, as you can imagine, required an extreme amount of sparkle. My sister, who is an amazing mom but not a confident baker, was stressed about the dessert table.
I showed up with a trial batch of these funfetti pops, half of them dipped messily in pink and blue candy melts, sprinkles flung everywhere with the wild abandon of a five-year-old’s imagination. The moment Chloe saw them, her eyes got wide. She didn’t see the imperfections; she saw magic on a stick. She declared them “unicorn food” and they were the hit of the party. That’s when it clicked for me—it’s not about perfection. It’s about the feeling. It’s about creating those little moments of pure, sprinkle-filled happiness. Every time I make these now, I think of Chloe’s grin and remember that cooking is, at its heart, about sharing joy.
Gathering Your Trio of Magic
Here’s the beautiful part: you only need three key players to get this party started. That’s it! Let’s break down why each one is a rockstar and how you can mix it up.
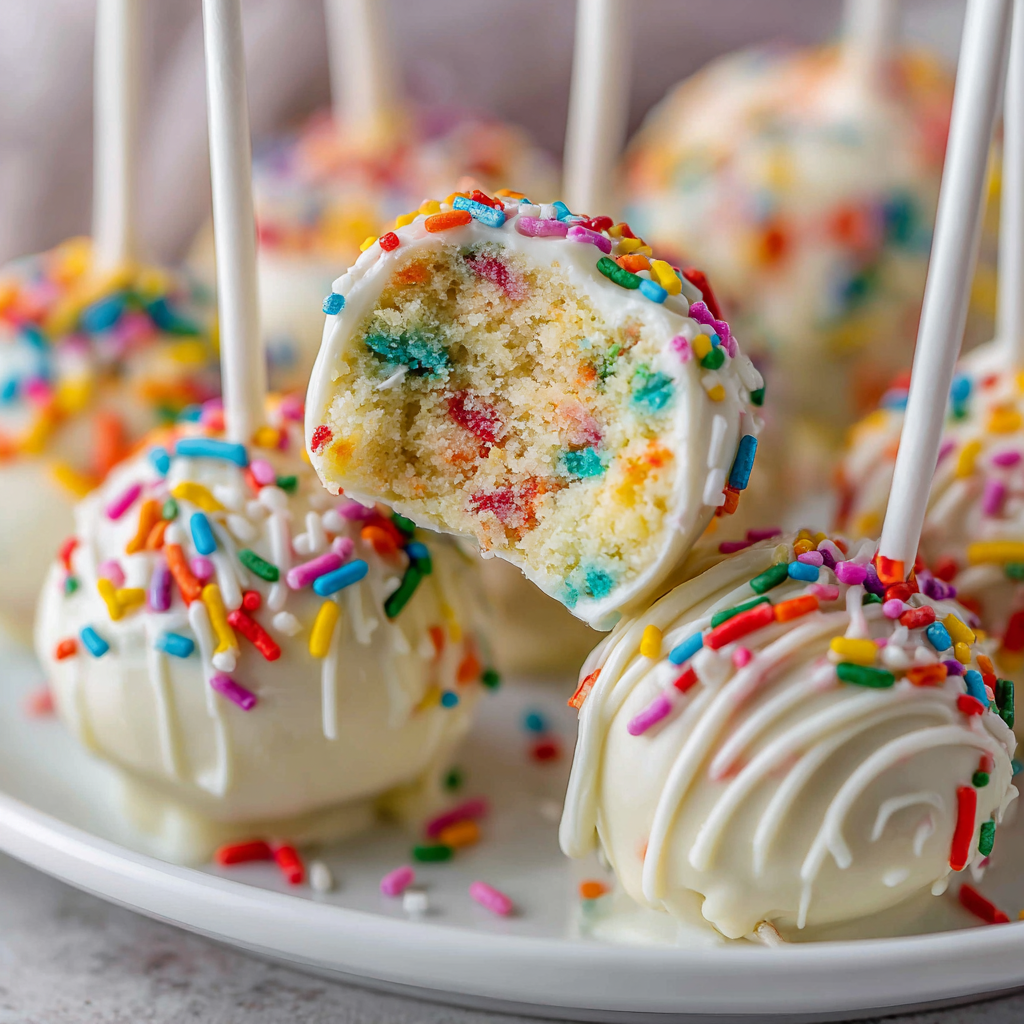
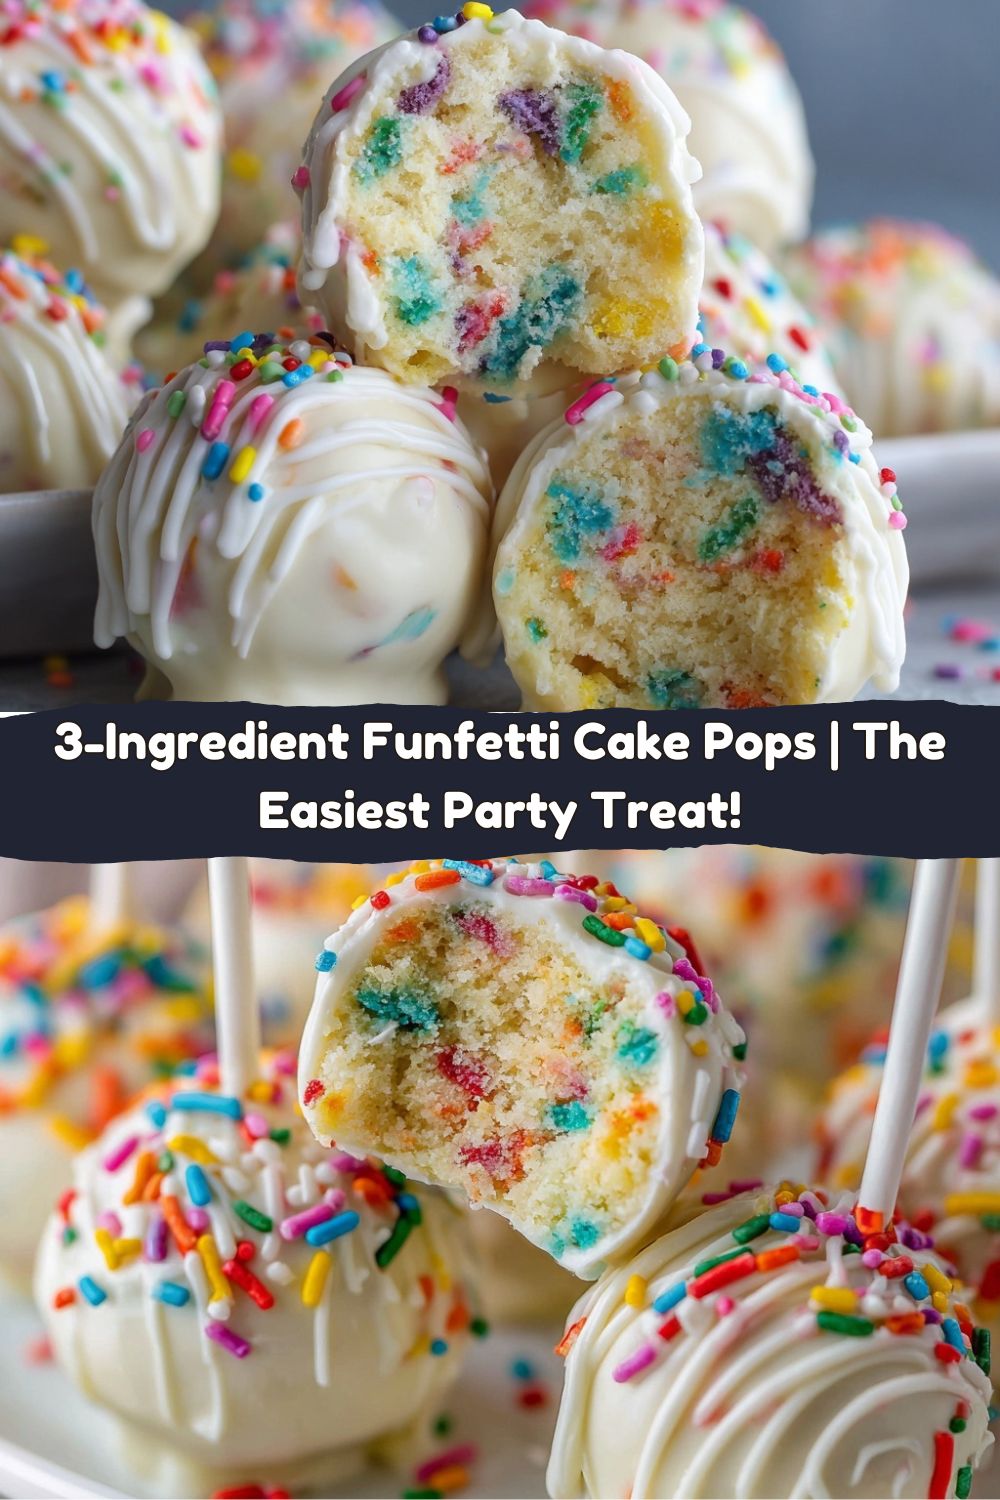
- 2 boxes Funfetti or Rainbow Bit Cake Mix (plus ingredients to prepare them) – This is our flavor and color foundation. The “Funfetti” mix already has those iconic rainbow sprinkles baked right in, giving our pops their signature confetti-core. Chef’s Insight: I use two boxes because it gives us the perfect volume of cake crumbs to frosting ratio for a crowd. Using just one box can make the frosting proportion tricky. Substitution Tip: Any vanilla or yellow cake mix works great here! Just stir in 2-3 tablespoons of rainbow jimmies (the long, cylinder-shaped sprinkles) into the dry mix before adding the wet ingredients. Avoid nonpareils (the tiny round balls) in the batter, as they tend to bleed color.
- ⅔ cup Whipped Cream Cheese Frosting – This is our “glue” and flavor booster. The cream cheese frosting adds a subtle tang that cuts the sweetness perfectly and creates that wonderfully soft, dough-like texture we need for rolling. Chef’s Insight: I specifically recommend whipped frosting because it’s lighter and easier to mix in evenly. Substitution Tip: Any vanilla or buttercream frosting from a can will work beautifully. For a richer flavor, try a vanilla bean frosting. If you’re feeling ambitious, homemade frosting is always a winner!
- 3 cups White Chocolate Melting Wafers or White Almond Bark – This is our sleek, creamy jacket. Melting wafers are my #1 recommendation because they are specifically formulated to melt smoothly, set firmly, and hold their shape. Chef’s Insight: The quality of your coating makes all the difference in the final look and ease of dipping. Substitution Tip: Almond bark is a great, often more affordable, alternative. You can also use candy melts in any color you like! I don’t recommend using pure white chocolate chips for dipping, as they often require added oil to thin them out and can be finicky.
Let’s Build Some Cake Pops!
Alright, team, this is where the fun begins. Put on some music, clear a little counter space, and don’t worry about making a mess. That’s half the charm!
- Bake & Cool: First, bake your two cake mixes according to the package directions, usually in a 9×13 inch pan. Let them cool completely. I’m talking totally, 100% room temperature. Rushing this step is the number one mistake! A warm cake will turn into a greasy, mushy mess when you add the frosting. Chef’s Hack: To speed this up, you can crumble the slightly warm cake onto a baking sheet and pop it in the fridge for 20 minutes.
- The Great Crumble: Once cool, crumble the cakes into a large bowl. You want the crumbs to be fine and even, with no big chunks. I just dive in with clean hands—it’s therapeutic! You can also use a stand mixer with the paddle attachment on low for about 1-2 minutes for a super consistent crumb.
- The Magic Mix: Now, add your ⅔ cup of frosting to the crumbs. Start by mixing it in with a spatula, then switch to your hands again. Squeeze and mix until the mixture becomes a uniform, play-dough-like consistency. It should hold together when you pinch it. Pro Tip: You may not need the entire ⅔ cup! Start with a little less, mix, and add more only if needed. The goal is a mixture that rolls easily without being overly sticky.
- Roll & Rest: Using a small cookie scoop or a tablespoon, portion out the mixture and roll it into smooth, 1-inch balls. Place them on a baking sheet lined with parchment paper. Once they’re all rolled, this is the most important step for a successful dip: chill them. Pop the whole tray into the freezer for 30-45 minutes. They need to be firm to the touch but not frozen solid.
- Melt Like a Pro: While the balls are chilling, melt your coating. Place the wafers in a deep, microwave-safe bowl (a tall, narrow mug or glass works great for dipping!). Microwave in 30-second intervals, stirring well each time, until completely smooth. Do not overheat! Chef’s Hack: If your coating seems too thick, you can add a tiny teaspoon of coconut oil or shortening to thin it out for a smoother drip.
- Stick the Landing: Take your chilled cake balls and your cake pop sticks. Dip the tip of a stick about ½ inch into the melted coating, then gently push it into a cake ball, going about halfway through. This “glues” the stick in place and prevents the pop from sliding off later. Let them set for 5 minutes.
- The Big Dip: Now for the main event! Holding the stick, dip a cake pop straight down into the melted coating until it’s completely submerged. Gently lift it out and, without turning it upside down, gently tap your wrist while rotating the pop to let the excess coating drip off. This is the key to a smooth, non-drippy finish.
- Set & Decorate: To set them upright, you can stick them into a block of styrofoam, a cardboard box with holes poked in it, or even the holes of a colander turned upside down. Immediately, while the coating is still wet, add your extra sprinkles! If you wait even 30 seconds, they won’t stick. For a drizzle, let the coating fully harden first, then use a fork or a piping bag with a different colored melt to zig-zag over the top.
Showing Off Your Masterpieces
You’ve just created edible confetti bombs! Now, let’s serve them with style. For a party, I love sticking a whole bunch of them into a large, sturdy vase filled with sugar or dried beans to hold them upright. It creates this incredible, whimsical centerpiece that just screams “celebrate!”
For a more casual get-together, simply lay them on their sides on a beautiful platter. I like to drizzle a few with dark chocolate and a few with pink candy melts to create a dynamic look. They’re the perfect handheld dessert, so they’re ideal for parties where people are mingling. No plates or forks needed—just pure, portable fun. Pair them with a cold glass of milk, a hot coffee, or just a big smile.
Make ‘Em Your Own!
The beauty of this recipe is its versatility. Once you master the basic method, the flavor world is your oyster! Here are a few of my favorite twists:
- Chocolate Lover’s Dream: Use a chocolate fudge cake mix, chocolate frosting, and dip them in dark chocolate melting wafers. Roll them in crushed Oreos for the ultimate treat.
- Lemon Bliss: Swap in a lemon cake mix and lemon frosting. Dip in the white chocolate as usual, but add a teaspoon of lemon zest to the coating for a bright, sunny pop.
- Cookies & Cream: Use a vanilla cake mix, but mix in ½ cup of crushed Oreo pieces with the frosting. Dip in white chocolate and roll in more Oreo crumbs.
- Nutty Buddy: Add ½ teaspoon of almond extract to your cake mix before baking. The almond and vanilla combo tastes just like a classic bakery cake.
- Birthday Cake Bling: Go all out! After dipping, roll the entire pop in a bowl of rainbow nonpareils or sanding sugar for maximum sparkle and crunch.
Jackson’s Kitchen Confidential
I’ve made these cake pops more times than I can count, and let me tell you, my first batch was… a learning experience. Let’s just say I had more cake pop on my walls than on the sticks because I didn’t chill them long enough! The recipe has evolved since then. I started using two cake mixes for a better yield, and I swear by the “dip the stick first” trick—it’s a total game-changer.
The best advice I can give you is to embrace the imperfections. Maybe one has a little thumbprint on it. Maybe the coating isn’t perfectly smooth. Who cares? They are homemade with love (and a whole lot of sprinkles), and that’s what makes them special. The messy ones always taste just as good, I promise.
Your Cake Pop Questions, Answered!
Q: My cake pops are cracking after I dip them! What did I do wrong?
A: This is almost always a temperature issue. If your cake balls are too cold (frozen solid) and your coating is too hot, the thermal shock causes the shell to crack. Make sure your balls are just firm from the fridge/freezer, not rock-hard frozen. Also, ensure your coating isn’t scalding hot—just warm enough to be fluid.
Q: Can I make these ahead of time?
A: Absolutely! They are fantastic make-ahead treats. Once fully set, store them in a single layer in an airtight container at room temperature for up to 3 days, or in the fridge for up to a week. You can also freeze them for up to 3 months! Just thaw in the refrigerator overnight.
Q: My coating is too thick and clumpy. How can I fix it?
A: This usually means the coating got too hot or was overheated. Try adding a small amount of paramount crystals or coconut oil (about ½ tsp at a time) and stirring until it smooths out. If it’s truly seized and grainy, it’s often best to start with a new batch of wafers.
Q: Why are my cake pops falling off the stick?
A: Two likely culprits: 1) You skipped the step of “gluing” the stick in with a dab of coating before dipping. 2) The cake balls were too soft/warm when you dipped them. A good chill is non-negotiable for structural integrity!
Let’s Talk Nutrition (The Fun Kind!)
Look, we’re here for a good time, not a long time, but I believe in being transparent about what we’re eating. These cake pops are a treat, through and through. The estimated nutritional info per pop is a guide, but remember, your actual count can vary based on the specific brands you use.
Each pop comes in at around 215 calories, with 26g of carbs, 11g of fat, and 17g of sugar. They also have about 2g of protein. The main sources of sugar and fat are the cake mix, frosting, and chocolate coating. While they’re not an everyday health food, they are a perfect portion-controlled dessert for a celebration. You get that sweet, satisfying fix in one perfect, handheld bite, which can actually help with mindful eating compared to slicing a giant piece of cake. So enjoy every single bite without guilt!
You Did It!
And just like that, you’re a certified cake pop wizard! Look at what you created—a whole batch of colorful, creamy, joyful little treats that are guaranteed to bring a smile to anyone’s face. You took three simple ingredients and worked some kitchen magic.
This is what Food Meld is all about: taking the intimidation out of cooking and injecting a whole lot of fun and flavor into the process. I hope you feel proud of your creations and, more importantly, I hope you had a blast making them. Don’t forget to tag me on social @FoodMeld if you share your creations—I love seeing your kitchen wins!
Now, go enjoy that cake pop you’ve earned it. Until next time, keep mixing it up and making it yours. Happy cooking!
— Jackson


